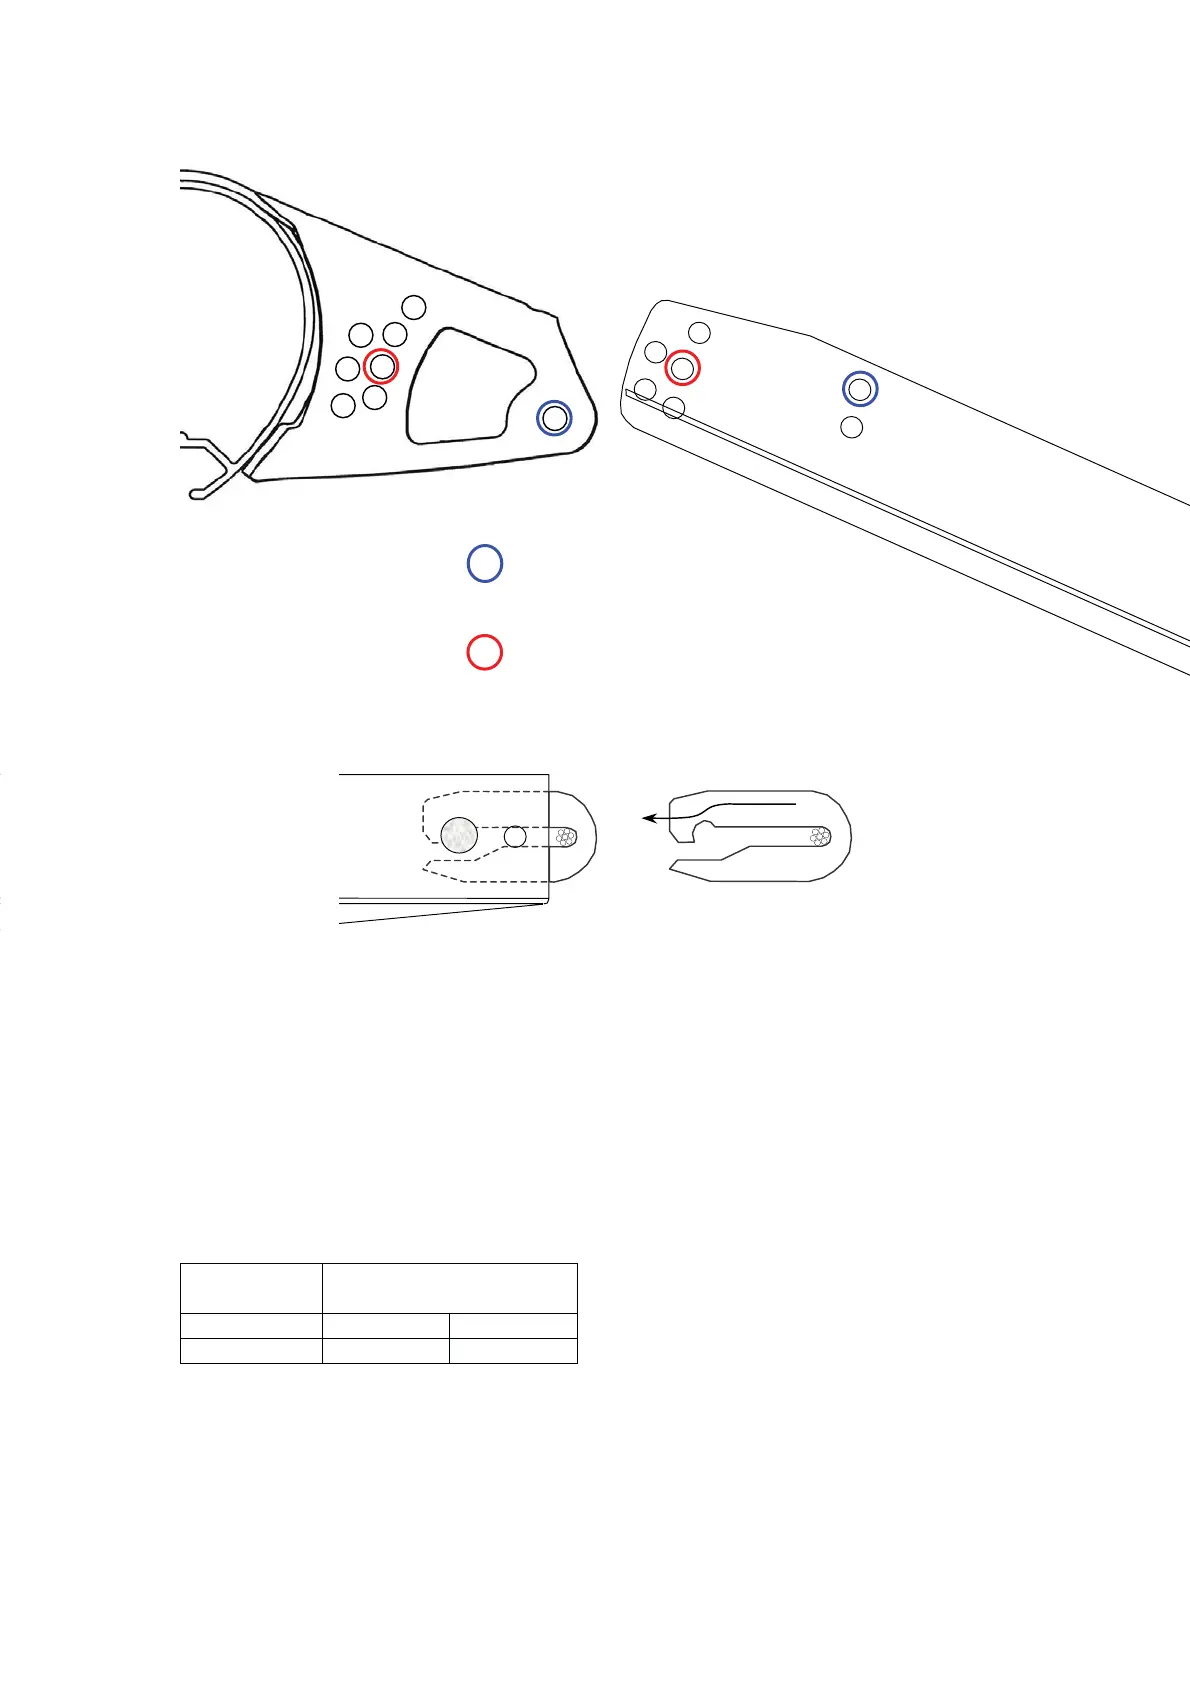
Attachment of Spreader.
Primary Pin:
Fit down through the bracket’s Primary hole and the Forward spreader hole.
Adjuster Pin:
Fit down through bracket adjuster hole 3, and through spreader adjuster hole B.
Spreader Ends
Remove the clevis pin and slide out the spreader end hook.
Slide the hook over the shroud, and slide back into the spreader.
Refit the clevis pin and split ring.
Security
All clevis pins must be fitted with the flat head on top, and locked with a split ring.
Tape all split rings, pins and the outboard end of the spreader extrusion. This will
reduce chafe on the mainsail and prevent flailing sails/halyards becoming damaged.
Self-amalgamating tape is best, but PVC electrical tape is an adequate alternative.
Class Bracket Connection
Pin
Primary Adjuster
Laser Vago Fwd 3B
Aft
4
6
Primary
10