Initial Set-Up
Mounting The Articulator To The Tractor
Initial Set-Up Lastec//021819 3-3
3
units 3-point hitch arms. Secure with the lynch pin found in the clevis pins.
6. Adjust the traction units sway bars, putting outward pressure against the lynch pins to
center the Articulator pull arms. This should eliminate any side-to-side motion.
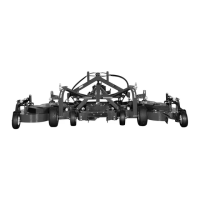
7. Attach the upper Articulator pull arm to the upper arm of the tractor 3-point hitch. Secure
with the clevis pin and hitch pin provided. See figure above.
8. Attach the PTO shaft to the Articulator, then to the traction unit. Full engagement occurs
when the coupler of the PTO shaft slides far enough onto the PTO allow the locking collar
to snap into its original position. See figure above.
9. Secure the PTO guard retaining chains located at each end of the PTO shaft to the Artic-
ulator pull bar and the traction unit. These prevent the outer guard from turning with the
PTO shaft for safety purposes.
10. Install the hydraulic lines to the Articulator and the traction unit.
11. Start the tractor, making sure no personnel are near the articulator.
12. Activate the hydraulic cylinder slightly as if to fold the Articulator, relieving tension from
the safety latch. Disengage the safety latch. Activate the hydraulic cylinder to lower the
Articulator to the ground.
13. Turn off the tractor. Make sure the parking brake is set.
14. Complete the entire Initial Set-Up section of this manual before operating the Articulator.