H2-506 Vector Easy Servo Drive User Manual Version 1.0
Leadshine Technology Co., Ltd
11/F, Block A3, iPark, No.1001 Xueyuan Blvd. Shenzhen, China Tel: 1-949-608-7270 Fax: 1-949-608-7298
Web: www.leadshine.com Email: tech@leadshine.com
Remark:
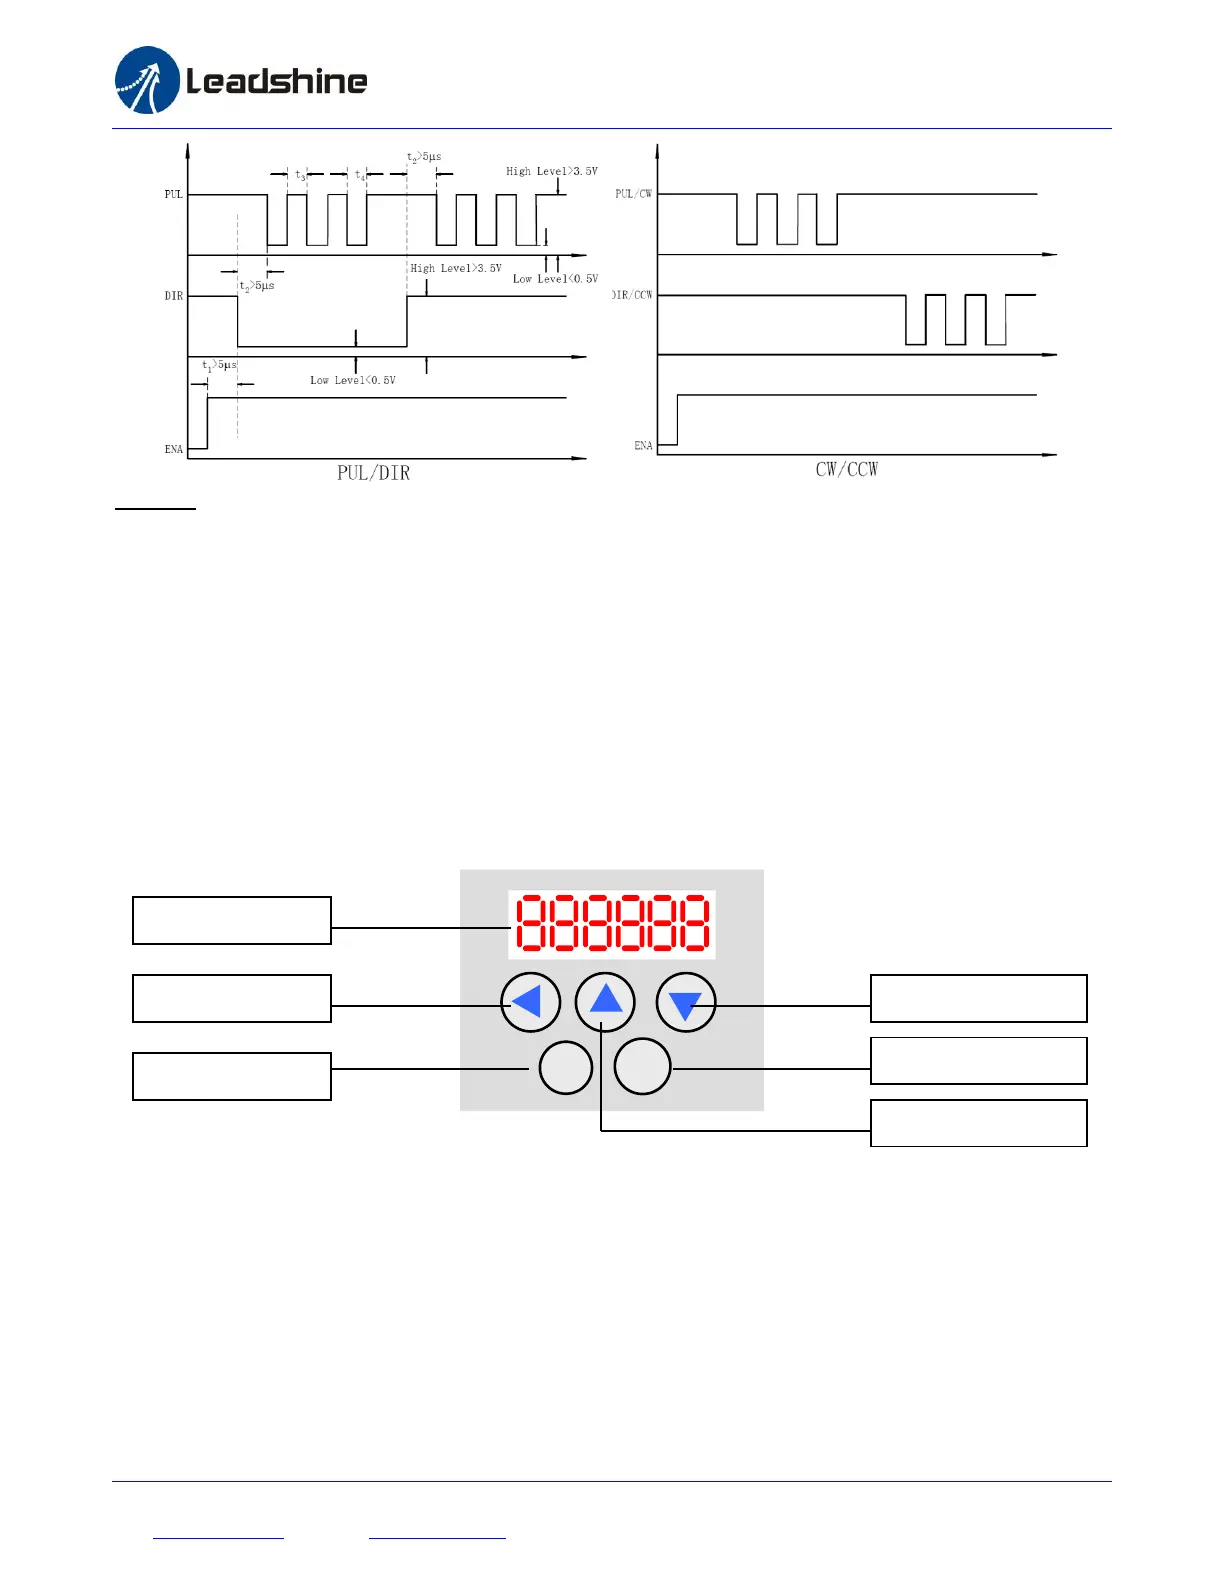
a) t1: ENA must be ahead of DIR by at least 5s. Usually, ENA+ and ENA- are NC (not connected). See
“Connector P1 Configurations” for more information.
b) t2: DIR must be ahead of PUL effective edge by 5s to ensure correct direction;
c) t3: Pulse width not less than 2.5s;
d) t4: Low level width not less than 2.5s.
4.3 Configuring H2-506
4.3.1 Configuring H2-506 by the on-board HMI
Users can configure the drive via the on-board HMI in the front panel. This HMI includes six 7-segment digits and
five keys for users operation as follows. More detailed descriptions of the parameters on the panel are presented in
section 4.3.2
There are 4 operation modes in the on-board HMI. Users can switch between these modes by pressing the “Mode”
key. The following figure illustrates the operation procedure of this on-board HMI.