11
EN
Example: Now it is 7:00, the set time is1:20,o time set is11:20,
meaning the oven should work for 1h and 20seconds from 10:00
to 11:20.
Note
When setting the clock, the functions of timing roast and delayed
roast are canceled.
Temperature setting:
Push the button°C, the temperature display area show the formal
data, to change the temperature by turning the knob clockwise
or anticlockwise. The temperature range is 40°C-250°C.
Push the button°C for 3S, you can change between °C and °C.
Alarm setting:
Touch
show “h” and hour number hose display. The setting
way as the same as the instruction of CLOCK. At this moment,
after alarm auto count down, until it blinks “0:00”, alarm buzzers
for 10 times.
Note
When using the alarm as timer, the timer will not inuence the
other functions when it is working and stops.
When setting the alarm, press
one time again, it means cancel-
ling the alarm function.
Lock button:
Touch display operate any keys is not eective. Touch
again 3 seconds to unlock, not show the other touch-
ing keys return using situation.
Button
:
Press
one time, the light will bright in the oven, press again
the light turns o.
.
key:
press
adjust buzzer volume.
Note
E1 alarm is temperature sensor open circuit or short-circuit fail-
ure’s showing code
USAGE
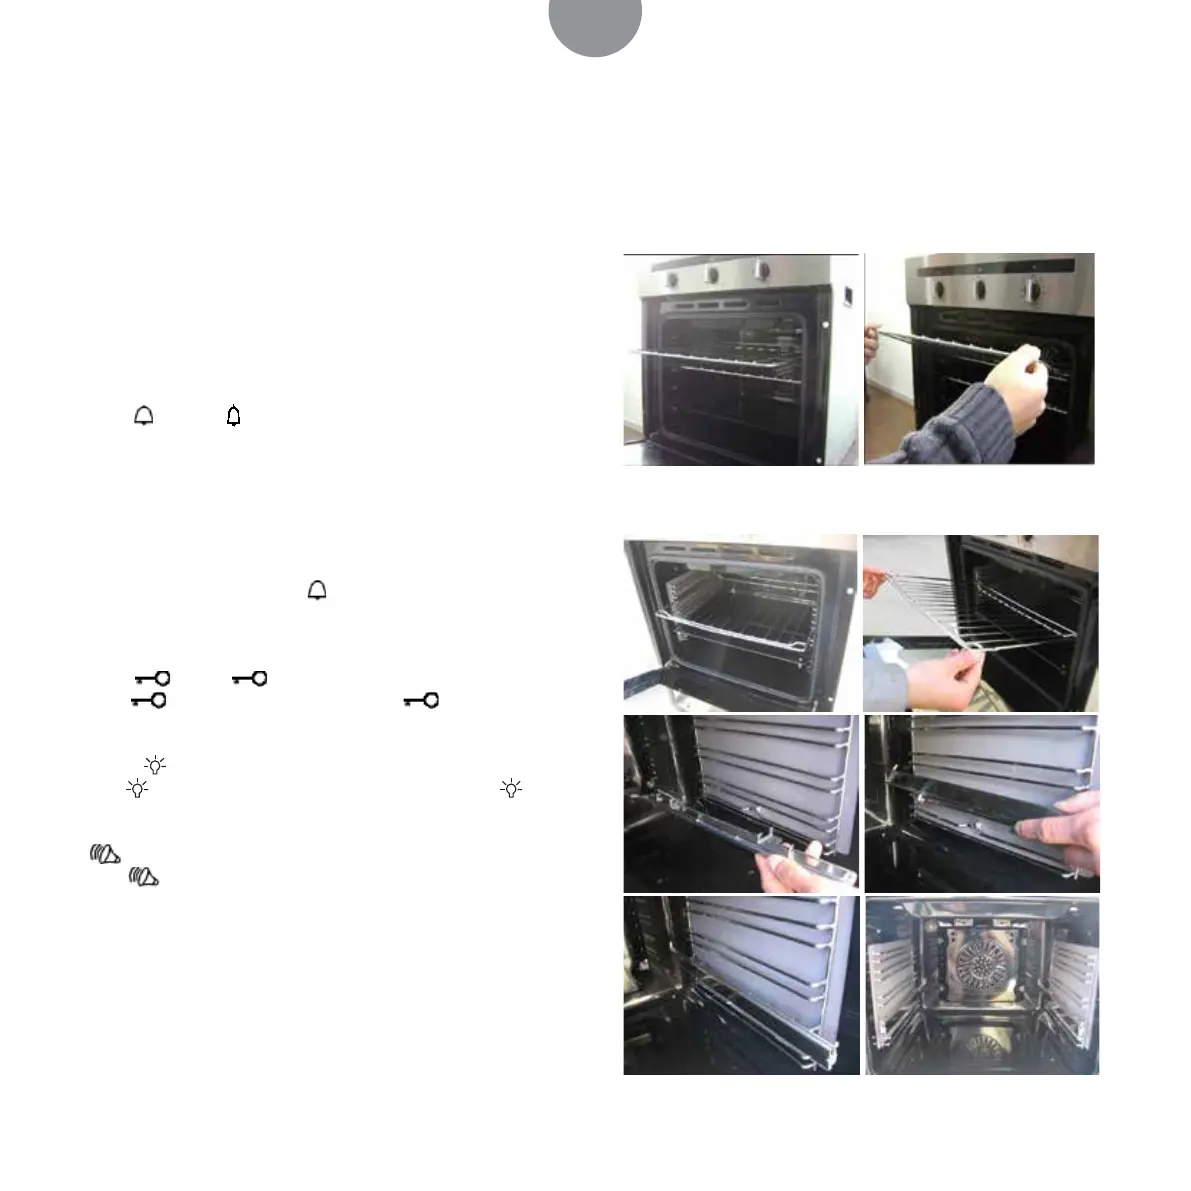
To avoid possible burns, place the shelves they have been pro-
vided in the desired position before you turn the oven on (see
table for grill position below).
Place the selves correctly on the supports:
1. To remove a shelf, pull it towards you, lift the front end up
and pull it out.
2. To replace a shelf, place the end of the shelf on the support,
lift the front end up and push the shelf in.
Interior with slide way:
Interior without slide way: