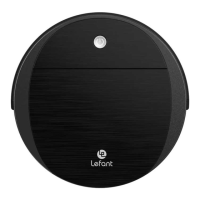
3. Using the product /
3.1 How to use buttons
3. Using the product /
3.2 Indicator Meaning
3. Using the product /
3.3 Floor-mopping functions
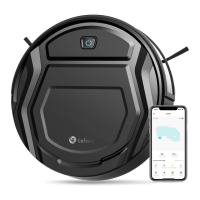
1. Downloading and installation of the “Lefant” app
Method I : Scan the following QR code, and then
download and install App as prompted.
Method II : Search "Lefant" in the App store, download
and install the Lefant app.
3. Using the product /
3.4 App download and configuration
Tips:
* Follow the guidance in the Lefant app to register, login,
and pair the robot.
* Please make sure that the mobile phone is connected
to your Wi-Fi network before paring the robot vacuum
cleaner.
Note: The robot works with 2.4GHz Wi-Fi networks only.
TP-Link_2.4G
TP-Link_5G
* When cleaning and maintaining the robot and its accessories,
please unplug the docking station.
* When cleaning and maintaining the robot and its accessories,
please unplug the charging stand.
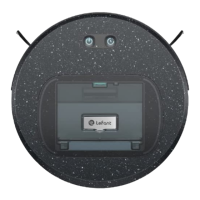
3. Using the product /
3.3 Maintenance-Dust bin
The HEPA Filter
should not touch the water.
Warning
Clean the Filter Net
Tap the High Efficiency Filter
Press and hold the Dustbin Release Buttonto remove the dust
bin
Remove the dust filter assembly
3. Using the product /
3.3 Maintenance-Water tank
3. Using the product /
3.3 Maintenance-Others
* When cleaning and maintaining the robot and its accessories,
please unplug the docking station.
It is suitable for the ground environment
where the garbage is relatively concen-
trated, and the main machine performs
fixed-point cleaning in the designated
area.
When cleaning for the first time, the
robot automatically builds a map
through LDS. After the map is created, the robot cleans each home
area in the same way.
Fixed point mode button
During the cleaning process, the host
can sense that its own power is insuffi-
cient, automatically start the "return to
charging" mode, and automatically find
a charging base for charging.
Return and charge button
Single press: Start/pause
Keep pressing for 3 seconds:
Entering Wi-Fi pairing mode
Start/pause button
NOTE: During the first cleaning, supervise the robot and assist if
problems arise.
Robot status
Indicator status
WiFi display status
Cleaning
Pause/standby
Low battery-automatic
return and charge
Cleaning complete-auto-
matic return and charge
Charging
Entering Wi-Fi pairing mode
Blue light on
Blue light on
(14% or more charge)
Blue light flash
(blue light stays on for 10s after full charge and then goes out)
Red light on
Blue light on
Blue light on
Without network,
blue light is off;
with network, blue
light is on.
Blue light flash
Connect to Wi-Fi
Blue light on Blue light on
Error
Red light on/flash
Open the lid on the water tank and add the appropriate
amount of water
Close the lid
Attaching the mop to the mop holder
Snap the Dust bin water tank into the slot at the rear of the Robot
Align and snap the mopping module into the mop bracket
mounting holes at the rear of the Robot. A "click" sound will be
made when the unit is in place
Start mopping
Tips:
1. To prolong the life of the water tank, we recommend that you use
purified or softened water.
2. Do not use the mopping function on carpets.
3. Empty the water tank immediately after mopping.
4. When cleaning with the mopping function, please fold the edges
of the carpet to avoid contaminating the carpet with foreign
objects on the mop.
Open the dust bin latch and dump the garbage
Clean the dustbin
Remove the mop holder assembly, remove the mop and wash it
with water and leave it to dry in the sun.
* If disposable dry mop are used, they can be discarded after use.
When you have finished mopping, empty the water in the tank.
4. Clean the driving wheel to
ensure clean smoothly.
2. Clean the universal wheel to
prevent hair from tangling.
1. Clean the anti-drop sensor to ensure the sensitivity of the sensor.
3. Clean the charging
electrode to ensure suc-
cessful charging.
5. Clean the roller brush to ensure smooth cleaning.
7. Clean the side brush to prevent hair from tangling.
6. Clean the Anti-collision sensors to ensure sensitive obstacle
avoidance.
8. Clean the charging electrode of the docking station to ensure
successful charging.
 Loading...