4. Using MIPC on Windows and PC Client
The Camera features a number of different settings, all of which you will be able to
access through the main interface. Keep in mind that when you are changing settings,
which we will be discussing in the following part, the camera must first be on line and
work normal.
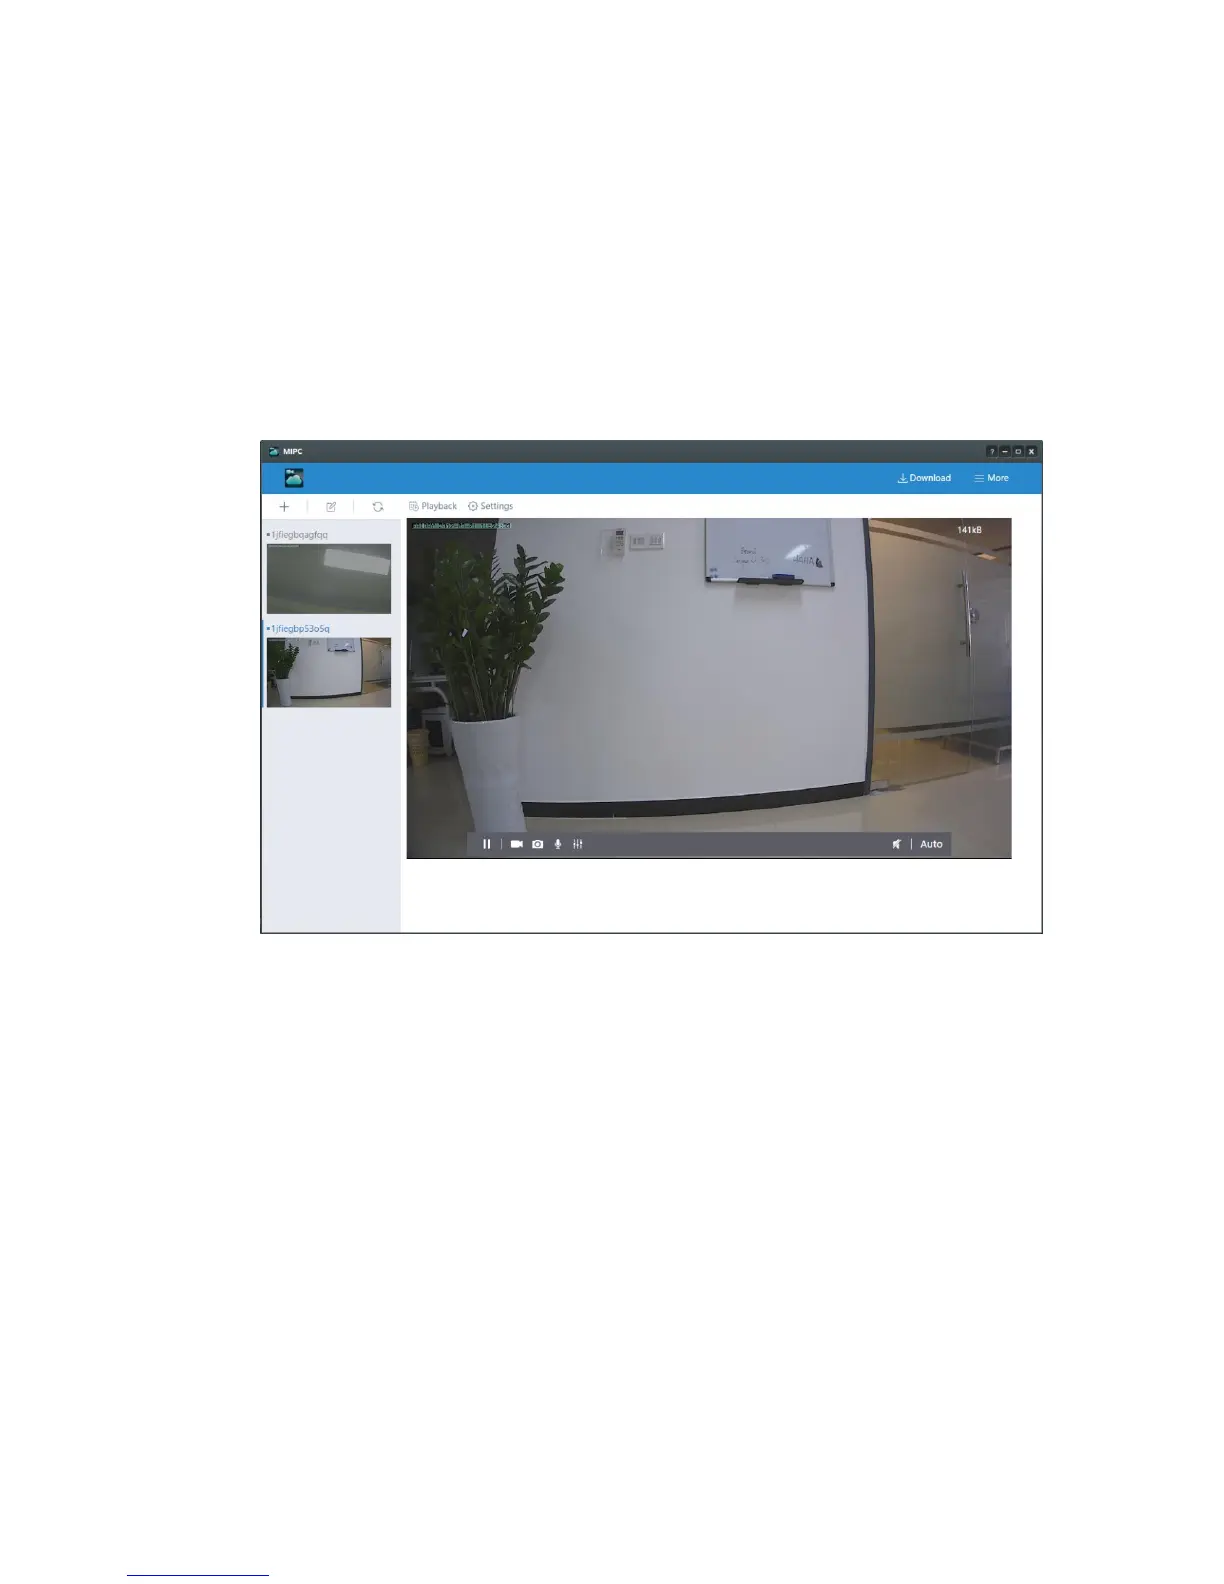
1. Device Add Button: Click the “+” icon to complete the addition according to the
2. Device delete button: The delete button is beside the “+” icon. When you click it,
there would be a minus icon beside every camera. When you click it, the camera
will be deleted.
3. Device Refresh Button: When you camera stay the loading status, please click
4. Device Thumbnails: For each device that has been added to the account, one
thumbnail appears. Blow the image, the nickname of the device is listed.
5. Stop/Play: Press the button and you will be able to see the live video.
6. Record: To initiate a live recording
7. Snapshot: to create a snapshot image of the current review.
8. Microphone: to transmit your voice through the device.
9. Image Setting: Which enables you to set the mode for brightness, contrast,
10. Speaker: To transmit remote sounds.
11. Resolution: User can choose the resolution of the images.