• Various means of locomotion
• Bumper design
• The use of gears
• Motors
• Software multitasking
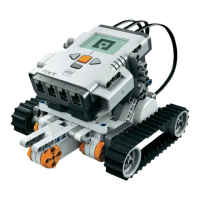
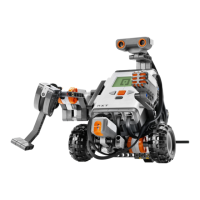
Figure 2-1 shows a picture of the completed robot. I suggest you begin by building and programming Hank. Let him run around your floor for a while. Then come back and read the rest of the
chapter, where I'll talk about some of Hank's interesting features.
About the Building Instructions
The building instructions for the robots in this book are comprised of pictures, with a little bit of explanation here and there. Each step shows you the parts you need as well as how they fit
together. There are, however, some names with which you should be familiar, so that I don't end up describing everything as a ''doo-hickey" or a "little gray thingy." The parts you need to know
are beams, plates, shafts, gears, bushings, and wire bricks.
Page 15
Figure 2-1.
Hank, a friendly robot
Beams, plates, and shafts are characterized by their length. For beams, at least, this corresponds to how many studs (bumps) are on the beam. Figure 2-2 shows a photograph of some beams, plates,
and shafts with their corresponding lengths. The "u" stands for "units."