3
SETTING SENSOR PARAMETERS
To adjust the default sensor parameter settings:
1. Remove the cover to expose the CONFIGURE and LOAD buttons.
2. Press the CONFIGURE button 3, 4, or 5 times to choose the setting to
adjust (see the chart below). The button must be pressed the desired
number of times within a 5 second period.
3. Three seconds after successfully selecting a configuration setting, the
red and blue LEDs will blink until exiting Configuration mode.
NOTE: While in Configuration mode, the red LED blinks
corresponding to the currently selected parameter (3, 4, or
5 times), and blue LED blinks corresponding to the current
value of that parameter (1 through 10 times). (For PIR and
Ultrasonic Sensitivity, if the blue LED does not blink, that
parameter is currently set to OFF.)
4. Press the LOAD button to change the value for that setting based
on the values in the following chart. Each time you press the Load
Button, it will advance to the next value and the number of times the
Blue LED blinks will change to show the new value. After reaching the
maximum value (six presses for Time Delay and eleven presses for
PIR and Ultrasonic Sensitivity), a subsequent button press will wrap back to the one button press value.
NOTE: When you first press the LOAD button after selecting the parameter to edit, the number of initial button presses will go
directly to that value. So for example, if Time Delay is currently at 20 minutes and you press the LOAD button twice, it will
change to 10 minutes, not increase by two to 30 minutes. After that, each additional button press increases the value.
5. To return to normal operation, press the CONFIGURE button the number of times corresponding to the currently selected setting
(3, 4, or 5 times), also indicated by the red LED blink pattern.
NOTE: You must press the CONFIGURE button the same number of times to exit edit mode. For example, if you press the button
4 times to edit PIR Sensitivity, pressing 3 times will not exit edit mode.
After exiting edit mode, you may repeat from step 2 to edit additional parameters.
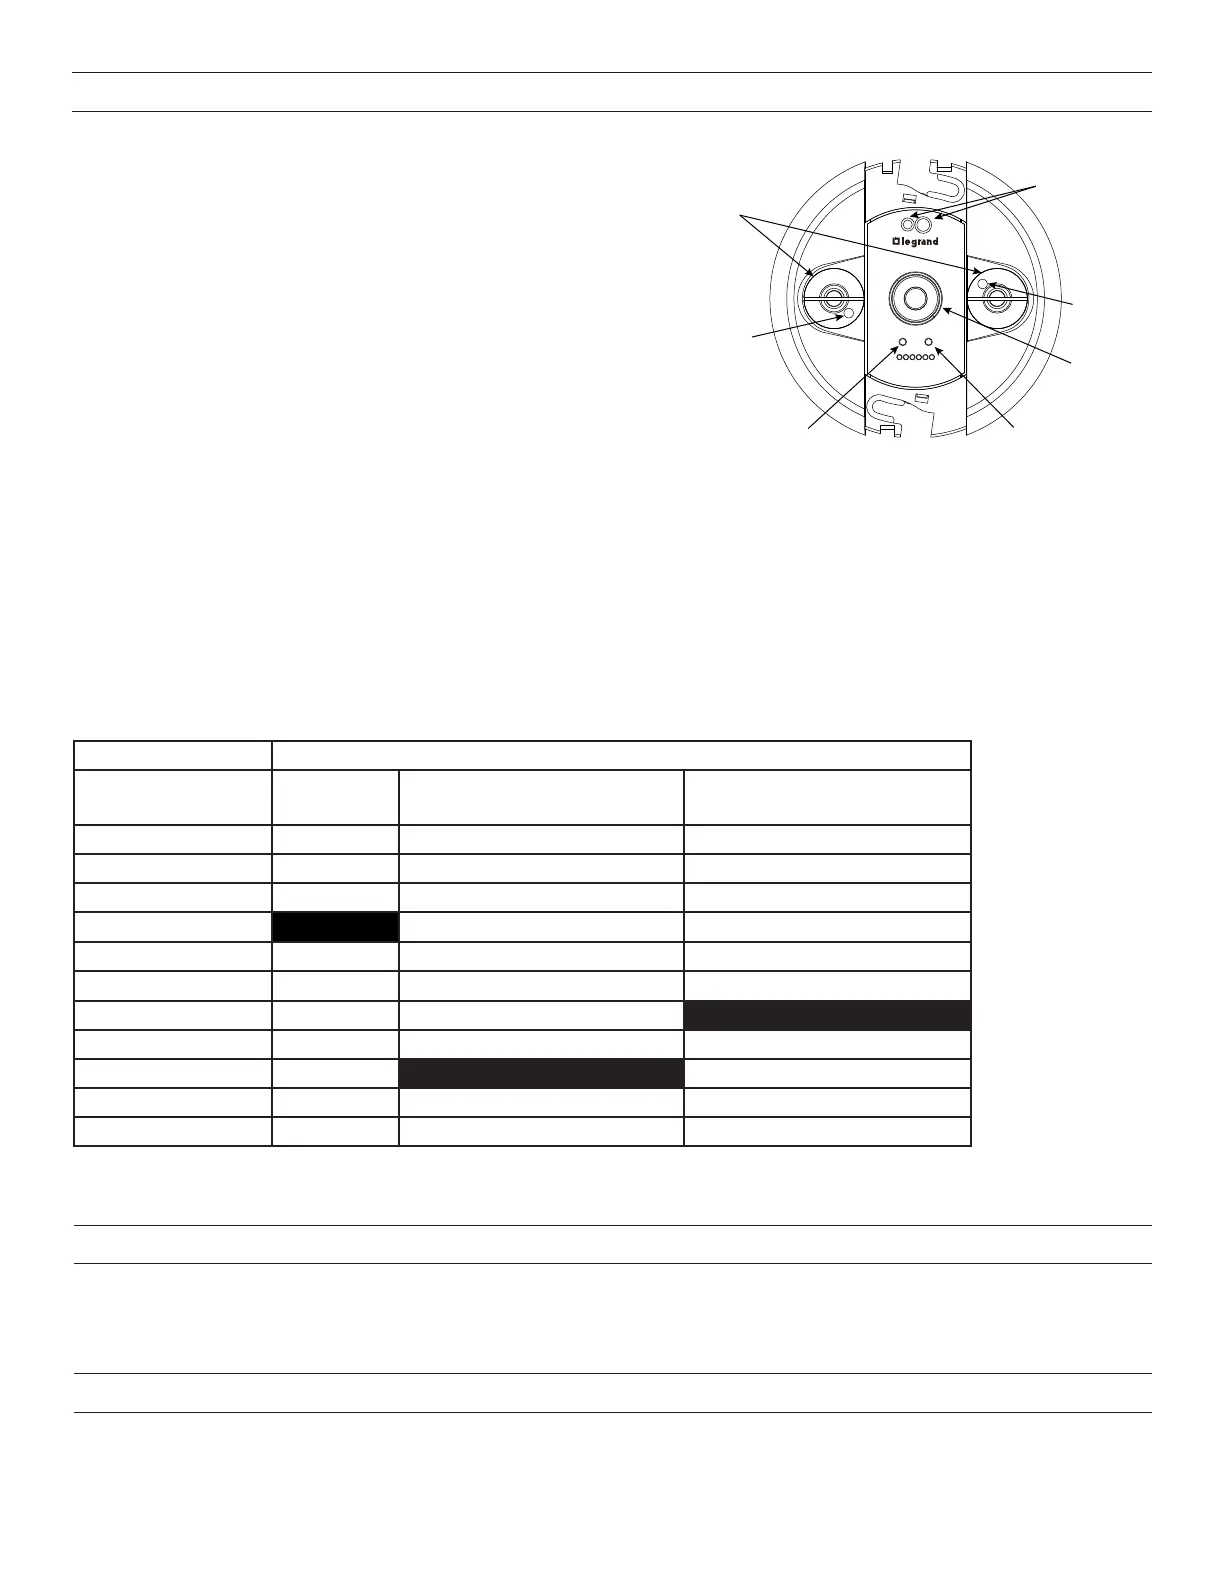
Red LED
PIR Detect
& Push n’ Learn
Blue LED
Ultrasonic Detect
Load Binding
LoadConfigure
www.legrand.us/wattstopper
Red LED
Blue LED
Configure Button
Load Button
IR Transmitter
and Receiver
Ultrasonic
Sensors
PIR Sensor
Configure Button Presses (Red LED)
Load Button Presses
(Blue LED)
3 Presses
Time Delay
4 Presses
PIR Sensitivity
5 Presses
Ultrasonic Sensitivity
1 Press 5 minutes 10% 10%
2 Presses 10 minutes 20% 20%
3 Presses 15 minutes 30% 30%
4 Presses 20 minutes 40% 40%
5 Presses 25 minutes 50% 50%
6 Presses 30 minutes 60% 60%
7 Presses 70% 70%
8 Presses 80% 80%
9 Presses 90% 90%
10 Presses 100% 100%
11 Presses 0% (Off) – Blue LED will not blink 0% (Off) – Blue LED will not blink
Default Values Highlighted
ENTERING TEST MODE
Test Mode allows you to quickly determine the coverage area of the LMDC-100 by setting Time Delay to 5 seconds. You can then move
around till the sensor triggers the lights, then move out of range and wait 5 seconds (or until the lights turn Off) before trying again.
To turn Test Mode On, press and hold the LOAD button for 3 to 10 seconds The red LED will turn on. To exit Test Mode, press and hold
the LOAD button for 3 to 10 seconds again.
RESETTING THE LMDC-100
To reset the LMDC-100, press and hold the LOAD button for 10 to 20 seconds. Both the red and blue LEDs will turn on. Once you
release the button, the LMDC-100 will reset to default values.
If you press and hold the LOAD button for more than 20 seconds, the red LED will turn on and the blue LED will blink. All wired sensors
in the room will reset to default values.
 Loading...