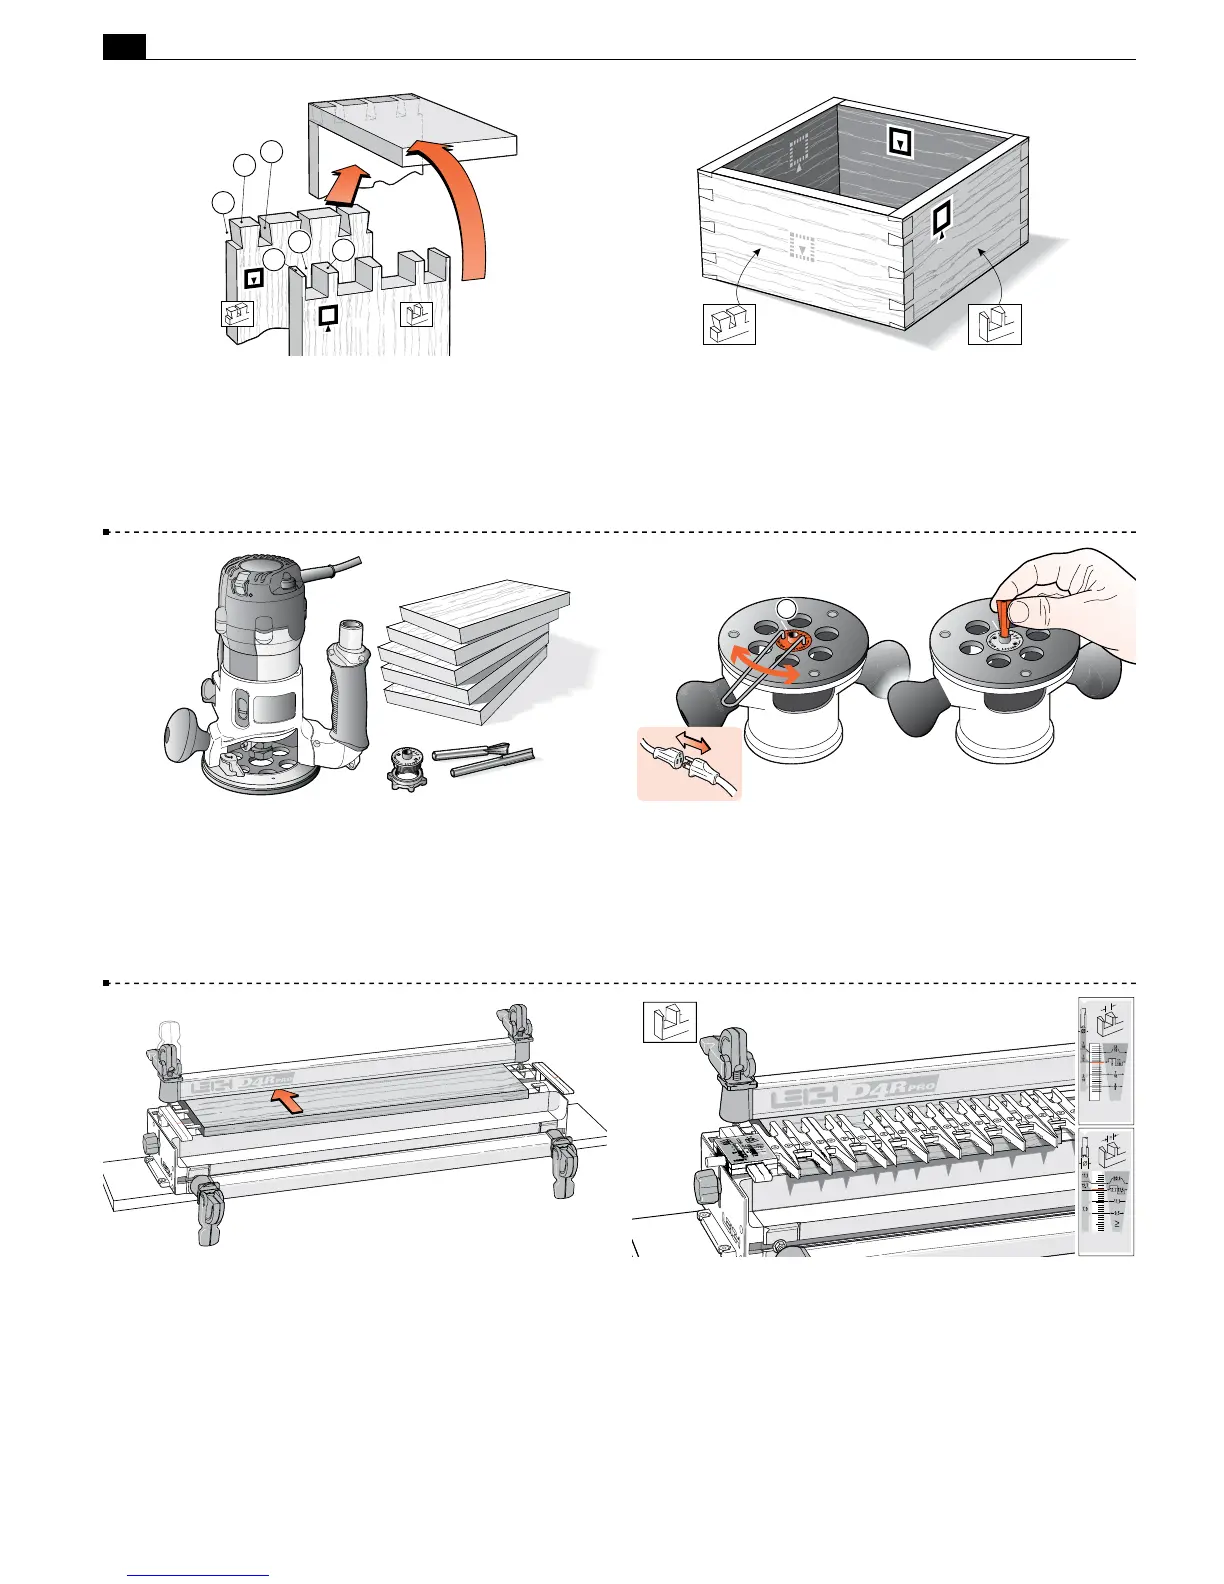
THROUGH DOVETAILS
20
Chapter 8 D4R Pro User Guide
8-4 Fit the e7-Bush or
7
⁄16"[11,1mm] securely to the router
and set it to the No.10 index mark
➀
. Then fit the supplied 80-8
dovetail bit to the router. Note: The e7 guidebush is not used to
adjust joint tightness with through dovetails.
1
8-5 Clamp the spacer board in the rear clamp.
8-6 Place the finger assembly on the support brackets in the
d
TD PINS mode, flat on the spacer board, and with the scale set
on the
1
⁄2"[12,7mm] setting for now. Don’t worry about the scale’s
specific meaning now. Each scale’s use will be fully explained in
the appropriate section.
The pins fit in the pin sockets. Joints should almost always end
each side with half-pins.
2
5
4
1
6
3
Pin
Board
Tail
Board
8-2 Let’s look at how to make a simple square box. When you
assemble the finished pieces with the faces properly oriented, any
one of the pin ends will fit any one of the tail ends. In fact, the
box can be put together in six different ways …each of the four
corners will fit two ways!
8-3 Make five identical boards
3
⁄4"x 5
1
⁄2"[20x140mm] about
8"[200mm] long. Mark the inside faces of the two tail boards and
outside faces of the three pin boards (you may not need one of the pin
boards). Use Leigh e7 or
7
⁄16"[11,1mm] O.D. guidebush with:
- No. 80-8
1
⁄2"[12,7mm] x 8° dovetail bit and
- No.140-8
5
⁄16"[7,9mm] straight bit.
8-1 Through Dovetail Terminology:
➀
Pins
➁
Pin sockets
➂
Half-pins
➃
Half-pin sockets
➄
Tails
➅
Tail sockets
 Loading...

