D4R Pro - CHAPTER 9
The following procedures considerably expand the D4R Pro jig’s versatility. However, before attempting them,
thoroughly master the techniques of Through Dovetails in Chapter 8.
9-1 LARGE THROUGH DOVETAILS
The procedures for using bits 90 and 160 or 100 and 150 are
identical to the previous figures, except that a Leigh 716C or
5
⁄8"[15,9mm] OD guidebush is used, and each guidefinger must be
at least
3
⁄16"[5mm] apart. Use the Leigh wrench gauge (
3
⁄16"[5mm]
thick) to make sure there is enough separation. Note: Because the
716C or
5
⁄8"[15,9mm] guidebush is used, the closest possible pin
centers using these bit combinations is 1
3
⁄8"[35mm], instead of
1"[25,4mm].
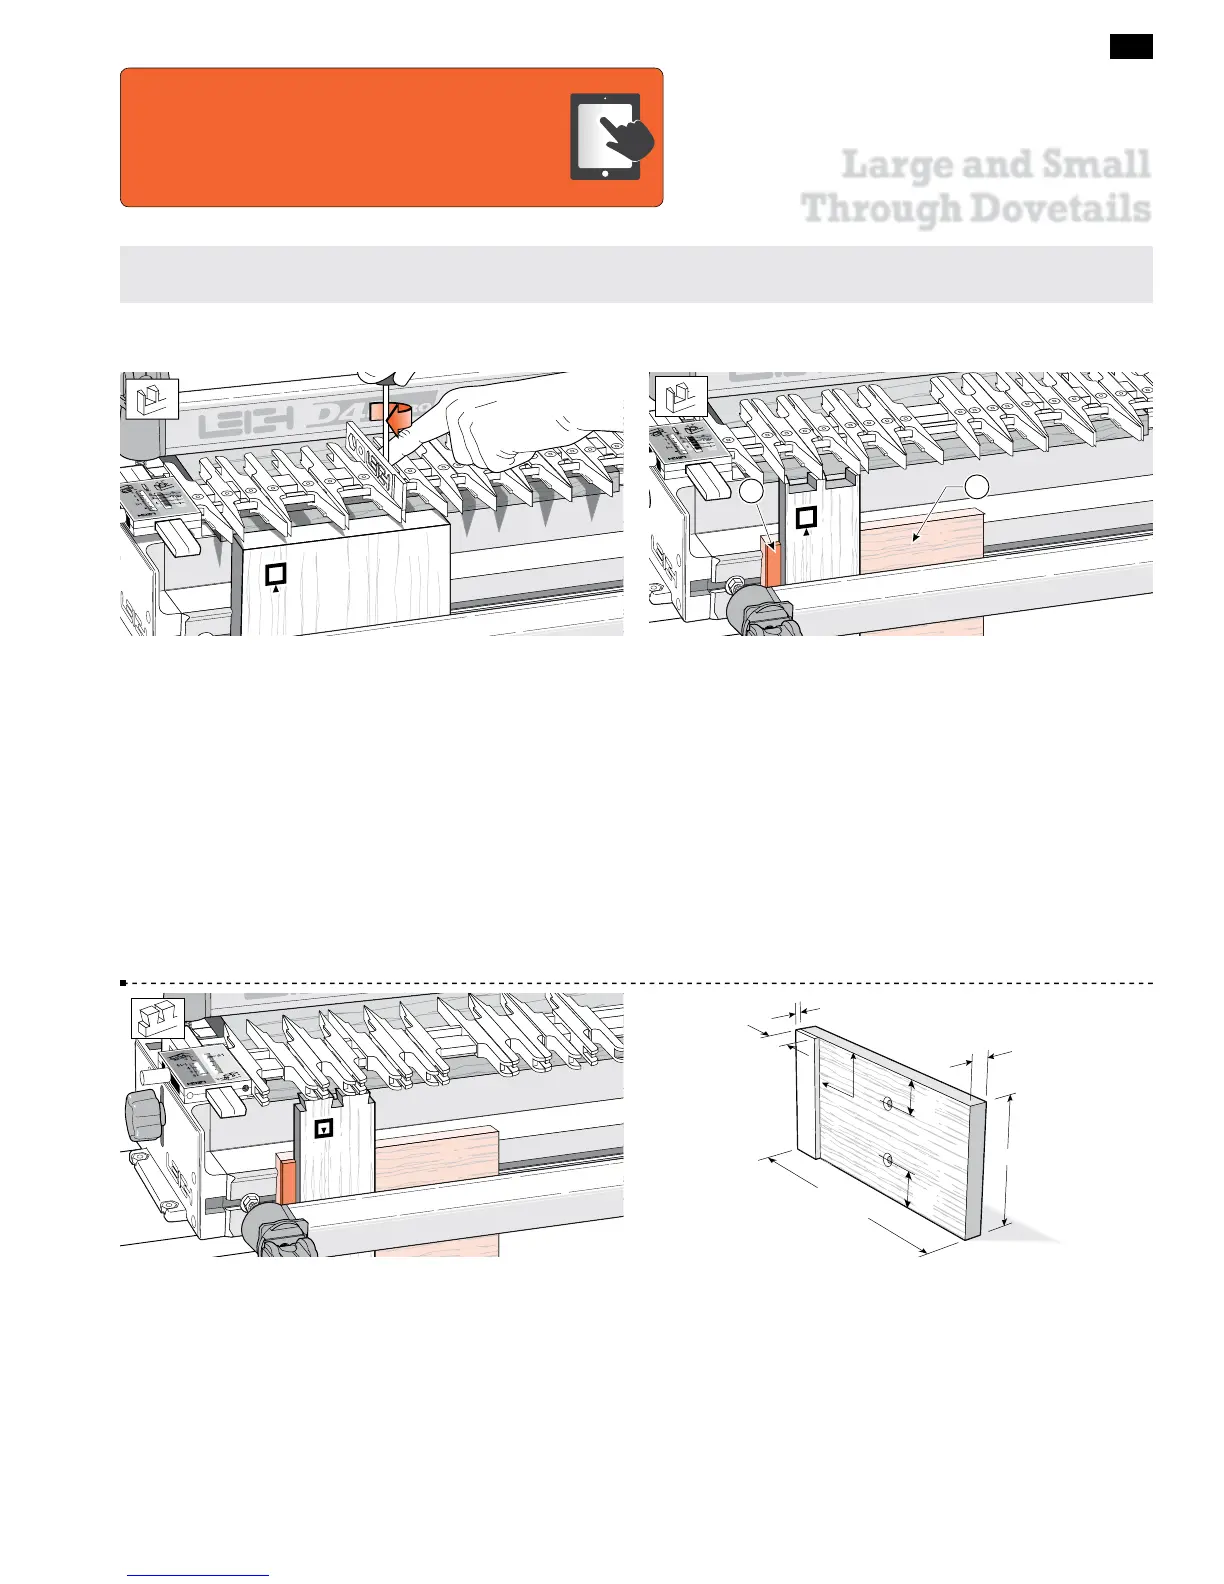
9-2 SMALL THROUGH DOVETAILS
Bits 50-8 and 60-8 allow you to create tiny through dovetails in
material
3
⁄8"[10mm] or less in thickness. This procedure is an extra
bonus: the Leigh jig was not originally designed for it. The
d
TD
PINS scale does not go down far enough, so you have to space the
boards away from the jig face with a shop-made block
➀
fitted
with its own side stop
➁
(see 9-4). Use the e7 or a
7
⁄16"[11,1mm]
O.D. guidebush for these small joints.
2
1
9-3 Use the same block with side stop when cutting the tails to
ensure correct alignment of the pin and tail boards.
9-4 Make the block with its side stop out of
1
⁄2"[13mm] stock
as shown. Bore two
1
⁄4"[6mm] holes, countersunk for a flat head
screw (part no. 287) to allow the blocks to be used at either end
of the jig.
6"[150mm]+
90
o
~
3
/
4
"[20mm]
~
1
/
8
"[3mm]
1
/
2
"[13mm]
~5
1
/
2
"[140mm]
1
1
/
2
"[40mm]
1
1
/
2
"[40mm]
29
Large and Small
Through Dovetails
The online video will reduce your learning time
dramatically!
Stream to your smart phone or tablet to use in
your shop as a visual reference. Find the video in the Instructional
Videos section of the Support menu at leighjigs.com.
Watch the Online Instructional Video
 Loading...

