SINGLE PASS HALF-BLIND DOVETAILS
44
Chapter 11 D4R Pro User Guide
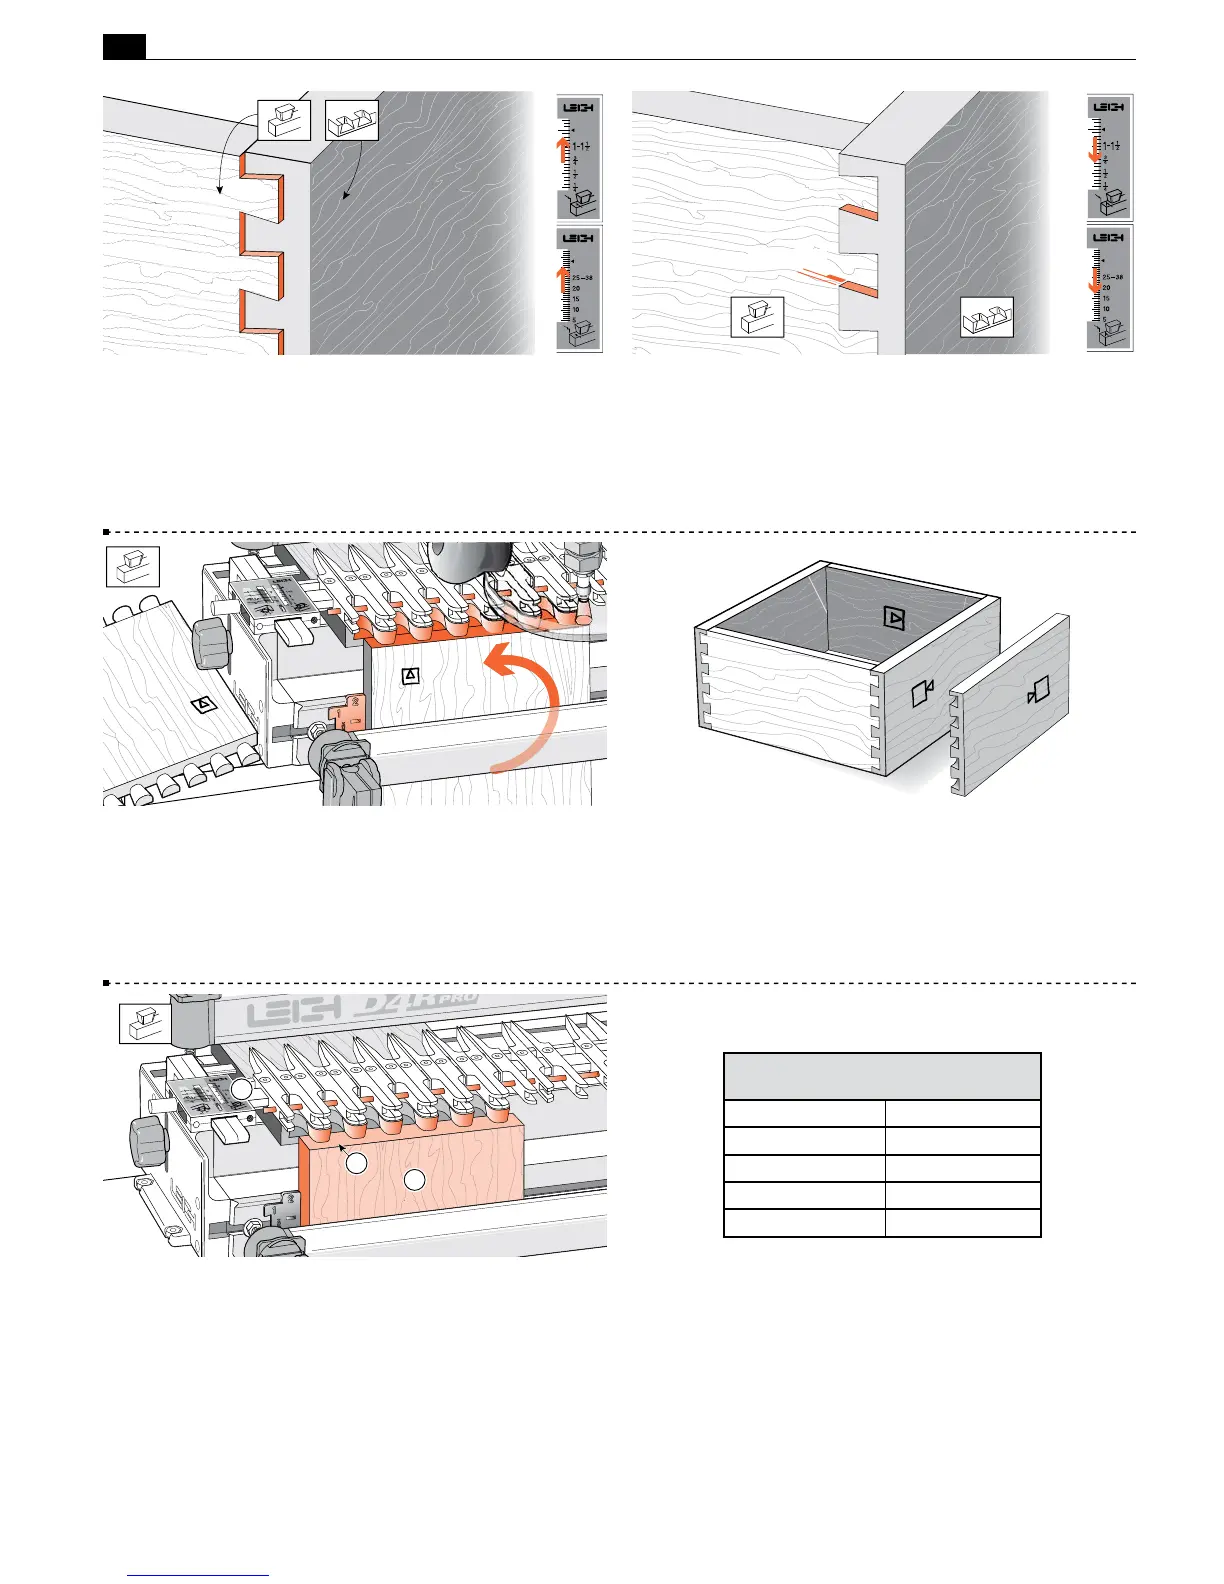
11-21 Moving the finger assembly affects the pins and tails.
So, if the tails stand out from the pins, set the
H
HB TAILS scale
away from the operator by half the amount required.
11-22 If the tails fit in too far past the pins ends, set the
H
HB TAILS scale toward the operator by half the amount
required.
1/64[0,3mm]
11-23 To make a box, repeat the procedure four times, ensuring
the drawer fronts, rears and sides are all rotated correctly in the
jig, keeping the inside face
i
of the boards away from the jig.
11-24 Assemble the drawer. As with through dovetails, it doesn’t
matter which edge of any of the boards are at the top or bottom, the
drawer will still fit together e.g. pin board “A” can be up either way.
X
A
A
X
Y
Y
11-25 For tail (drawer side) boards thicker than
9
/16" [14,29mm]
➀
,
set the scale to
1
/2
"
[12,7mm]
➁
and leave the stop rod in place. Do
not set the scale to the actual tail board thickness. With thicker boards,
more of the inside portion of the tail board
➂
will be routed away.
Slight scale adjustments may be required for a flush fit. See figures
11-20 through 11-22.
11-26 Hint: Increasing the Depth of Cut (see page 40) This is
based on setting the eBush on 10. The depth of cut for each bit
can be increased slightly by turning the eBush to a lower number.
For example, if you turn the eBush from 10 to 9 you will have to
increase the depth of cut by 0.014" [0,36mm] for the 80-8 bit. If
you turn the eBush two increments to number 8 you will have to
increase the depth of cut by 0.028" [0,71mm] and so on.
■
Cutting Depth Increase
80-8 0.014"
101-8 0.011"
112-8 0.009"
120-8 0.008"
128-8 0.006"
1
2
3
per e-Bush Increment
Bit
 Loading...

