SLIDING DOVETAILS
62
Chapter 16 D4R Pro User Guide
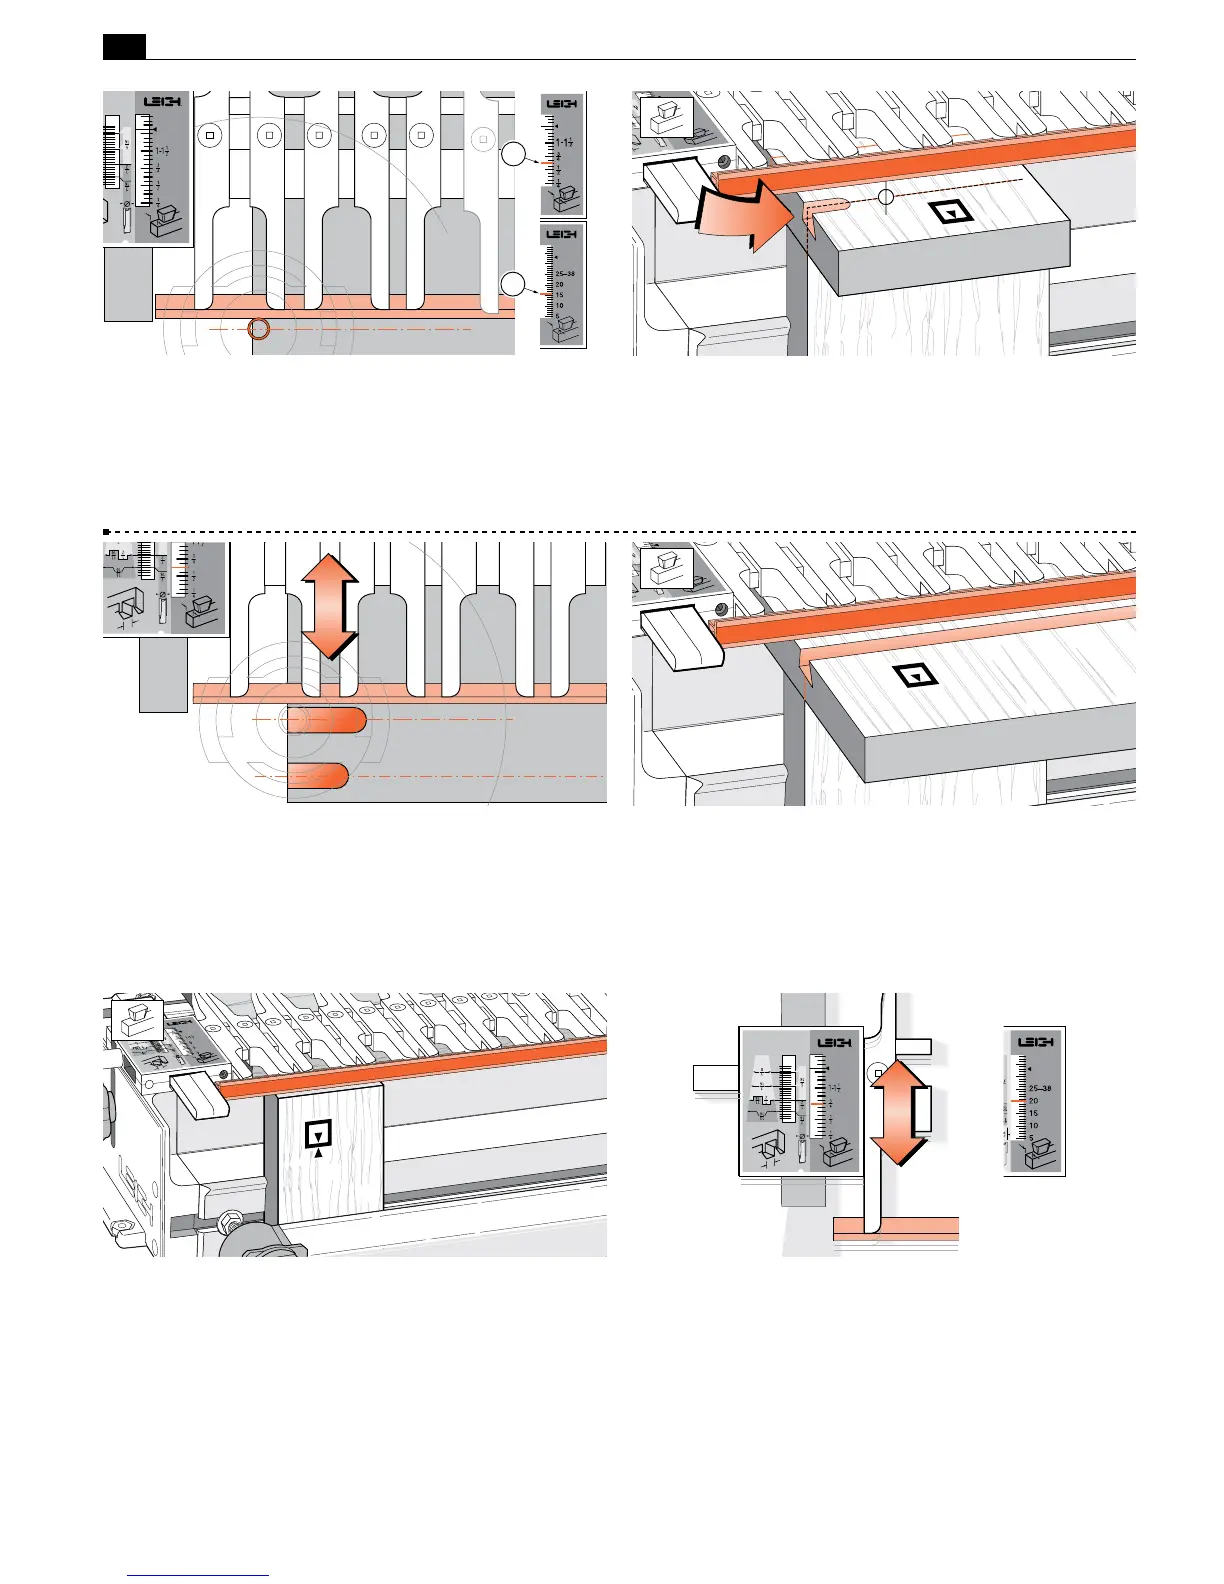
16-13 If you use a larger guidebush, for example
5
⁄8"[15,9mm]
rather than
7
⁄16"[11,1mm], move the scale in by the difference of
the two guidebush radii.
E.g., suggested scale reading for a
5
⁄8"[15,9mm] guidebush would
be
11
⁄32"[9mm]
➁
.
2
2
16-14 Adjust the bit so the cut depth is about
5
⁄16"[8mm]. Rout
from left to right maintaining light inward pressure of the guidebush
on the fence. Rout in only about 1"[25mm] and back out again.
Do not lift the router.
16-15 Check to see if this short slot is centered on the pencil line.
If not, adjust the finger assembly in or out and retest on the other
lines as necessary until the slot is centered. Lock the finger assembly
in this position and record the setting for future reference.
16-16 Now rout sliding dovetail slots in the two main slot boards
with the boards in the horizontal position in the rear clamp, slot
side, that is inside face
i
up.
The guidefingers must be flush on the board.
16-17 Replace the spacer board in the rear clamp, and with
the finger assembly on the spacer board, mount a test tail board
vertically in the front clamp, flush under the guidefingers. Either
side can face out
j
.
16-18 The
H
HB TAILS scale is not designed specifically for
this mode, but it does allow you to make precise adjustments for
tail size and tightness of fit on sliding dovetails.
 Loading...

