5050
RTJ400 User Guide
Box Joint Procedures - 3/8"
Chapter 10
10-36
The depth of cut (how much the tail board intersects the
pin board) is arbitrarily set. Our suggestion is to set the depth of
cut about ⅛" less than the thickness of the pin board or in the
case of lipped drawer fronts, slightly lower than the lip. In this
case our pin board is ¾", so mark a line up from the end of the
tail board ⅝".
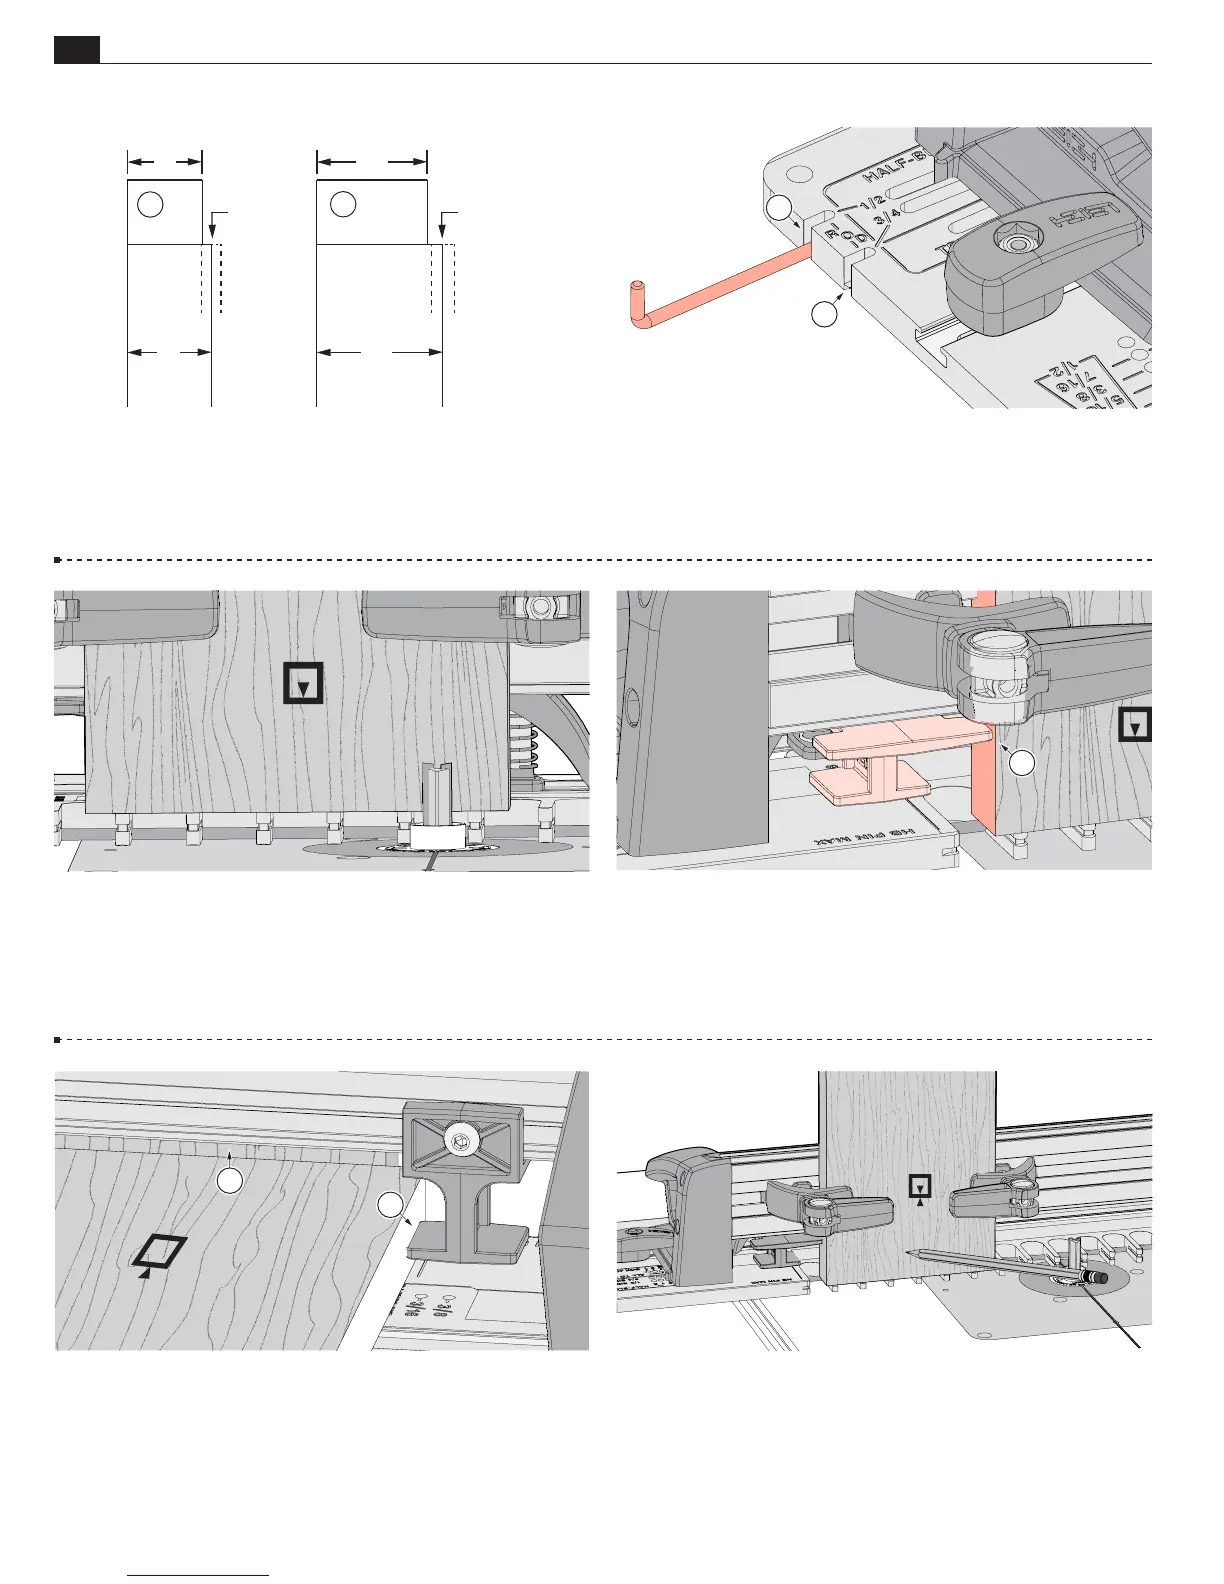
10-34 Slide the sidestop so it lightly touches against the tail
board and tighten it.
A.
10-35 Position the pin board against the sidestop
A
with the
end edge touching
flush against the rear of the tail board
B
,
and clamp.
Note: Clamp removed for clarity.
10-33 Center the tail board over the template so that the side
edges are equally spaced over the template fingers and touching
flush on the template. Clamp the tail board.
10-32 The Stop Rod. For tail boards from ⅜" [11mm]
to ⅝" [16mm] thick, insert the stop rod in the ½" slot
A
.
Note: For tail boards
⁄"
[17.5mm] thick or greater, the stop
rod is stored in the ¾" slot
B
.
10-31 When the frame pin and stop rod are in the ½" positions,
all tails will be ", dimension
A
, regardless of actual board
thickness (dashed line). Similarly, when the frame pin and stop
rod are in the ¾" hole, all tails will be ", dimension
B
,
regardless of actual board thickness.
⁄"
⁄"
⁄"
⁄"
⁄
"
to ⁄
" ⁄
" to ⁄
" or more
A
B
A
A
B
B
A
3/8" Half-Blind Box Joints cont.