51
51
RTJ400 User Guide
Chapter 10
Box Joint Procedures - 3/8"
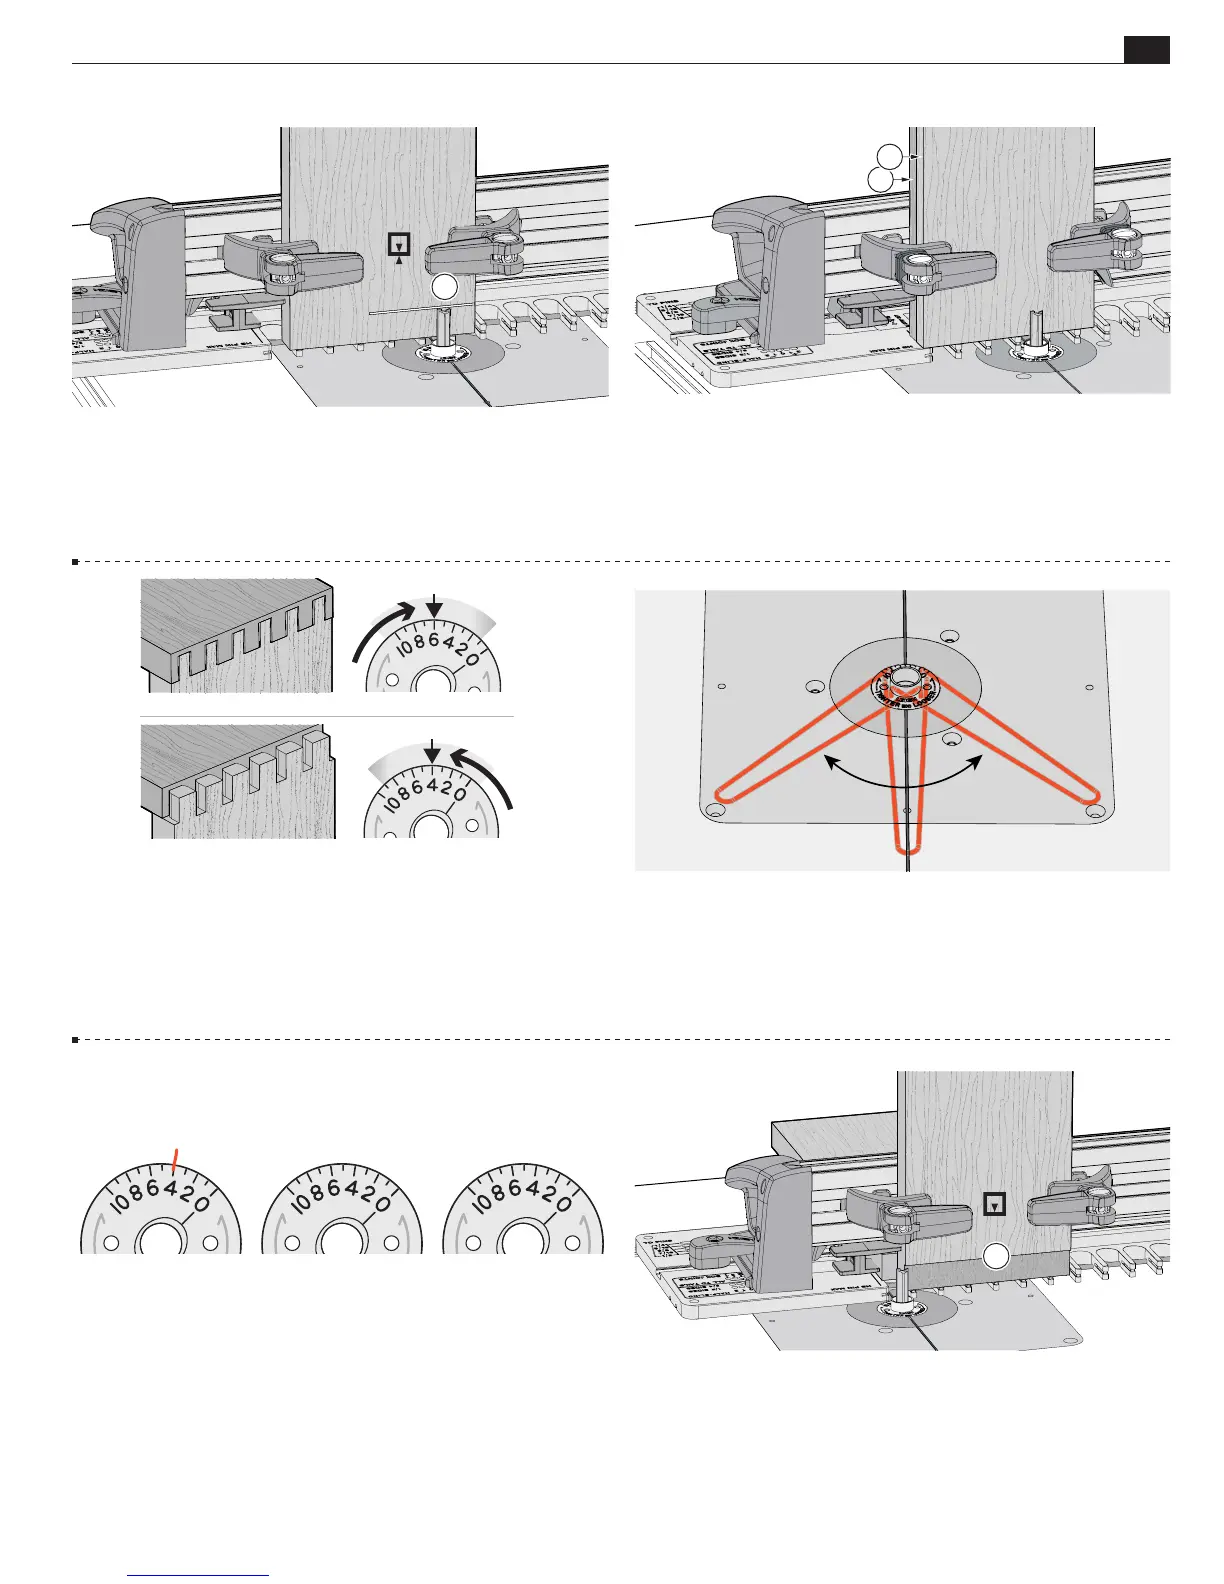
10-37 Adjust the bit to the center of the line
A
.
10-39
Test for Fit If the joint is too loose, turn the eBush to a
higher number with the pin wrench as shown in the next step, and
rout two fresh boards.
If the joint is too tight, turn the eBush to
a lower number and
rout two fresh boards
.
10-40
Each increment on the eBush changes the joint glue line
fit by 0.002" [0.05mm]. Half an increment, a mere 1000th inch!
Re-tighten the eBush after each guide bushing adjustment.
A
TOO LOOSE TIGHTEN
TOO TIGHT LOOSEN
Half-Blind Box Joints cont.
A
A
10-41 Record your perfect fit eBush setting on one of the
drawings provided above.
A
10-42 Re-clamp the tail board in position. Start by routing a
very light, shallow climb cut, moving the jig right to left
A
. This
will leave a nice clean shoulder.
The bit will tend to drive the jig to the right, so make the
cut light and with a firm grip.
Sample
Leigh 173-500C Bit
10-38 Quick Fit Test To save time and wood, clamp the two
½" thick scrap
test
boards in the jig, back to back
A
. Rout both
boards at the same time. Join the routed boards and make joint fit
adjustments in the next three steps. Don’t worry about board edge
alignment, the test is for joint fit only. Note: If you have already
done the Quick Fit Test in Step 10-17, use that eBush setting.