57
57
RTJ400 User Guide
Chapter 11
Box Joint Procedures - 3/4"
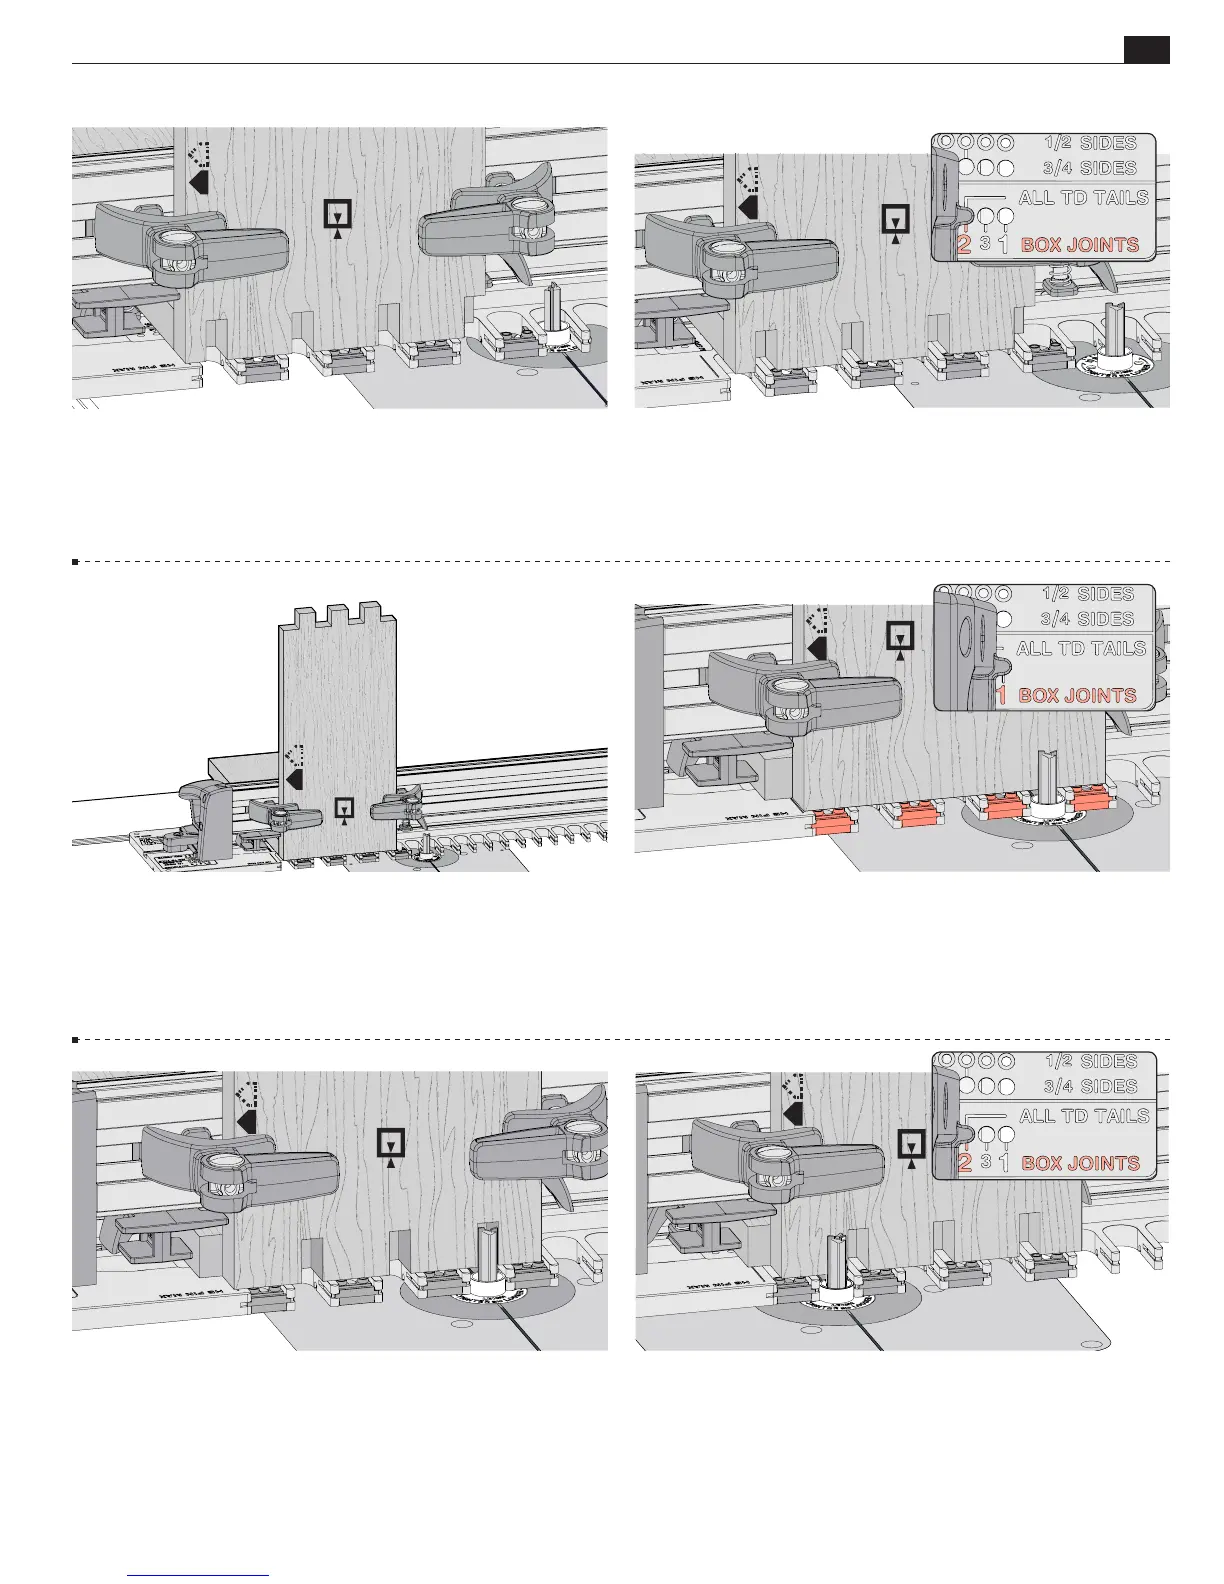
11-21 Loosen the latches and move the frame pin to the
No.2
BOX JOINTS
hole and latch the frame.
11-22 Again, carefully rout into the same sockets as before,
i.e. 1, 3, 5, 7. Unclamp and flip the board, keeping the same
edge against the sidestop. Clamp the board and repeat the steps
in reverse order. Remove socket board 1 and repeat steps 11-19
through 11-22 for socket board 2. Remove socket board 2.
11-20 Rout into the first opening and every other template
opening i.e. 1, 3, 5 and 7.
The eBush must touch one side
of the opening as you enter and the other side as you exit.
Do not remove the board or the backer board.
11-24 Now rout into the second and every alternating even
numbered openings, i.e. 2, 4, 6, etc.
Do not
remove the board,
backer board or the blockers
.
11-23
Leave the frame latched and the backer board in place.
The right frame pin should be in the
No.1 BOX JOINTS
hole. Move
the blockers to the odd numbered sockets. Clamp pin board 1
against the sidestop.
11-25
Move the frame pin to the
No.2 BOX JOINTS
hole and
latch the frame. Rout into the same, even numbered sockets i.e. 2,
4, 6, etc. Unclamp and flip the board. Clamp the board and repeat
the steps in reverse order. Repeat steps 11-23 through 11-25 with
the second pin board. Remove socket board 2. All four boards are
now complete and ready for assembly.