REARWHEEL
The rear wheel is installed into the rear fork with two nuts, one on the left and one on the right side of the wheel axle.
Tighten LEFT and RIGHT rear wheel nuts (7 and 12) to 30 Nm.
Removalofrearwheel
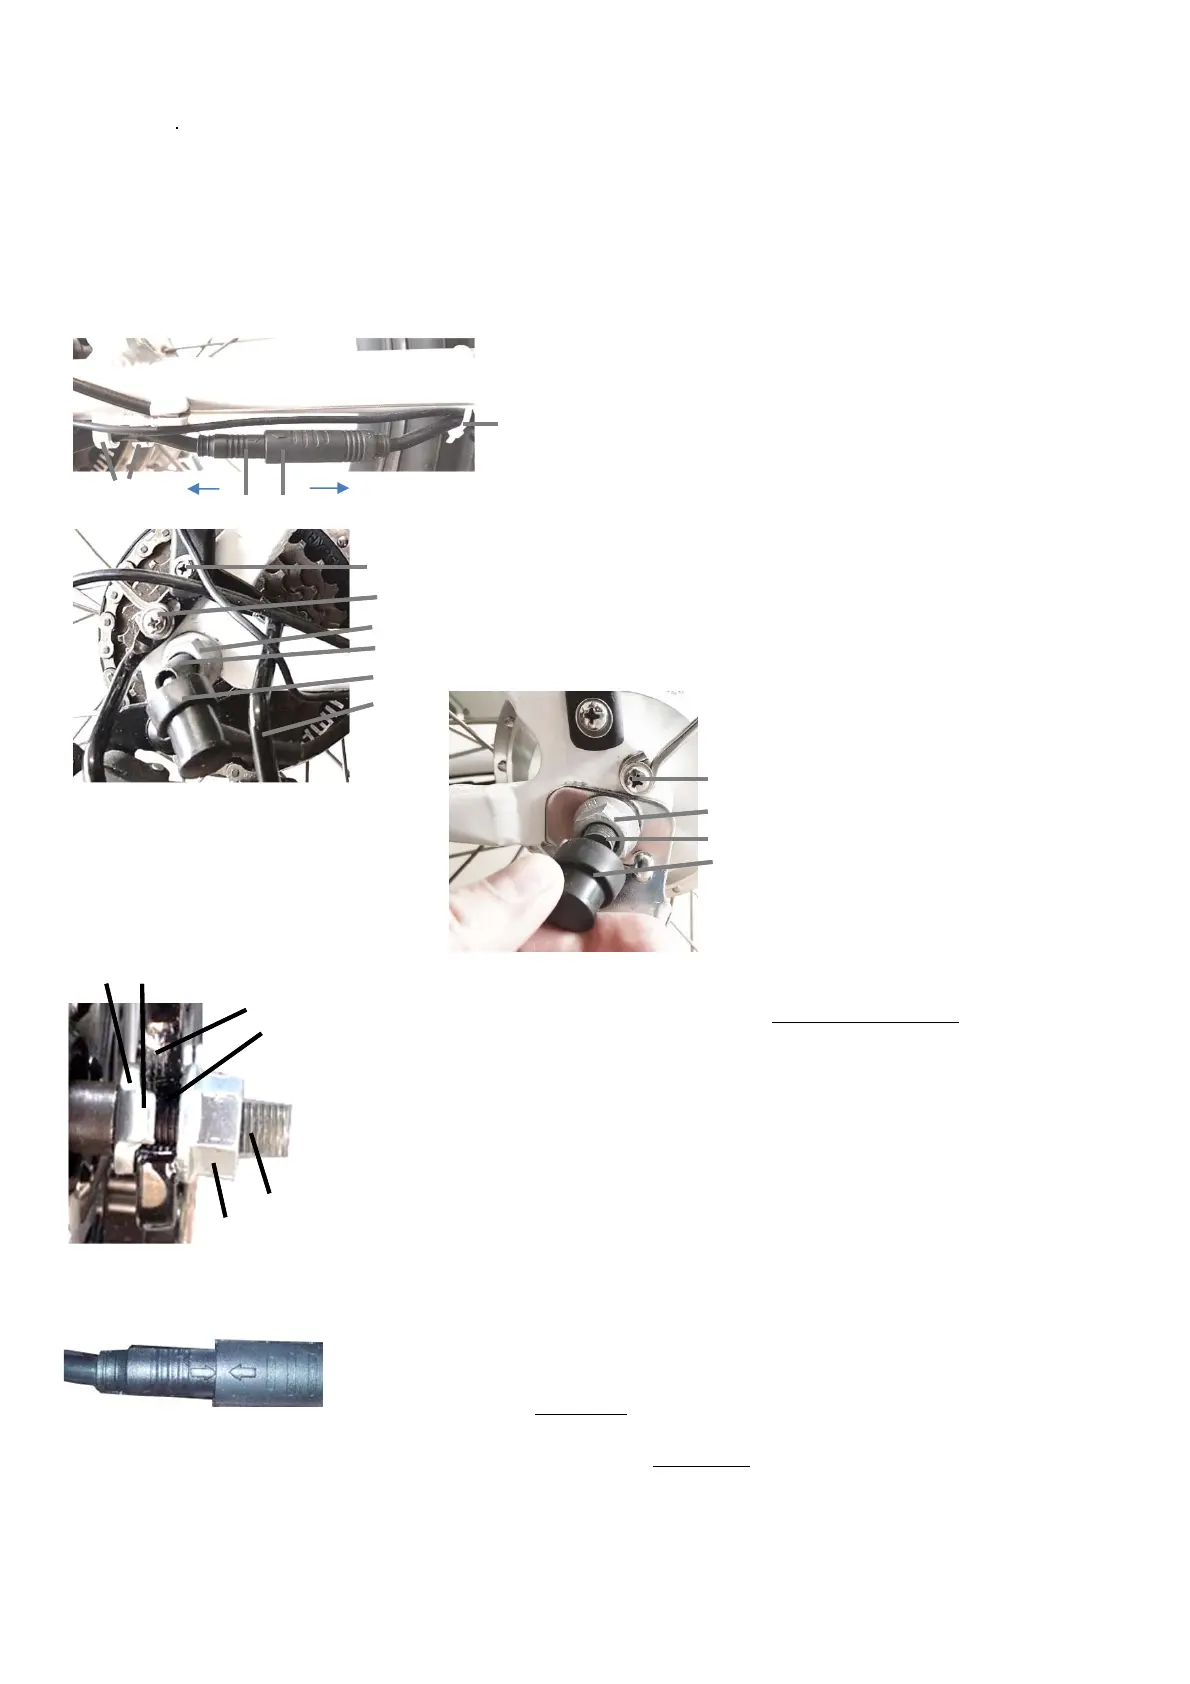
Figure RR1 (right side of bike at rear wheel):
To remove rear wheel, first disconnect male end of motor wire
(3) from female end of motor wire (2) by carefully pulling in the
directions of the arrows shown . Cut cable ties (1) if they are in
the way. Then, carefully remove male end of motor wire (3) from
the cable attachment guides (4).
1
23
4
Figure RR2 (RIGHT side of bike, at centre of rear wheel):
Remove rubber cap (9) from rear axle (8) to expose RIGHT rear wheel nut (7).
This figure shows a rubber cap which has already been removed. Use a wrench
to loosen RIGHT rear wheel nut (7). If you are having trouble to access the nut
(7), remove bolts 5 and 6 which allows to remove derailleur guard (10).
5
6
7
8
9
10
Figure RR3 (LEFT side of bike, at
centre of rear wheel):
Remove rubber cap (14) from rear
axle (13) to expose LEFT rear wheel
nut (12). This figure shows a rubber
cap which has already been
removed. Use a wrench to loosen
LEFT rear wheel nut (12).Thewheel
can now be removed. Remove bolt
11 if you are having trouble to access
bolt 12.
11
12
13
14
Figure RR4. Correct installation of rear axle into fork. View from bottom UP.
To re‐install rear wheel, place chain into one of the cogs on the rear wheel, then carefully
insert the rear wheel axle into the fork following the instructions below.
15 Inner washer, 16 Key (small protrusion) of inner washer, 17 Rear fork, 18 Opening of rear
fork to insert rear wheel axle, 19 rear wheel axle, 20 rear wheel nut. When installing the rear
axle (19) into fork it is very important to make sure that the inner washer (15) is located at
the inner side of the fork. The Key (small protrusion) of the inner washer (16) needs to
protrude into the opening of the rear fork (18). The axle needs to be fully inserted into the
fork, then the nut (20) needs to be tightened to 30 Nm. Also tighten nut on other side of
rear wheel axle
15 16
17
19
20
18
Figure RR5. To re‐install rear wheel, follow steps shown in Figure RR3, RR2 and RR1 in
reverse order. Make sure the wheel is installed safely. When re‐connecting the male and
femalemotorwire,firstmakesurethatbotharrowsonthewiresarealigned, then push
both cables together all the way as shown in this figure.
18
WARNING! Ensure male and female connector are pushed together all the way. If the connection is loose, it may lead to
heat build‐up, melting connections and damage to motor, controller and bike. During first ride after re‐installing rear‐wheel
check connection regularly for heat build‐up and push together if necessary.
WARNING! Ensure rear wheel is installed safely before riding. If wheel becomes loose during riding it may cause you to fall.
WARNING! Take care not to damage the wire and pins at end of connector (3). Do not bend wire with force where it enters
rear axle (8). To replace damaged wires the whole motor needs to be replaced.
©LeitnerPtyLtd2019