25
Extended guide
Insert the wand so that the end of the
nozzle is near the side of the jug (pre-
tend you have split the top section into
four parts and insert the nozzle into
one of them) and about one centime-
ter below the surface of the milk.
Since the milk will start to expand in
volume, you will have to gradually low-
er the jug so that the nozzle is always
kept immersed at the same depth.
This process is complete when the
milk reaches a temperature of about
37°C, or when you can feel the warmth
with your hand. You can use the ther-
mometer too (code PLA3800 - not in-
cluded).
Processing the milk
This phase is very important to make
the cream thick, with a ne texture and
a shiny surface.
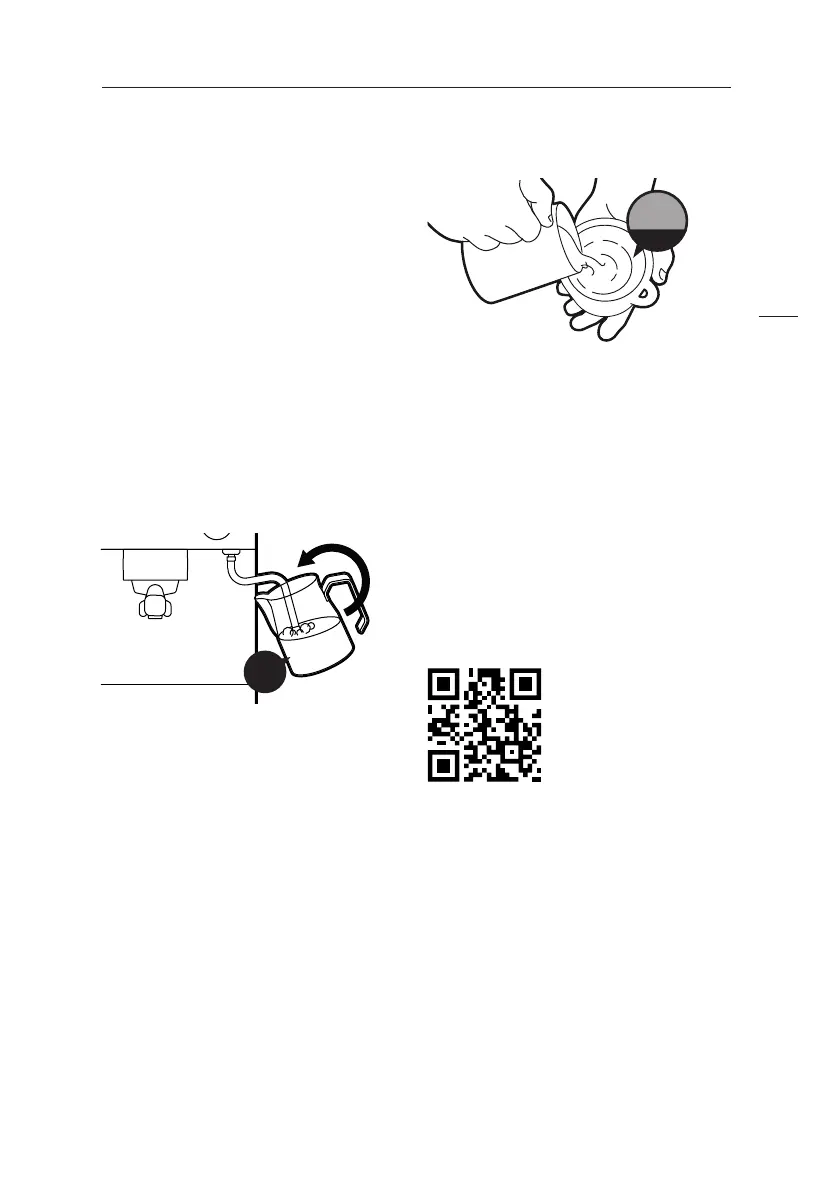
Insert the wand all the way down and
tilt the jug to create a vortex. Heat the
milk to the desired temperature, with-
out exceeding 65°C. Close the steam.
Prepare the milk by rst tapping the
jug on the countertop to remove any
air bubbles and then rotating it to keep
the milk and froth well amalgamat-
ed. The result should be a smooth,
creamy surface without any bubbles.
Pouring the milk
coffee
milk
You should leave the milk to settle for
a least half a minute, so we suggest
you always prepare it before making
the coffee.
The doses for a cappuccino should be
one part Espresso and two equal parts
of milk and froth. Clean the steam
wand with a damp cloth and let some
steam out to clean the tip.
To see the tutorial,
please scan the QR-Code.
To read the QR code, download the
proper app from your store.
65°C


 To Next Page