5.1004.8641.0 B
Maintenance 5-19
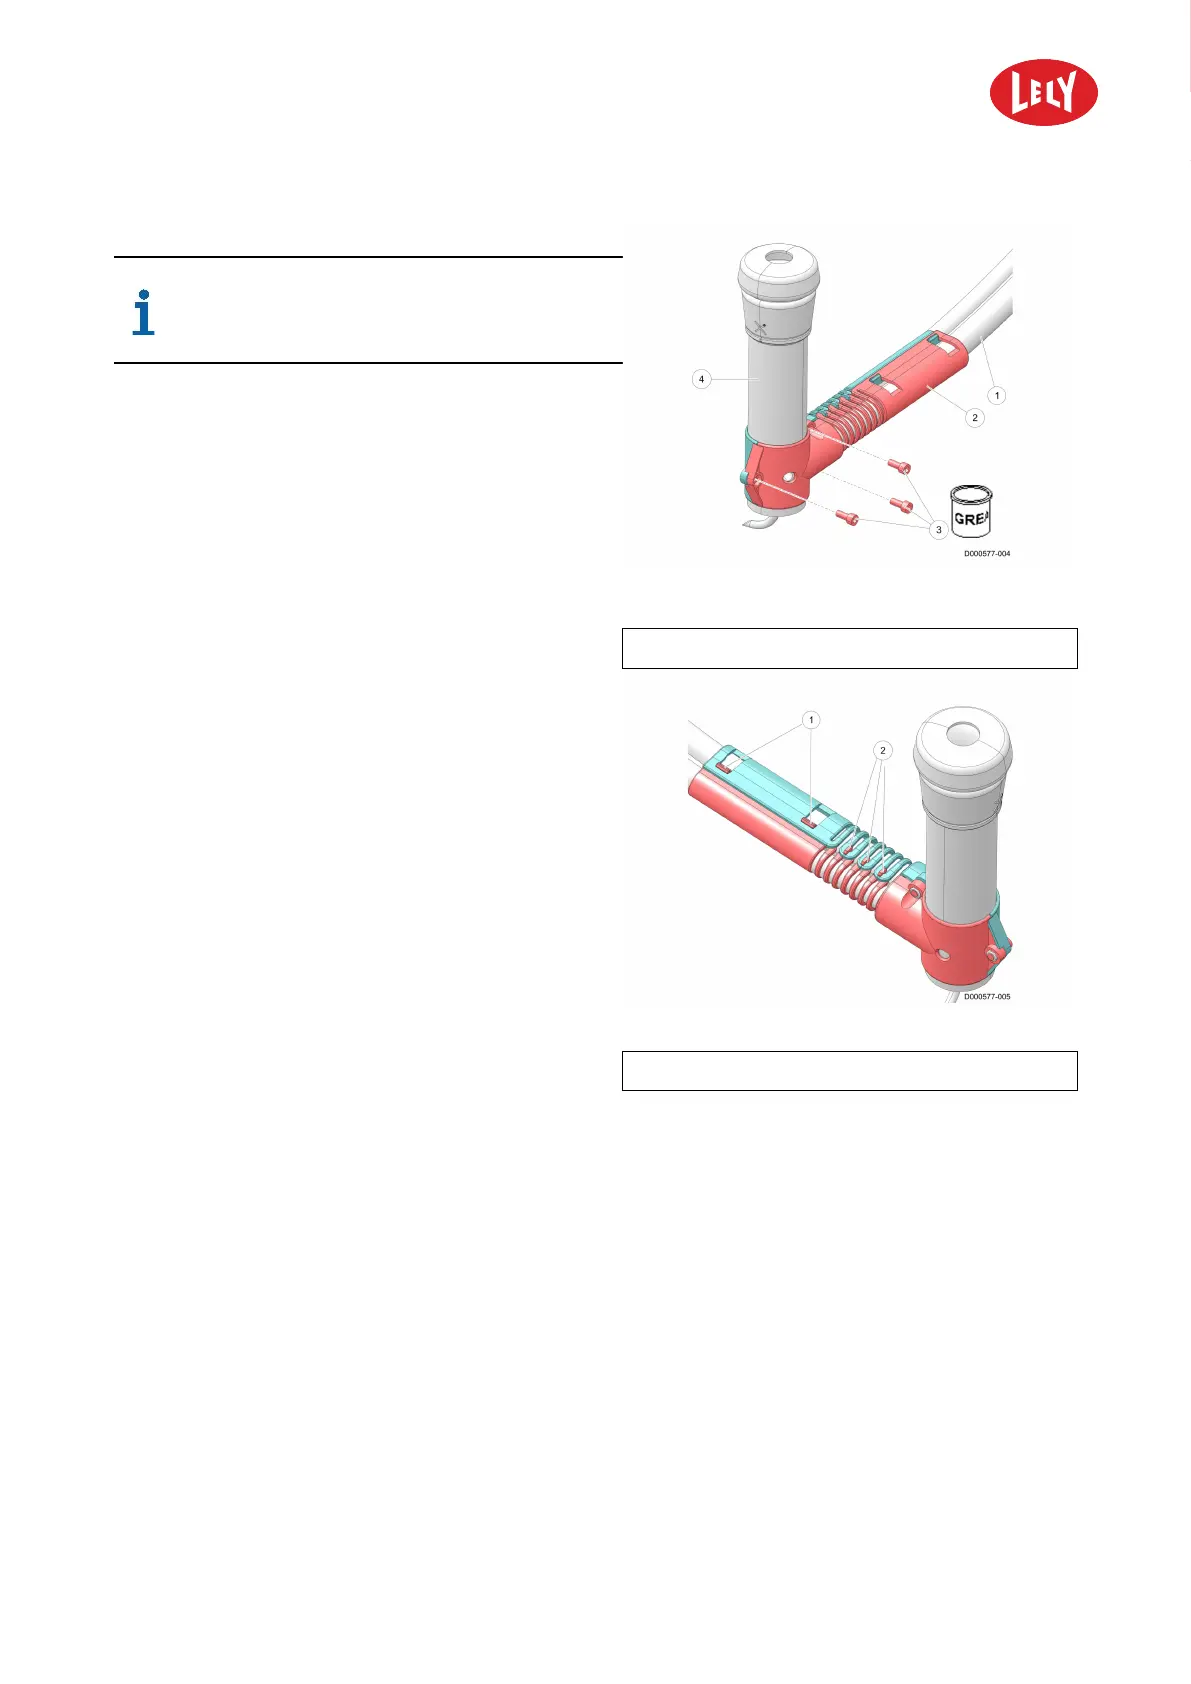
Figure 38. Install the second part of the twin tube
cover
KEY: 1. Twin tube - 2. Part of twin tube cover - 3. Bolts (2x)
Use anti-seize paste on all bolts to
prevent seizing.
6. Install the second (larger) part of the twin tube
cover (2) with the bolts to the smaller part of the
twin tube cover with a torque of 1.5 Nm (see
figure 38 on page 5-19).
Figure 39. Install the twin tube cover
KEY: 1. Snap connections - 2. Snap connections
7. Push the two parts of the twin tube cover
together (see figure 39 on page 5-19).
Make sure the snap connections (1) on both sides
of the twin tube cover are connected correctly.
8. Connect the flexible parts (2) at both sides of the
twin tube cover (see figure 39 on page 5-19).
9. Connect the milk tube (3) to the connection piece
(1) of the preformed milk tube (see figure 33 on
page 5-17).
Tighten the clamp with the special tool.
10. Connect the vacuum tube (3) to the connection
piece (2) of the 4effect pulsator tube.
11. Hold the teat cup with one finger in the line and
make sure that the teat cup does not turn.
If necessary, turn the twin tubes at the connection with the milk collection cup and align the teat cup.
12. Install the twin tube segregation (1) to the mothership and slide it away from the teat cups to
bring it in locking position (see figure 31 on page 5-16).
13. Install the locking strip (3) with the two bolts (2).
Cord Cups Fixed at the E-Link
At the E-Link select:
1. Tab Test.
2. Select Test menu.
3. Select Mothership.
4. Select Cups.
in n o vato rs in agriculture