10CH TXT Essential Instructions v1.docx 2024-09-05 7
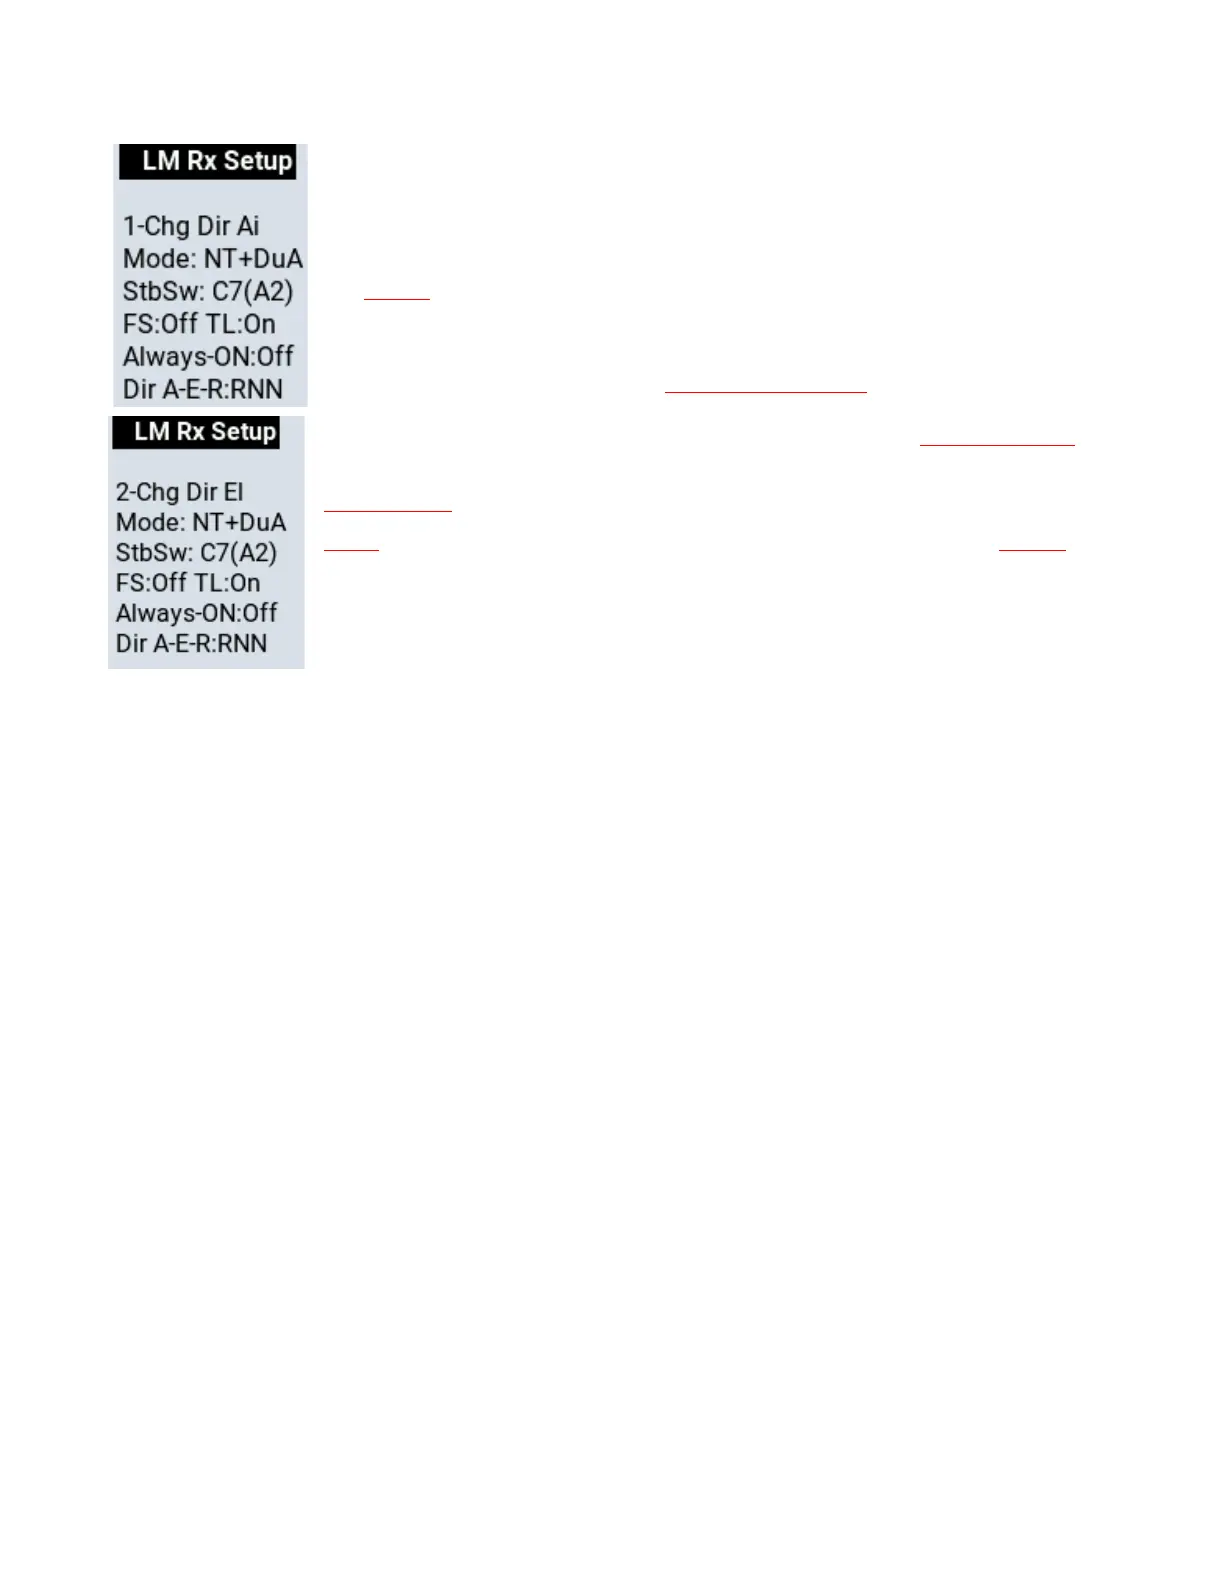
The first line with the number indicates what you can change. In this case the response
direction of the Ailerons.
The rest of the lines are the same as the basic Lemon Text Display and show the current
settings.
You change the value of the item displayed on the first line by moving the Elevator stick
fully up or down. In the example shown the Aileron response direction will toggle
between Normal and Reverse each time you move the Elevator stick.
While you are in Setup Mode you can select a different item by moving the Aileron stick
to one end. Moving the Aileron stick one way increments the screen number, the other
way decrements it. The second screen then appears. Now you can change the value of
the item by moving the Elevator stick up or down.
To summarize
Select the item you want to change by moving the aileron stick to one end. Change the
value of the item by moving the elevator stick up or down.
Basic Screens Available in Setup Mode
Seven screens are initially accessible in Setup Mode. The first four directly change settings:
1. Change the direction of roll (Aileron) stab reaction.
2. Change the direction of pitch (Elevator) stab reaction.
3. Change the direction of yaw (Rudder) stab reaction.
4. Change between single and dual aileron channel stabilizer response.
5. Show Config.
6. Exit and save your settings.
7. Exit without changing the settings.
Advanced Screens Available in Setup Mode
Selecting Screen 5, “Show Config.”, and moving the elevator stick up or down opens up advanced configuration
options. The additional screens are as follows:
8. Change the stabilizer mode among NT, DT, VT and Rx Only (no stabilization).
9. Change the stabilizer on/off switch between channel 5 and channel 7.
10. Change to Always On stabilization. Check that the blue Status LED on the receiver lights.
11. Turn Throttle Lock ON or OFF. Most electric fliers should leave it ON. The OFF option is intended for fliers
who use channel 1 for something other than throttle (see Appendix 3).
12. Cancel User-set failsafe. User-set failsafe can only be set using the F button on the receiver.
13. Reset the stabilizer to factory settings and reboot.
14. Calibrate the voltage probe wire or the voltage of the optional V/I sensor. See page 13 for reference.
15. Calibrate the current sensor of the optional V/I sensor. See page 13 for reference.
Depending on the receiver, a final un-numbered screen may appear that contains some system information and
cannot be changed.