Page 10
gauges after shutdown to confirm that the valves are
not allowing refrigerant to flow back into the low side of
the system. Disconnect the liquid and vapor lines from
the existing outdoor unit.
2 − Remove the existing outdoor unit. Set the new R410A
unit and follow the brazing connection procedure
which begins on the previous page to make line set
connections. DO NOT install provided R410A
check/expansion valve at this time.
Make low voltage and line voltage connections to the
new outdoor unit. DO NOT turn on power to the unit
or open the outdoor unit service valves at this
time.
3 − Remove the existing refrigerant flow control orifice or
thermal expansion/check valve before continuing with
flushing procedures. The existing devices are not ap-
proved for use with R410A refrigerant and may pre-
vent proper flushing. Use a field−provided fitting to re-
connect the lines.
IMPORTANT
The line set and indoor coil must be flushed with at
least the same amount of clean refrigerant that pre-
viously charged the system. Check the charge in
the flushing cylinder before proceeding.
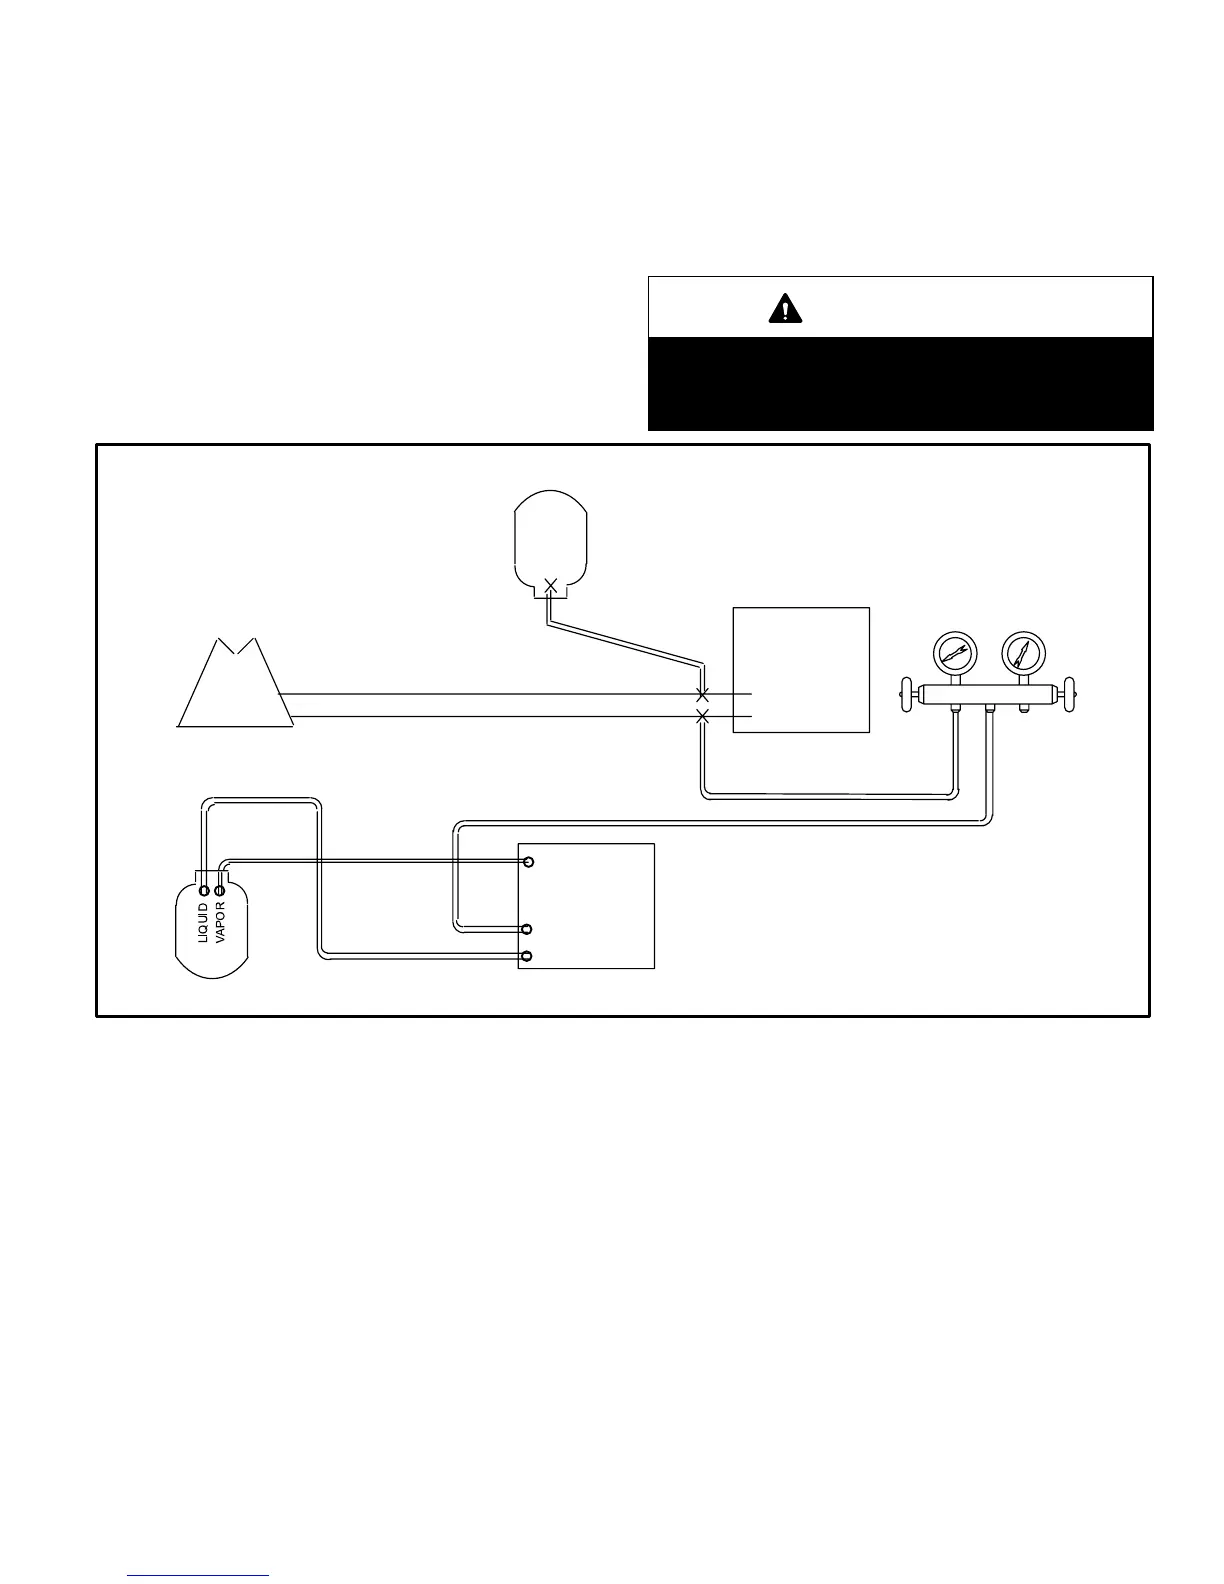
Flushing Connections
LOW
PRESSURE
HIGH
PRESSURE
VAPOR LINE
SERVICE VALVE
INDOOR COIL
HPXA12 UNIT
GAUGE MANIFOLD
RECOVERY MACHINE
INVERTED R22
CYLINDER
(Contains clean
R22 to be used for
flushing)
LIQUID LINE
SERVICE VALVE
INLET
DISCHARGE
TANK RETURN
CLOSEDOPENED
EXISTING
EXISTING VAPOR LINE
EXISTING LIQUID LINE
RECOVERY
CYLINDER
NOTE − The inverted R22 cylin-
der must contain at least the
same amount of refrigerant as
was recovered from the existing
system.
Figure 11
 Loading...