Page 10
Belt Drive Blowers
1- Loosen the reusable wire tie which secures the
blower wiring to the blower motor mounting plate.
2- Remove and retain screws on either side of sliding
frame. Pull frame toward outside of unit.
3- Slide frame back into original position when finished
servicing. Reattach the blower wiring in the previous
location on the blower motor base using the wire tie.
4- Replace retained screws on either side of the
sliding frame.
D-Determining Unit CFM
IMPORTANT - Belt-driven supply air inverter units are
factory-set to run the blower at full speed when there is a
blower (G) demand without a heating or cooling demand.
Use the following procedure to adjust motor pulley to
deliver the full load cooling or heating CFM. See
Belt-Driven Supply Air Inverter Start-Up section to set
blower CFM for all modes once the motor pulley is set.
1- The following measurements must be made with a
dry indoor coil. Run blower without a cooling demand.
Measure the indoor blower shaft RPM. Air filters must
be in place when measurements are taken.
2- With all access panels in place, measure static
pressure external to unit (from supply to return).
Blower performance data is based on static pressure
readings taken in locations shown in figure 11.
Note - Static pressure readings can vary if not taken
where shown.
3- Referring to page 14, 15, or 16, use static pressure
and RPM readings to determine unit CFM. Use page
17 when installing units with any of the optional
accessories listed.
4- The blower RPM can be adjusted at the motor pulley.
Loosen Allen screw and turn adjustable pulley
clockwise to increase CFM. Turn counterclockwise to
decrease CFM. See figure 10. Do not exceed
minimum and maximum number of pulley turns as
shown in table 2.
TABLE 2
MINIMUM AND MAXIMUM PULLEY ADJUSTMENT
Belt
Minimum
Turns Open
Maximum
Turns Open
A Section 0 5
B Section 1* 6
*No minimum number of turns open when B belt is used on
pulleys 6” O.D. or larger.
E-Blower Belt Adjustment
Maximum life and wear can be obtained from belts only
if proper pulley alignment and belt tension are
maintained. Tension new belts after a 24-48 hour
period of operation. This will allow belt to stretch and
seat in the pulley grooves. Make sure blower and motor
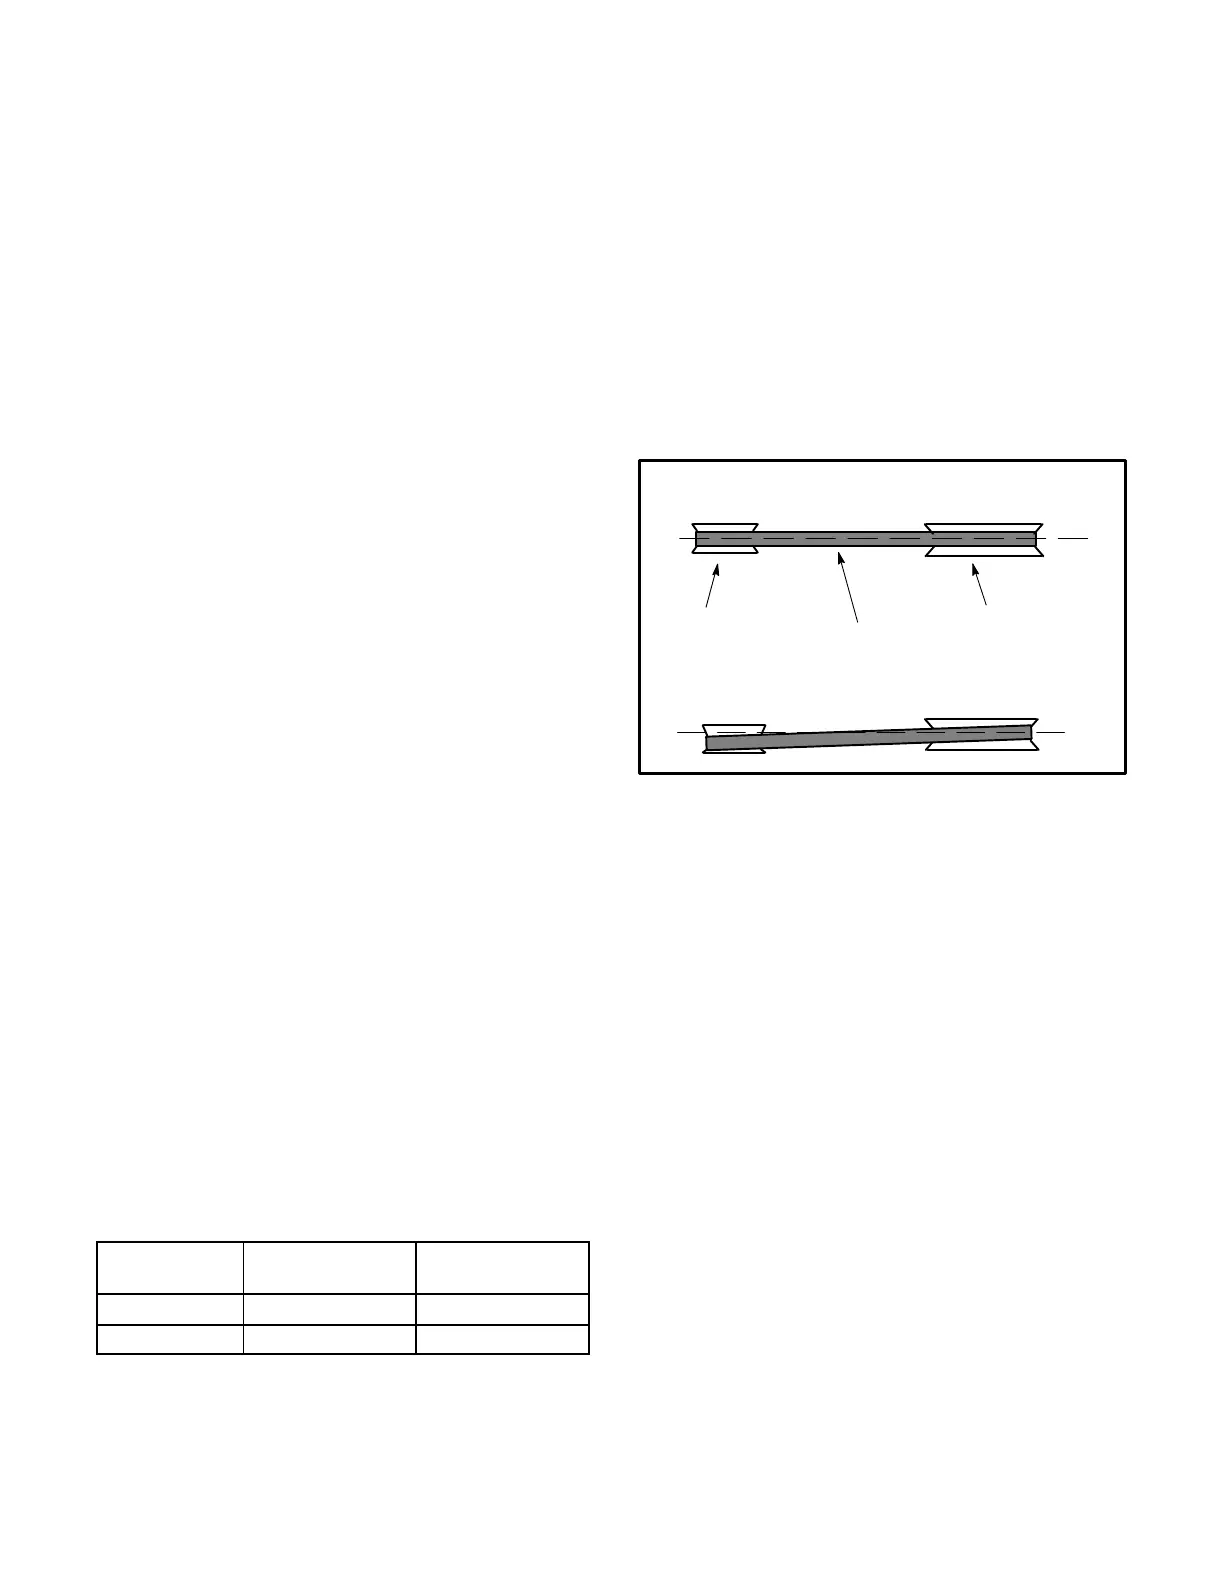
pulleys are aligned as shown in figure 12.
1- Loosen four bolts securing motor base to mounting
frame. See figure 10.
FIGURE 12
PULLEY ALIGNMENT
BELT
BLOWER
PULLEY
MOTOR
PULLEY
NOT ALIGNED
ALIGNED
2- To increase belt tension -
Turn both adjusting bolts to the right, or clockwise, to
move the motor outward and tighten the belt. This
increases the distance between the blower motor and
the blower housing.
To loosen belt tension -
Turn the adjusting bolts to the left, or
counterclockwise to loosen belt tension.
IMPORTANT - Align top edges of blower motor base and
mounting frame base parallel before tightening four bolts
on the side of base. Motor shaft and blower shaft must be
parallel.
3- Tighten two bolts on each side of the motor mounting
base. This secures the mounting base to the frame.
4- Relieve tension adjusting bolts.