Page 37
C-Burners
during the heating season. Before each heating season
examine the burners for any deposits or blockage which
may have occurred.
Clean burners as follows:
1 -
2 - Remove burner compartment access panel.
3 - Remove top burner box panel.
4 - Remove two screws securing burners to burner
WARNING
Danger of explosion. Can cause injury
or death. Do not overtighten main burner
mounting screws. Snug tighten only.
D-Combustion Air Inducer
A combustion air proving switch checks combustion air in-
ducer operation before allowing power to the gas control-
ler. Gas controller will not operate if inducer is obstructed.
Under normal operating conditions, the combustion air
inducer wheel should be checked and cleaned prior to
the heating season. However, it should be examined pe-
riodically during the heating season to establish an ideal
cleaning schedule.
Clean combustion air inducer as follows:
1 -
2 - Remove the mullion on the right side of the heat
section.
3 - Disconnect pressure switch air tubing from
combustion air inducer port.
4 - Remove and retain screws securing combustion air
Clean inducer wheel blades with a small brush and
damage exposed fan blades. Clean accumulated
6 - Return combustion air inducer motor and vent
connector to original location and secure with
retained screws. It is recommended that gaskets be
replaced during reassembly.
7 - Replace mullion.
8 - Clean combustion air inlet louvers on heat access
pane lusing a small brush.
E-Flue Passageway and Flue Box
-
-
tightly sealed.
F-Evaporator Coil
Inspect and clean coil at beginning of each cooling season.
Clean using mild detergent or commercial coil cleanser.
Flush coil and condensate drain with water taking care not
G-Condenser Coil
Clean condenser coil annually with detergent or commer-
cial coil cleaner and inspect monthly during the cooling
season. Condenser coils are made of single and two
formed slabs. On units with two slabs, dirt and debris may
become trapped between the slabs. To clean between
slabs, carefully separate coil slabs and wash them thor-
cleaning.
Note - Remove all screws and gaskets prior to cleaning
procedure and replace upon completion.
H-Supply Blower Wheel
Annually inspect supply air blower wheel for accumulated
access panel or to clean blower wheel.
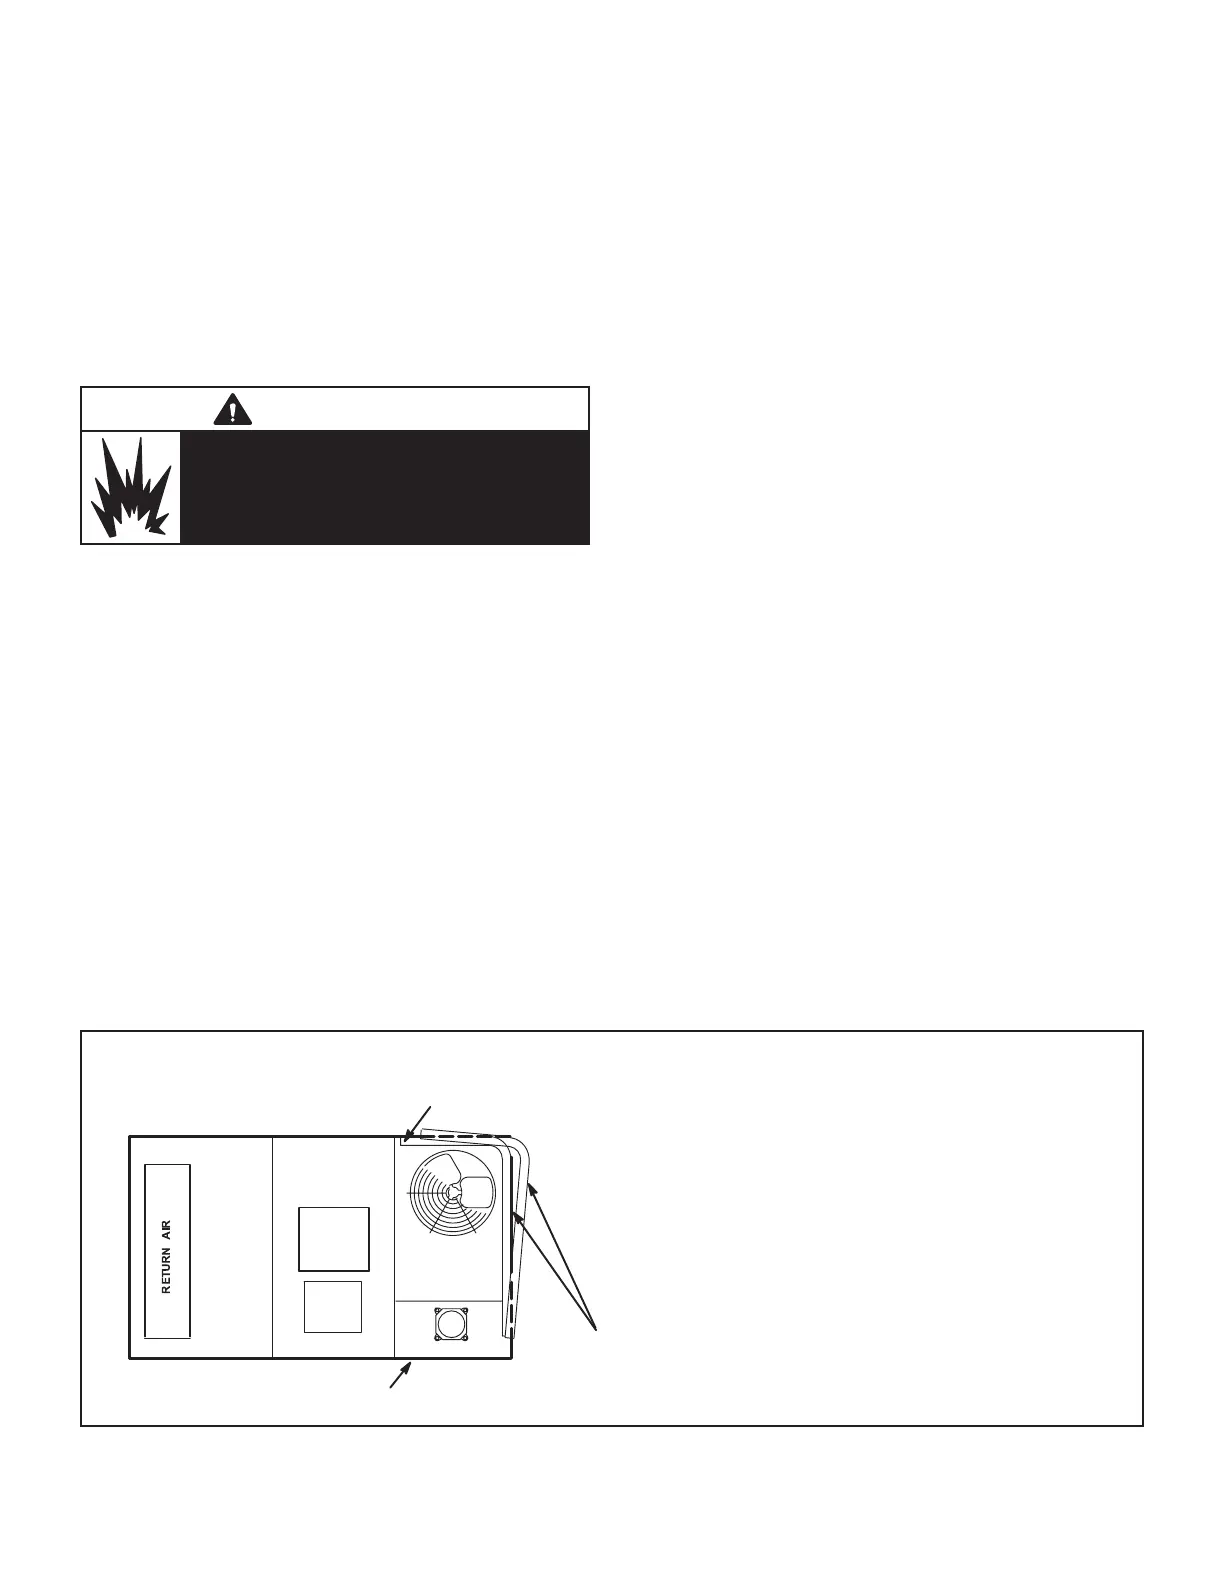
TOP VIEW
CONDENSER
COILS
BLOWER
CONDENSER ACCESS PANEL
ENDPLATE IS SECURED
TO MULLION
SUPPLY
AIR
1- Remove unit top panel and condenser section access
panel.
2- Remove screws securing coil end plate to mullion.
3- Remove wire ties connecting coils slabs and separate
slabs 3-4” (76-102mm).
4- Clean coils with detergent or commercial coil cleaner.
5- Rinse thoroughly with water and reassemble
.
Use
field-provided wire ties to connect coil slabs.
FIGURE 27
 Loading...