Do you have a question about the Lennox M0STAT64Q-2 and is the answer not in the manual?
Instructions to set the current day and time using the Timer button and +/- buttons.
How to toggle between Fahrenheit and Celsius display modes using Back/Turbo and Copy/Follow me buttons.
How to select room temperature sensing between indoor unit or controller using the Copy/Follow me button.
Instructions to turn on/off the key pad tone using Swing and Timer buttons simultaneously.
How to start or stop the unit's operation by pressing the Power button.
How to select operation modes like Auto, Cool, Dry, Heat, or Fan using the Mode and +/- buttons.
How to adjust the desired temperature set point using the +/- buttons.
Instructions to adjust fan speed settings (Auto, Low, Med, High) using the Fan Speed button.
How to lock or unlock all controller buttons by pressing the Fan Speed button for 3 seconds.
How to activate or deactivate Turbo mode for high fan speed using the Back/Turbo button.
How to adjust louver direction and oscillation using the Swing button, including independent louver control for cassette units.
Steps to set the start time for timed operation using the Timer and Confirm buttons.
Steps to set the stop time for timed operation using the Timer and Confirm buttons.
Steps to set both start and stop times for timed operation using Timer, Confirm, and +/- buttons.
Instructions to initiate the creation of daily schedules with up to 8 events using Timer and Confirm buttons.
Detailed steps to create and configure individual scheduled events, including time, mode, set point, and fan speed.
How to copy an existing daily schedule to another day using Timer, Confirm, and Copy/Follow Me buttons.
How to enable or disable the timed operation feature using the Timer and Power buttons.
How to set specific days when the unit will not operate, using Timer, Confirm, and Day Off/Del buttons.
Steps to modify an existing scheduled event's time, mode, set point, or fan speed.
Instructions to remove a specific event from a scheduled day using Timer, Confirm, and Day Off/Del buttons.
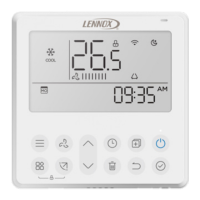
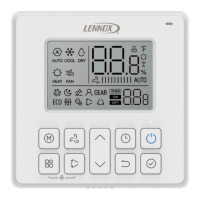
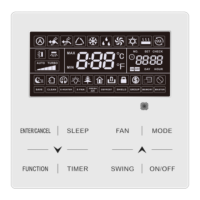
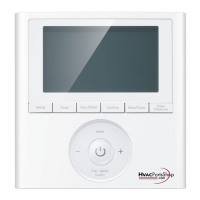
The MOSTAT64Q-2 Indoor Unit Programmable Controller (22U20) is a wired programmable local controller designed for mini-split indoor units, offering convenient timed schedules for daily operation. This device serves as a central interface for managing the comfort settings of your HVAC system, allowing users to precisely control various operational parameters.
The primary function of the MOSTAT64Q-2 is to provide comprehensive control over mini-split indoor units. It allows users to:
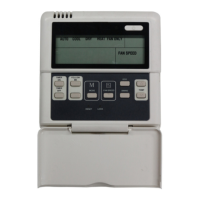
The MOSTAT64Q-2 is designed for ease of use with a clear display and intuitive button layout.
While the MOSTAT64Q-2 itself requires minimal maintenance, certain aspects are important for its longevity and proper functioning:
In summary, the MOSTAT64Q-2 is a user-friendly and feature-rich programmable controller that empowers users with precise control over their mini-split indoor units, enhancing comfort, energy efficiency, and overall system management.
| Product Type | Thermostat |
|---|---|
| Power Source | 24 VAC |
| Type | Digital |
| Display | LCD |
| Control | Touchscreen |
| Programmability | Programmable |