Page 21
14HPX SERIES
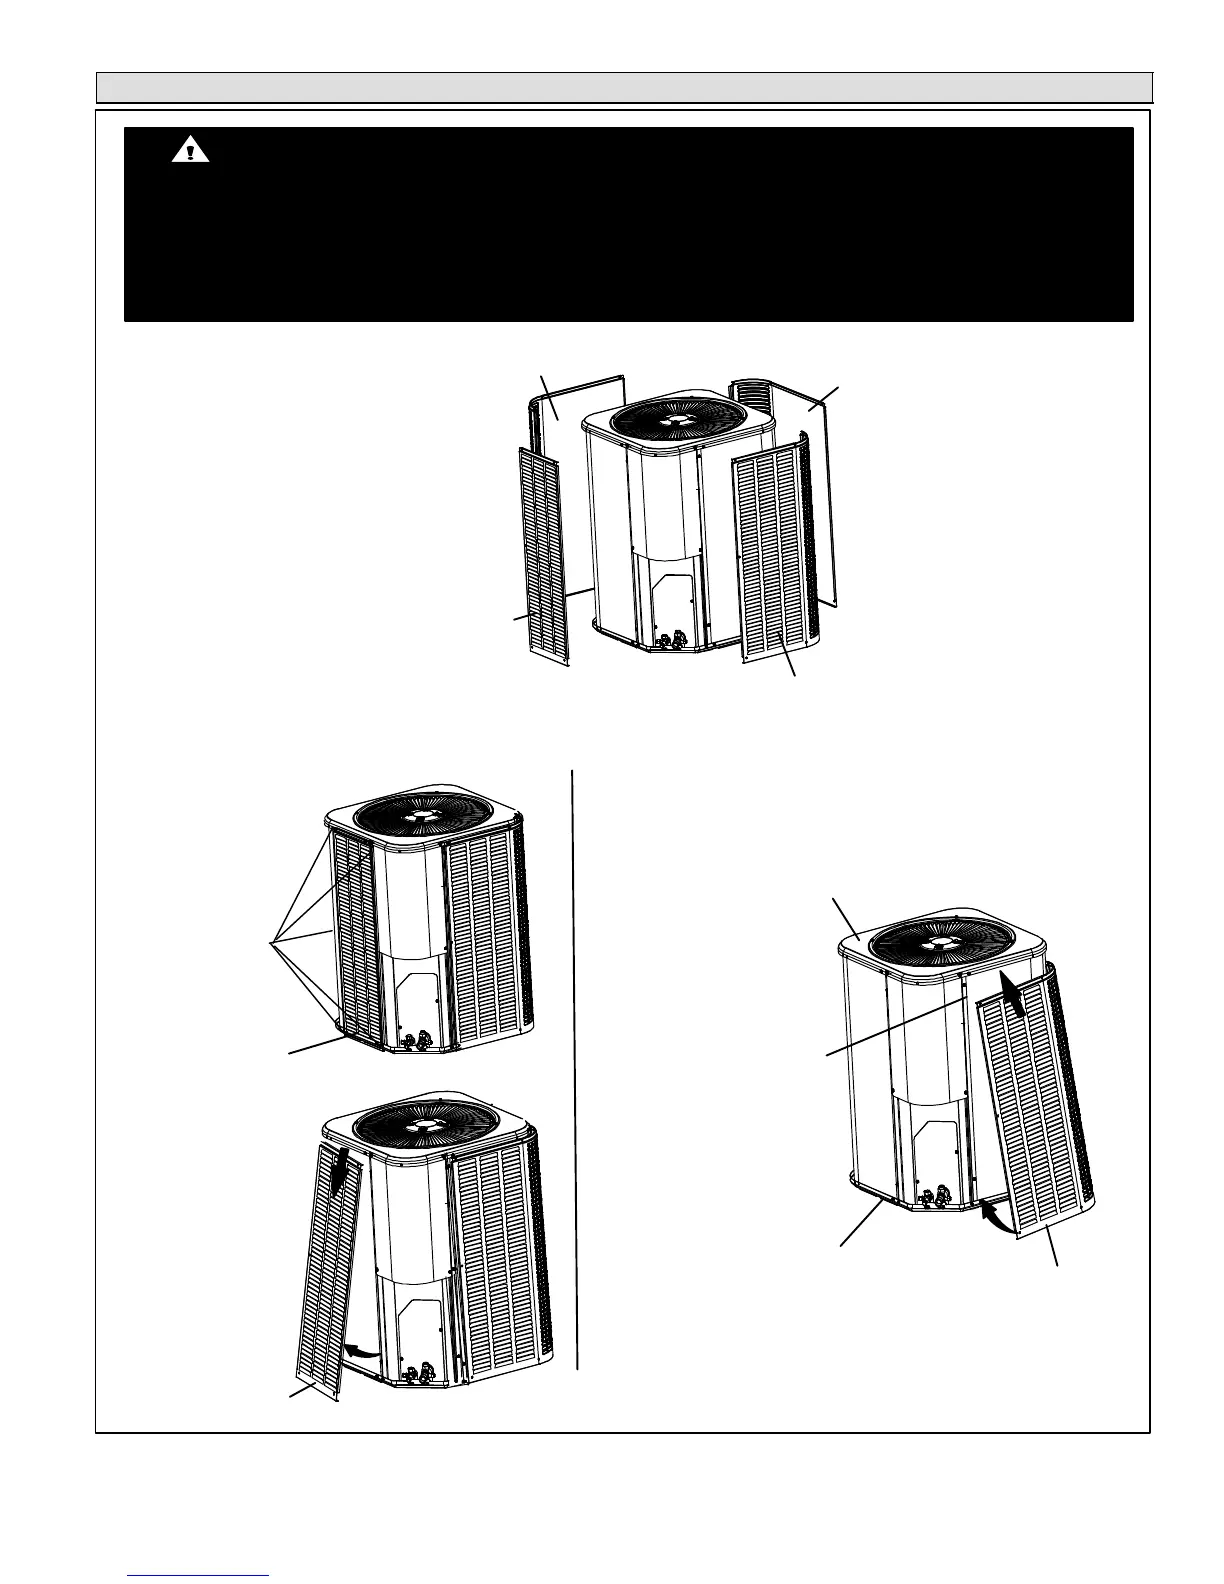
Removing and Installing Louvers
WARNING
To prevent personal injury, or damage to panels, unit or structure, be sure to observe the following:
While installing or servicing this unit, carefully stow all removed panels out of the way, so that the panels will not cause injury to personnel,
nor cause damage to objects or structures nearby, nor will the panels be subjected to damage (e.g., being bent or scratched).
While handling or stowing the panels, consider any weather conditions, especially windy conditions, that may cause panels to be blown
around and battered.
WARNING
PANEL A
PANEL B
PANEL C
PANEL D
When removing the unit panels. Remove panel A
first, then B, C and finally D. When reinstalling pan-
els, reverse that order starting with panel D, C, B
and finally A.
ORDER OF REMOVAL AND REINSTALLATION
REMOVAL
REPEAT STEPS 1, 2 AND
3 TO REMOVE PANELS B,
C AND FINALLY D.
STEP 1
STARTING WITH PANEL D,
INSERT PANEL UNDER UNIT
TOP CAP LIP AND LIFT
SLIGHTLY TO CLEAR SIDE LIP
OF PANEL FROM BASE.
PANEL A
PANEL A
STEP 2
INSTALLATION
REPEAT STEPS 1 AND 2 TO INSTALL PANELS C,
B AND FINALLY A.
TO REMOVE PANEL,
REMOVE MOUNTING
SCREWS SECURING
PANEL TO THE UNIT.
SLIGHTLY LIFT PANEL A IN
ORDER TO CLEAR SIDE
LIPS OF PANEL FROM
BASE OF UNIT.
STEP 3
TILT PANEL OUT SLIGHTLY
AND PULL DOWNWARD
TO REMOVE.
STEP 1
STEP 2
MOVE PANEL IN TOWARDS UNIT.
ALIGN LEFT/RIGHT SIDE LIPS OF
PANEL WITH GROOVE INSERTS
ALONG LEFT/RIGHT SIDE OF UNIT.
PANEL D
TOP CAP
BASE
SIDE
GROOVE
STEP 3
SECURE PANEL, WITH
MOUNTING SCREWS.
 Loading...