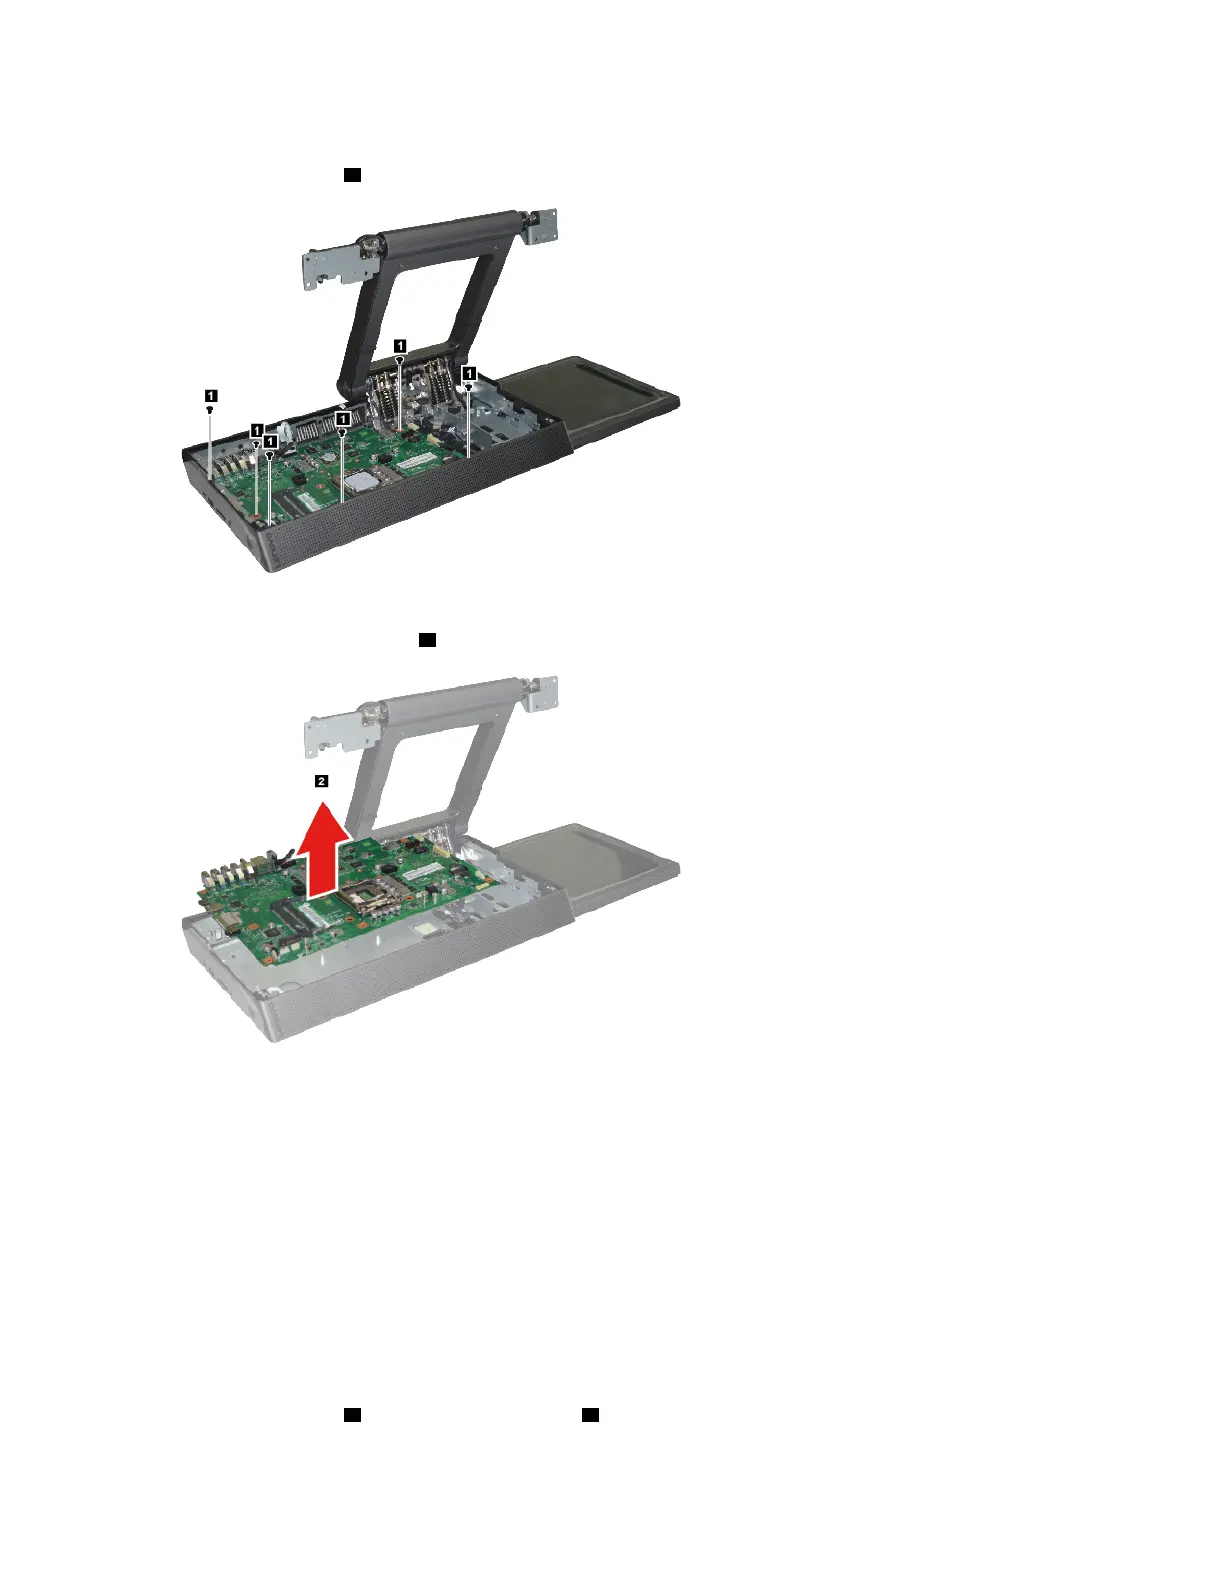
To remove the system board, do the following:
1. Remove 6 screws
1 .
Figure 48. Removing the system board
2. Remove the system board 2 .
Figure 49. Removing the system board
What to do next:
• To work with another piece of hardware, go to the appropriate section.
• To complete the installation or replacement, go to “Completing the parts replacement” on page 55.
Replacing the power button board
Make sure the following FRUs (or CRUs) have been removed.
“Replacing the computer display panel” on page 25
“Replacing the front bezel” on page 38
To remove the power button board, do the following:
1. Remove 2 screws
1 and detach 1 connector 2 .
Chapter 7. Installing or replacing hardware 49
 Loading...