EasyManua.ls Logo

Lentek MK10 - User Manual

Default Icon
19 pages
Print Icon
To Next Page IconTo Next Page
Loading...
1
LENTEK ELITE MOSQUITO TRAP
MK10
CAPTURES MOSQUITOES
An attractant for mosquitoes!
NO TOOLS NEEDED!
Assembles in less than 60 seconds
Uses 9 kg (20 lb) Propane Tank (not included)
Propane lasts 4 to 6 weeks
INCLUDES FREE PROPANE TANK COVER!
Weatherproof Design
Electronic Push Button Starter
Chrome Support Columns
Constructed with durable outdoor furniture quality plastic
Light weight
Wheels for easy movability
One Year Limited Warranty
DOMESTIC
KEEP OUT OF REACH OF CHILDREN
READ THE LABEL AND ENCLOSED INSTRUCTIONS BEFORE USING
REG. NO. 28461 PCPA
KOOLATRON INC.
1-800-265-8456
27 Catharine Avenue
Brantford, ON N3T 1X5
Canada
2011-4165
2012-01-03
Question and Answer IconNeed help?

Do you have a question about the Lentek MK10 and is the answer not in the manual?

Summary

One Year Limited Warranty

How the Lentek Elite Mosquito Trap Works

UL Approved Power Supply

Details the product's UL approved power supply for operation.

Directions for Use

For Your Safety

Provides essential safety instructions, including actions to take if propane is smelled.

Propane Gas Warnings

Directions for Assembly and Use

For Your Safety

Highlights safety precautions during assembly and general use of the product.

Parts List

Lists all components included with the Lentek Elite Mosquito Trap for assembly.

Assembly Instructions

Step 1: Assemble support column to base

Instruction for attaching the support column to the base of the unit.

Step 2: Attach the Burner Unit

Instruction for connecting the burner unit to the support column.

Step 3: Attach upper body support

Instruction for connecting the upper body support to the burner unit.

Step 4: Attach trap body

Instruction for attaching the main trap body to the upper body support.

Step 5: Secure the unit with stakes

Instruction for securing the assembled unit to the ground using stakes.

Attaching the Propane Tank

Step 6: Attach the power adapter

Instruction for connecting the power adapter to the unit's base.

Step 7: Attach the Propane Tank

Instruction for safely connecting the propane tank to the unit.

Step 8: Install;replace the battery

Instruction for installing or replacing the battery in the spark unit.

Where to Place the Trap

Optimal Placement Strategy

Guidance on finding the best location for trap placement based on airflow patterns.

What to Expect from the Trap

Starting the Mosquito Trap

Step 1: Open gas valve

Instruction to open the gas valve on the propane tank.

Step 2: Press and hold safety button

Instruction for igniting the burner unit using the safety and ignitor buttons.

Step 3: Continue holding safety button

Instruction to keep the safety button pressed after initial ignition.

Step 4: Wait between lighting attempts

Guidance on waiting periods between ignition attempts for safety.

Operation

Plug in power cord and adapter

Instructions for connecting the power adapter and cord to the unit.

Turn ON the unit

Instruction to locate and activate the ON/OFF switch.

Continuous operation duration

Information on how long the trap operates on a single tank of propane.

Maintenance

Check and clean capture cup

Guidance on regularly checking and cleaning the mosquito capture cup.

Refill propane tank

Instruction on when and how to refill the propane tank.

Check replaceable fuse

Instruction on checking the fuse if the unit does not turn on.

Keep area clear of debris

Instruction to keep the area around the trap clear of flammable materials.

Burner Orifice Cleaning

Use carburetor cleaner

Instructions for using carburetor cleaner to clean the burner orifice.

Attach straw and spray

Steps for using the cleaner with the provided straw.

Allow interior to dry

Instruction to let the trap interior dry for at least 24 hours after cleaning.

Light trap after drying

Instruction to light the trap only after the cleaner has thoroughly dried.

Shutting Off the Mosquito Trap

Step 1: Close gas valve

Instruction to close the gas valve on the propane tank.

Step 2: Verify flame is out

Instruction to check the burner unit window to confirm the flame has extinguished.

Accessories

Propane Tank Cover Details

Information on the features and benefits of the propane tank cover accessory.

Precautions

Extension Cord Usage

Guidelines for using appropriate outdoor extension cords.

Electrical Cord Safety

Safety rules regarding the handling and condition of electrical cords.

Cord Connection Security

Advice on securing extension cord connections to prevent disconnection.

Cord Moisture and Grounding

Instructions on keeping cord connections dry and off the ground.

Disconnecting Power

When to disconnect the trap from the power supply for safety.

Foreign Object Insertion

Warning against inserting foreign objects into the trap.

Outdoor Use Only

Reinforces that the trap is designed for outdoor use only.

Cleaning Precautions

Warnings against cleaning the trap with water or immersion.

Repair Service

Requirement for repairs to be performed by qualified service personnel.

Propane Tank Instructions

Instruction to follow all affixed labels and instructions on the propane tank.

Child Supervision

Importance of supervising children when they are near the trap.

Flammable Material Placement

Warning about not hanging or placing flammable materials on or near the trap.

Protective Device Replacement

Requirement to replace protective devices before operating.

Compartment and Airway Cleaning

Importance of keeping the compartment, burner, and airways clean.

LP-Gas Cylinder Size

Specifies the maximum allowed size for the LP-Gas cylinder.

LP-Gas Cylinder Valve Outlet

Details requirements for the LP-Gas cylinder's shutoff valve and outlet.

LP-Gas Cylinder Vapor Withdrawal

Requirements for the LP-Gas cylinder supply system and valve collar.

LP-Gas Cylinder Construction

Requirements for LP-Gas cylinder construction and marking per DOT.

Outdoor and Ventilated Use

Mandate for outdoor and well-ventilated space usage, prohibiting enclosed areas.

Indoor Storage

Guidance on storing the trap indoors when not in use.

Disconnect Cylinder for Storage

Instruction to disconnect the propane cylinder if the trap is stored indoors.

Outdoor Cylinder Storage

Rules for storing LP-Gas cylinders outdoors, including ventilation and caps.

Regulator and Hose Assembly

Requirement to use supplied regulator/hose and purchase replacements from Koolatron.

Overview

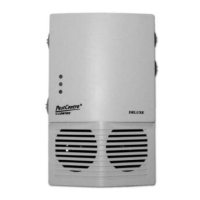
The Lentek Elite Mosquito Trap, model MK10, is a domestic outdoor appliance designed to capture and kill mosquitoes. It operates by utilizing a combination of documented attractants for mosquitoes, including carbon dioxide (CO2), moisture, body temperature (thermal imaging), color, shape, and airflow. This traditional trapping approach, similar to methods used by universities, state monitoring programs, and researchers, aims to redirect female mosquitoes' natural hunting techniques towards the trap, facilitating their capture for private home owners.

Function Description:

The trap works by generating CO2 through a burner unit, mimicking the exhalation of a host. A vacuum fan pulls mosquitoes into a catch cup, where they are trapped. The device is designed for continuous operation during mosquito season and is not intended for occasional use. It operates 24 hours a day and requires minimal upkeep.

Important Technical Specifications:

  • Power Source: Fueled by propane gas and requires 120V AC electrical power.
  • Propane Tank: Uses a standard 9 kg (20 lb) propane tank (not included). The propane lasts for 4 to 6 weeks of continuous operation.
  • Gas Supply: Maximum inlet gas supply is less than 30 SCFH.
  • Electrical Rating: 120 Volt / 0.6 Amp. An extension cord with 16 gauge or thicker wire, suitable for outdoor use, is required.
  • Power Supply (Included): Input: 120VAC 60Hz, 71W; Output: 12VAC @4200mA.
  • Battery: The spark unit uses one "AAA" size battery for ignition.
  • Fuse: A replaceable 250V / 2Amp fuse is located on the bottom of the trap body.
  • Dimensions: Minimum clearance of 61 cm (24 inches) to walls or ceilings is required for safe operation.
  • Construction: Constructed with durable outdoor furniture quality plastic.
  • Weight: Light weight, designed for easy movability.

Usage Features:

  • Assembly: "NO TOOLS NEEDED!" and "Assembles in less than 60 seconds."
  • Portability: Equipped with wheels for easy movability.
  • Security: Base design allows for attachment of a padlock to the propane tank for extra security. Heavy-duty ground stakes are included to secure the unit.
  • Ignition: Features an electronic push-button starter.
  • Weather Resistance: Designed with a weatherproof design.
  • Propane Tank Cover: Includes a free propane tank cover (Item#: MKTCoverP), made of durable outdoor cotton-based, weather-resistant material, machine washable, and designed with sewn-in Velcro strips for easy wrap-around installation.
  • Placement: Optimal placement is 9 to 12 meters (30 to 40 feet) from living areas, in the normal down-wind direction towards where mosquitoes are living (trees, bushes, and water). Placing the trap close to shrubs, bushes, or other vegetation can enhance capture rates.
  • Safety Features:
    • If propane odor is detected: Shut off main gas valve, extinguish open flames, and call the gas supplier if the odor persists.
    • Propane gas is invisible, odorless (an odorant is added but can fade), heavier than air, and highly flammable.
    • Only use propane tanks with a capacity not larger than 9 kg (20 lb), equipped with a shut-off valve for vapor withdrawal and a collar to protect the valve.
    • Propane must be stored outdoors in a well-ventilated area, out of reach of children, and never in enclosed spaces.
    • The supplied pressure regulator and hose assembly must be used for connection to the propane tank.
    • The trap must be used outdoors and only in a well-ventilated area.
    • UL Approved Power Supply and cULus Listed.
    • Conforms to local codes or ANSI Z223.1-1998 (US) and CANI-B149 (Canada) for installation.
    • Do not store or use gasoline or other flammable vapors/liquids near the trap.
    • Do not insert foreign objects into the product.
    • Do not clean by spraying water or immersion.
    • Young children should be supervised near the trap.
    • Clothing or flammable materials should not be hung from or placed near the trap.
    • Any guard or protective device removed for servicing must be replaced before operating.

Maintenance Features:

  • Catch Cup: Simply empty the contents of the capture chamber periodically. Check the capture cup regularly (start weekly and adjust based on catch). Rinse the cup with clean water only; do not use chemicals or soap as fragrance may repel mosquitoes.
  • Propane Tank Refill: Refill the propane tank as necessary for continuous use. Turn off the unit and disconnect the electrical supply before changing the tank.
  • Fuse Check: If the trap does not turn on when properly plugged in, check the replaceable fuse located on the bottom of the trap body.
  • Area Clearance: Keep the area around the trap clear of combustible materials, gasoline, and other flammable vapors and liquids.
  • Cleaning: Clean the outside surface with a mild detergent and a damp cloth. Do not spray with or immerse any part in water.
  • Burner Orifice Cleaning: If the burner orifice becomes clogged (causing a small flame or failure to light), use Gum Out brand carburetor cleaner (or equivalent). Attach the provided straw to the can nozzle, insert it through the side window to guide the tip into an air hole under the burner, and spray two 1-second bursts. Allow the interior to dry for at least 24 hours before attempting to light (carburetor cleaner is highly flammable).
  • Storage: Store the trap in a cool, dry place when not in use and away from chemicals. If stored indoors, disconnect the propane tank and store it outdoors with a threaded valve plug tightly installed.
  • Inspections: The heater should be inspected before use and at least annually by a qualified service person. More frequent cleaning may be needed. The compartment, burner, and circulating air passageways must be kept clean at all times.
  • Replacement Parts: Replacement parts (Regulator with hose, Catch Cup, Ground Stakes) are available from Koolatron Inc.
  • Repairs: All repairs must be performed only by qualified service personnel.
  • Warranty: One-year limited warranty.

Lentek MK10 Specifications

General IconGeneral
BrandLentek
ModelMK10
CategoryLawn and Garden Equipment
LanguageEnglish

Related product manuals