18
Reassembling (cont.)
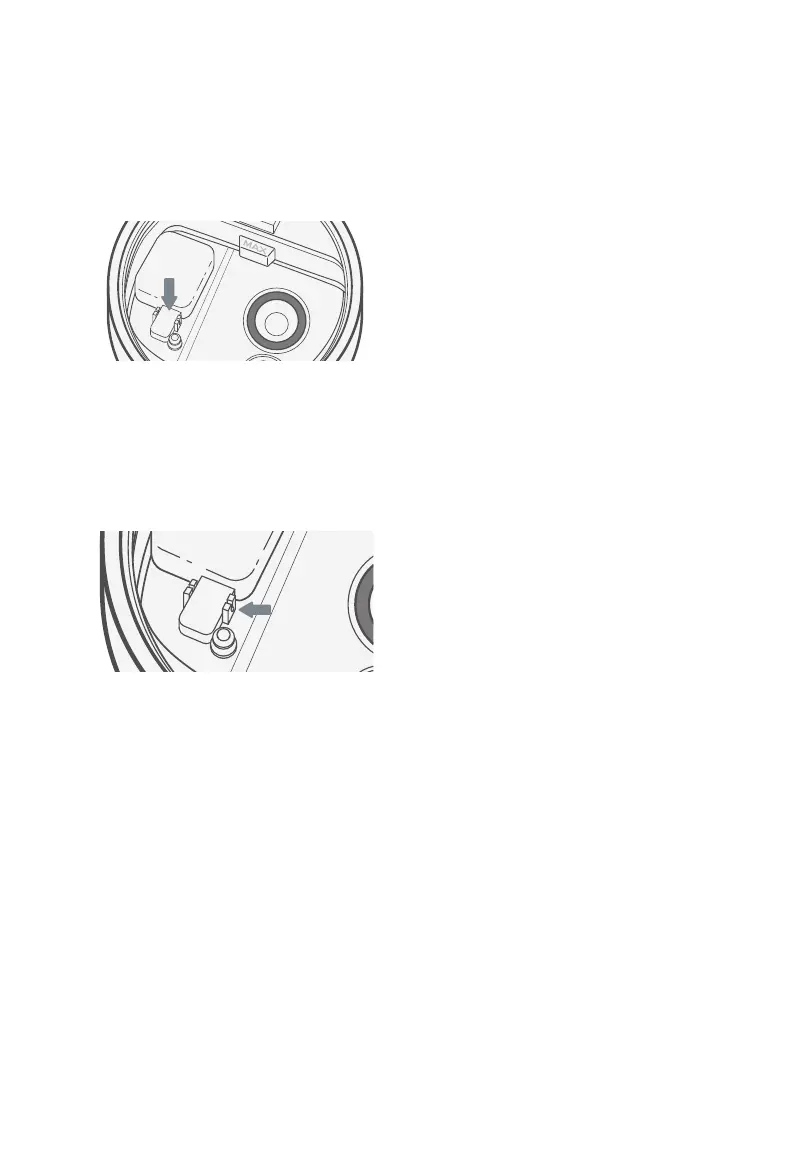
Figure 4.18
Figure 4.19
c. Place the larger prong into
the open Ushaped side of
the float brackets.
4. Place the tank back on the base. Refill
the tank, if necessary.
5. Place the tank properly on the base and
place the tank cover on the water tank.
b. Insert the smaller prong into the
closed side of the float brackets.
[Figure 4.19]
Storing
Replacing the Filter Assembly
Follow the cleaning instructions (see page 14)
and allow all parts to dry completely before
storing. Store in a cool, dry location.
If the filter assembly is damaged or water
cannot flow into the base chamber, the filter
or filter assembly needs to be replaced.
For more information, contact Customer
Support (see page 23).
3. Place the float back into the base chamber:
a. Make sure the correct side of the
float is facing up. [Figure 4.18]