Do you have a question about the Lexmark MX826ade and is the answer not in the manual?
Instructions for making standard copies using the ADF or scanner glass.
Steps to configure SMTP settings for sending scanned documents via email.
Steps to scan documents from the printer to a computer for Windows and Macintosh users.
Instructions for setting up the fax function using analog fax or a fax server.
Steps to set up the printer's Wi-Fi Direct peer-to-peer network connection.
Detailed steps to clear a paper jam located behind door A of the printer.
Instructions for clearing paper jams from areas behind door C, including the fuser and duplex areas.
Procedure to clear a staple jam from the staple finisher by removing the staple cartridge.
Instructions to clear staple jams from the staple, hole punch finisher, opening doors F or G.
This document provides a comprehensive guide to operating and maintaining a multifunction printer, covering copying, e-mailing, scanning, faxing, and printing functions, as well as troubleshooting paper jams and replacing consumables.
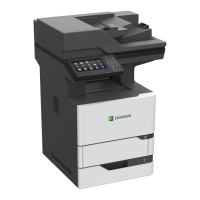
The device is a multifunction printer capable of copying, e-mailing, scanning, faxing, and printing. It supports various paper handling options, including a standard tray, a 550-sheet tray, a 2100-sheet tray, and a multipurpose feeder. The printer can connect to a network via Ethernet or Wi-Fi Direct, allowing for flexible placement and access.
The printer offers straightforward copying functionality. To make copies, users load an original document onto the Automatic Document Feeder (ADF) tray or the scanner glass. From the home screen, selecting "Copy" allows users to specify the number of copies and adjust settings as needed. A quick copy function is also available by pressing a dedicated button on the control panel. For two-sided copying, the "Sides" option is selected from the "Copy" menu, and settings are adjusted before copying. The device also supports copying multiple pages onto a single sheet by selecting "Pages per Side" from the "Copy" menu.
The printer can send scanned documents via e-mail. This feature requires configuring SMTP settings, which vary depending on the e-mail service provider. Configuration can be done either through the printer's "Settings" menu (Settings > E-mail > E-mail Setup) or via the Embedded Web Server (EWS). The EWS is accessed by typing the printer's IP address into a web browser. The manual provides specific SMTP settings for various popular e-mail services like AOL Mail, Gmail, Mail.com, NetEase Mail, Outlook Live, QQ Mail, Sina Mail, Sohu Mail, Yahoo! Mail, and Zoho Mail, including details on primary SMTP gateway, port, SSL/TLS requirements, authentication, and password types (e.g., app passwords for services with two-step verification). To send an e-mail, an original document is loaded, "E-mail" is selected from the home screen, information is entered, output file type settings are configured, and the e-mail is sent. Shortcut numbers can also be used for quick e-mail sending.
The device supports scanning to a computer for both Windows and Macintosh users. For Windows, users load the document, open "Windows Fax and Scan," select a scanner source, adjust settings, and scan. For Macintosh, users open "Image Capture" or "Printers & Scanners," select the printer, and then "Open Scanner" to configure settings and scan. The printer firmware should be updated, and the computer and printer must be on the same network for scanning to function correctly.
The printer can be set up to send faxes using either analog fax or a fax server. Analog fax setup involves configuring settings through the printer's "Settings" menu (Settings > Fax > Fax Setup > General Fax settings) or the EWS. Fax server setup allows sending faxes via an e-mail-supporting fax service provider, configured through the EWS (Settings > Fax > Fax Server Setup). To send a fax, an original document is loaded, "Fax" is selected from the home screen, recipient information is entered, settings are adjusted, and the fax is sent. A fax driver must be installed on the computer for sending faxes from a computer.
The printer supports printing from a computer and mobile devices. When printing from a computer, users open the print dialog from their document, select the printer, adjust settings, and print. For mobile printing, the device supports Mopria Print Service for Android devices (version 5.0 or later) and AirPrint for Apple devices. Wi-Fi Direct® allows direct printing from mobile devices to the printer without an access point, requiring the mobile device to be connected to the printer's wireless network. The document also details printing confidential and other held jobs, which involves selecting "Print and Hold" from the print dialog, assigning a user name, and entering a PIN for confidential jobs.
This section covers attaching cables and replacing the toner cartridge.
To clean the scanner, users open the scanner cover and wipe the ADF glass and ADF glass pad with a damp, soft, lint-free cloth. For the scanner glass, users open door E, and then wipe the ADF glass in door E and the scanner glass pad in door E.
The manual provides detailed instructions for loading paper into different trays:
The print driver is included in the software installer package. For Macintosh computers with macOS 10.7 or later, the driver is not always needed for AirPrint-certified printers but is recommended for custom printing features. Users obtain the installer package from the software CD or website and follow the on-screen instructions. Fax driver installation follows a similar process.
Firmware updates are necessary for some applications to operate correctly. Users open a web browser, type the printer's IP address, navigate to "Settings > Device > Update Firmware," and then either check for updates online or upload a flash file.
For Windows users, this involves installing the print driver, opening "Printers & scanners," and then adding the printer by selecting it from a list, using Wi-Fi Direct, or adding it via TCP/IP address/hostname. For Macintosh users, open "Printers & Scanners," click "+," select the printer, and choose a print driver (AirPrint, Secure AirPrint, or manufacturer print driver).
Wi-Fi Direct allows direct wireless connection between devices and the printer. Users navigate to "Settings > Network/Ports > Wi-Fi Direct" to enable Wi-Fi Direct, assign a name, set a password, and configure auto-accept push button requests.
Mobile devices can connect via Wi-Fi Direct (for Android) or Wi-Fi. For Wi-Fi Direct, users go to mobile device settings, enable Wi-Fi, tap Wi-Fi Direct, select the printer's Wi-Fi Direct name, and confirm the connection on the printer control panel. For Wi-Fi, users tap Wi-Fi in mobile device settings, select the printer's Wi-Fi Direct name, and enter the Wi-Fi Direct password.
The manual provides detailed instructions for clearing paper jams in various locations:
Throughout the maintenance sections, warnings are provided regarding potential damage from electrostatic discharge, hot surfaces, and exposure of the imaging unit to direct light. Notes emphasize removing all paper fragments and proper handling of components.
| Print Technology | Laser |
|---|---|
| Functionality | Print, Copy, Scan, Fax |
| Print Resolution | 1200 x 1200 dpi |
| Print Resolution, Black | 1200 x 1200 dpi |
| Processor Speed | 1.2 GHz |
| Memory, Standard | 2 GB |
| Memory, Maximum | 2 GB |
| Hard Disk | 320 GB |
| Reduction / Enlargement Range | 25 - 400% |
| Scanner Type | Flatbed, ADF |
| ADF (Automatic Document Feeder) | Yes |
| Fax Transmission Speed | 33.6 kbps |
| Modem Speed | 33.6 kbps |
| Ethernet Network | Yes |
| Wireless | Optional |
| Direct USB | Yes |
| Mobile Printing | Yes |
| Duplex Printing | Automatic |
| Scan Speed (Letter, Black) | 65 ipm |
| Scan Speed (Letter, Color) | 65 ipm |
| Scan Speed (A4, Black) | 65 ipm |
| Scan Speed (A4, Color) | 65 ipm |
| Scan Area, Maximum | 8.5" x 14" |
| Operating System Compatibility | Windows, Mac, Linux |
| Paper Capacity | Standard: 650 sheets |