Do you have a question about the Lexmark X204N series and is the answer not in the manual?
Instructions on how to clean the printer's exterior safely and effectively.
Steps to clean the scanner glass to resolve print quality issues like streaks.
Procedure for cleaning ADF separator rollers after heavy use or if streaks appear.
Guidance on choosing a cool, clean storage area for printer supplies.
How to check printer supply levels remotely via a network connection.
Contact information and procedures for ordering printer supplies like toner and kits.
Instructions for redistributing toner and when to replace the toner cartridge.
When to order a photoconductor kit based on printer notifications and status checks.
Instructions and procedures for replacing consumable printer supplies.
Step-by-step guide to removing and installing a new toner cartridge.
Detailed steps for replacing the photoconductor kit and resetting the counter.
Safety guidelines and precautions for safely moving the printer to a new location.
Recommendations for shipping the printer, including using original packaging.
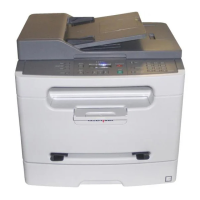
The Lexmark X203n and X204n Series are multifunction printers designed for office environments, offering printing, copying, and scanning capabilities. This maintenance guide provides essential information to ensure optimal performance and print quality over the device's lifespan.
These Lexmark printers are robust devices capable of handling various document tasks. They are primarily designed for monochrome printing, delivering crisp text and graphics. The integrated scanner allows users to digitize documents, which can then be saved, emailed, or used for copying. The Automatic Document Feeder (ADF) enhances efficiency by allowing multiple pages to be scanned or copied in a single batch, reducing manual intervention. Network connectivity is a key feature, enabling multiple users to share the printer and manage print jobs from their computers. This network capability also facilitates remote monitoring of supplies and device status, streamlining office workflows.
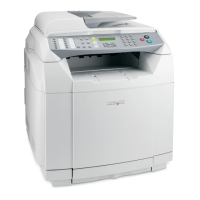
The Lexmark X203n and X204n Series are designed for ease of use, with straightforward controls and clear indicators. Users can initiate print jobs from their connected computers, and the printer's display provides feedback on current operations and alerts. For copying and scanning, documents can be placed on the flatbed scanner glass for single pages or delicate items, or loaded into the ADF for multi-page documents. The printer's interface allows for basic adjustments to copy settings, such as density and number of copies. Network integration means that users can check the status of their print jobs and the printer's supplies directly from their workstations, without needing to physically interact with the device. The printer is designed to handle standard paper sizes like letter and A4, making it suitable for common office tasks.
Regular maintenance is crucial for maintaining the print quality and longevity of the Lexmark X203n and X204n Series printers. The guide outlines several key maintenance tasks:
Cleaning the Exterior: To prevent electric shock, the printer must be turned off and unplugged, with all cables disconnected, before cleaning. A clean, lint-free cloth dampened with water should be used to wipe the outside surfaces. It is important not to use household cleaners or detergents, as these can damage the printer's finish. The interior should not be cleaned with a damp cloth to avoid damage. All areas must be dry before resuming printing.
Cleaning the Scanner Glass: If streaks appear on copied or scanned images, the scanner glass and ADF glass need cleaning. This involves opening the scanner cover and wiping the specified areas (white undersides of the scanner glass cover, ADF cover, scanner glass, and ADF glass) with a slightly dampened, soft, lint-free cloth or paper towel. The ADF tabs should not be folded or creased, as this can cause jams.
Cleaning the ADF Separator Rollers: After copying over 5,000 pages using the ADF, or if streaks appear, the ADF separator rollers require cleaning. This involves opening the ADF cover, unlocking and removing the separator roll, and wiping it with a clean, lint-free cloth dampened with water. A second clean, lint-free cloth should be used to wipe the other separator roller while gently rotating it. Finally, the separator roll is reinstalled and locked, and the ADF cover is closed.
Storing Supplies: Printer supplies, such as toner cartridges and photoconductor kits, should be stored in a cool, clean area, right side up in their original packaging. They should not be exposed to direct sunlight, temperatures above 35°C (95°F), high humidity (above 80%), salty air, corrosive gases, or heavy dust.
Checking Supply Status: From a network-connected computer, users can check the status of supplies by typing the printer's IP address into a web browser and navigating to the "Device Status" page. This provides a summary of supply levels.
Ordering Supplies: The guide provides contact information for ordering supplies in the U.S. and directs users to the Lexmark website or their place of purchase for other regions. It emphasizes that using non-manufacturer supplies can void the warranty and degrade print quality.
Ordering and Replacing Toner Cartridges: When the "88 Cartridge is Low" message appears or print becomes faded, users should remove the toner cartridge, shake it side-to-side and front-to-back to redistribute toner, and reinsert it. This procedure can be repeated until print quality no longer improves, at which point the cartridge needs replacement. The guide provides part numbers for regular and Lexmark Return Program cartridges. To replace, the front door is opened, the button on the base of the photoconductor kit is pressed, and the toner cartridge is pulled out. A new cartridge is unpacked, shaken, and then installed by aligning its rollers with the tracks on the photoconductor kit until it clicks into place.
Ordering and Replacing a Photoconductor Kit: The printer displays "84 PC Kit Life Warning" when the photoconductor kit is near its end of life and "84 Replace PC Kit" when replacement is due. Users should order a new kit when the warning first appears. To replace, the front door is opened, and the photoconductor kit and toner cartridge are pulled out as a unit. The unit is placed on a flat, clean surface. The toner cartridge is then removed from the photoconductor kit by pressing a button. A new photoconductor kit is unpacked, taking care not to touch the photoconductor drum, as extended light exposure can cause print quality problems. The toner cartridge is then inserted into the new photoconductor kit until it clicks, and the combined unit is installed into the printer by aligning arrows on the guides. After replacement, the photoconductor counter must be reset using the instructions provided with the new kit; failure to do so can damage the printer and void the warranty.
Moving the Printer: When moving the printer, it is crucial to turn it off, unplug the power cord, and disconnect all cables to prevent personal injury or printer damage. The printer should be lifted using the handholds on both sides, ensuring fingers are not under the printer when setting it down. Adequate clearance around the printer should be ensured before setup.
Shipping the Printer: For shipping, the original packaging should be used, or a relocation kit should be obtained from the place of purchase. The printer should be kept in an upright position, and severe jarring movements should be avoided. Any cart used for moving must be able to support the printer's weight and footprint.
| Print Technology | Monochrome Laser |
|---|---|
| Print Speed | Up to 24 ppm |
| Duplex Printing | Manual |
| Monthly Duty Cycle | Up to 10, 000 pages |
| Memory | 64 MB |
| Display | 2-line LCD |
| Scan Technology | ADF |
| Connectivity | USB, Ethernet |
| Paper Input Capacity | 250 sheets |
| Media Types Supported | Plain, Envelope, Transparency |
| Media Sizes Supported | A4, A5, B5, Letter, Legal, Executive |
| Functions | Print, Scan, Copy |
| Print Resolution | 1200 x 1200 dpi |
| Paper Output Capacity | 150 sheets |