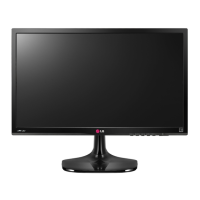
This document is a service manual for an LG LED monitor, specifically model 24MP60, with chassis LM68A. It provides comprehensive information for servicing, including safety precautions, specifications, adjustment instructions, block diagrams, exploded views, disassembly procedures, and a troubleshooting guide.
Function Description:
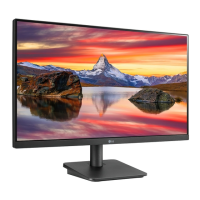
The LG 24MP60 is an LED monitor designed for various display purposes. It supports multiple input types and offers a range of display adjustments and features to enhance user experience and picture quality.
Important Technical Specifications:
General Specifications:
- Chassis Name: LM68A
- User Model Name: 24MP60
- Display Size: Available in 21.5", 23.8", and 27" WIDE LCD MONITOR variants.
- External SW & Adjustment: Features a Joystick OSD for Menu, Picture Mode, Input, and Power off control.
- Functionality: Includes OSD, DDC2B, DDC2AB, HDCP, Control Lock, Original Ratio / Wide, Black level, Smart Energy Saving, Screen Split, SUPER RESOLUTION+, Color Wizard, Reader mode, LG Color Cloning, and Black Stabilizer.
- Input Ports:
- D-SUB IN: RGB Analog
- DVI IN: DVI IN
- HDMI IN: HDMI IN
- HP OUT: Audio L/R OUT
- Power Cord: Length 1.5±0.05 M, Wall-out shape, Black color.
- Signal Cables:
- D-SUB: Length 1.5m, Detachable Type, Black color, 15 Pin D-Sub (Triple Row).
- HDMI: Length 1.5m, Detachable Type, Black color, 19Pin HDMI.
- Power Input: AC100~240V 50~60Hz, 1.0A Max; DC 19V 1.6A; DC 19V 1.3A.
- Power Output: DC 19V 1.3 A.
- Applied Panel List (Examples): EAJ62570001 (LM238WF1-SJE1), EAJ63989601 (LM238WF1-SJK1), EAJ63908401 (MV238FHB-N40), EAJ63953201 (HM238EUN-SLML9).
- Applied BLU List (Examples): EBV61158009 (BLACK), EBV61158010 (WHITE), EBV61158021 (Black color), EBV61158022 (White color), EBV61158025 (BLACK).
Signal Timing (Resolution):
The manual provides detailed H/V timing specifications for various resolutions, including:
- 720x400 @ 70Hz
- 640x480 @ 60Hz, 75Hz
- 800x600 @ 60Hz, 75Hz
- 1024x768 @ 60Hz, 75Hz
- 1152x864 @ 75Hz
- 1280x1024 @ 60Hz, 75Hz
- 1680x1050 @ 60Hz
- 1920x1080 @ 60Hz
- Note: D-SUB/DVI DTV Mode is not supported (interlace mode).
HDMI Timing (Factory Support Mode):
- 480P @ 60Hz
- 576P @ 50Hz
- 720P @ 50Hz, 60Hz
- 1080P @ 50Hz, 60Hz (Recommend Mode)
Usage Features:
Adjustment Instruction:
The adjustment process is critical for optimal monitor performance and is typically performed in a factory setting.
- Coverage: Applies to 21.5"/23"/24"/27" Wide monitors manufactured in Kumi, Korea, or according to Kumi Factory processes.
- Sequence: Adjustments must follow a fixed sequence, which can be modified with R&D engineer agreement for mass production.
- Power: AC 100-240V to Adapter, 19Vdc out.
- Input Signal: As per Product Standard (Signal ROM).
- Warm-up Time: Depends on the assembly line, recommended over 5 minutes.
- Adjustment Equipment: White balance equipment (CA-110/210), Signal Generator (VG-819/VG828), PC with white balance adjust program, HDCP Adjusting Jig, Display Monitor, Oscilloscope.
- Overview: Primarily uses factory automation equipment for automatic adjustments, with manual adjustments for error occurrences.
- Adjustment Order:
- Board Assembly Line: Connect D-sub signal, check command functionality, display gray scale patterns (256 gray scale), and verify initial EEPROM values.
- Total Assembly Line: Input analog signal (1920x1080@60Hz). This model does not require HDCP key input as it's embedded in the scaler IC. Warm-up for 5 minutes with signal. Default values: Contrast "70", Brightness "100(Max)".
- Screen Position, Clock, Phase Adjustment: No special factory mode adjustment. Initial EEPROM values are set during Board Assembly.
- Color Coordinates and Luminance Adjustment:
- Monitor Contrast / Brightness: Contrast 70, Brightness 100(Max), Energy saving low.
- Uses CA-110/210, Signal Generator (16 step pattern for ADC, 700 mVp-p output voltage, Mode 12: 1920x1080+ 60Hz).
- Internal ADC Calibration (MP58 models): Checks ADC OFFSET and GAIN flags from NVRAM (0xA8 0x0D, 0x0E). If not 0xAA, internal ADC calibration is performed and results are saved, setting flags to 0xAA.
- External ADC Calibration (if internal ADC not used): Input 16 step pattern, adjust using AUTO_COLOR_ADJUST command, confirm "Success" message or check EEPROM data (0x0D, 0x0E address of 0xA8 is 0xAA). If "FAULT" or non-0xAA data, readjust. Saves 6500K, User Color, and 9300K values.
- Confirm PRESET 6500K/9300K Color Coordinates: Set Aging mode ON, select module, send SYSTEM RESET, input Full White Pattern (700 mVp-p).
- 9300K Color Adjustment (Non TCO-6.0): Adjust x, y coordinates and luminance (Y > 150cd) within specified tolerances and timeframes (5 min, 5-30 min, >30 min).
- 6500K Color Adjustment: Input Full White Pattern, set 6500K mode. Adjust x, y coordinates and luminance (Y > 200cd) within specified tolerances and timeframes.
- Confirm User Color Coordinates: Verify user color is saved as 6500K. After confirmation, return to 6500K.
- Confirm Operation State: Check correct operation of each appointed mode. Confirm Auto/Manual equipment adjustment standards are met. Confirm Analog screen state at 640480 @60Hz (Mode 2) and 800600@75Hz (Mode 5).
- OSD & Adjustment Device Confirmation: Verify Brightness/Contrast variation, Super+ Resolution function, and perform FACTORY RESET.
- Display State Confirmation: Input 8 color Bar Pattern & 256 Gray Scale pattern.
- DPM Operation Confirmation: Check Power LED breathing and Power Consumption (230V@50Hz Analog).
- DDC EDID Write: Check default EDID Checksum (0xEF, Page 0xA6). Commands for D-sub, DVI, HDMI EDID checksums (128/256 byte).
- HDMI Part EDID Data: For MP55HQ/H, HDMI EDID is embedded in F/W and loaded automatically. For other models, input EDID on the line. After D-sub EDID input, send commands "0x77 00 00" & "0x77 00 01" to update S/N of DVI&HDMI EDID, then check 0xF8 address of EEPROM(0xA6) is 0x77.
- Analog Part EDID Data: Connect analog Signal Cable to D-sub wafer. Write EDID DATA to EEPROM(24C16) using DDC2AB protocol. Check EEPROM flag (A6, FA data: 0x1F). If NG, press all keys and recheck. After writing EDID, send Elapsed Time Clear command.
- Shipping Condition: Contrast 70, Power Switch Off, Brightness "100(Max)", Color Select custom, Language Select (refer to product spec). OSD Position matches Key position. Power indicator ON, Sound ON. Check HDMI Audio headphone function, then set signal source to RGB Mode by Hand.
- V-Com Adjustment (LGD panels): Adjust V-Com level to minimize flicker. If flicker level doesn't meet spec, adjust V-com value via IIC line of panel and save to EEPROM. Target flicker level: ≤20.
Pattern for Adjustment:
The manual lists various patterns used for adjustment:
- Pattern 0: FULL BLACK (without video signal)
- Pattern 1: FULL WHITE (no other characters)
- Pattern 3: FULL WHITE
- Pattern 4: Cross hatch pattern (Horizontal 10Line, Vertical 8Line) & Rectangle Pattern
- Pattern 5: 1 Dot on, 1 Dot off & Rectangle Pattern
- Pattern 6: Vertical Sync only input (Pin #5 GND)
- Pattern 7: Horizontal Sync only input (Pin #5 GND)
- Pattern 8: State of without Vertical/Horizontal Sync and Video Signal (Pin #5 GND)
- Pattern 9: 8 Color Bar Pattern + 16 Gray Level Pattern
- Pattern 10: SMPTE Pattern
- Pattern 11: 16 Gray Step Pattern (700mV)
Maintenance Features:
Safety Precautions:
- Important Safety Notice: Many parts have special safety-related characteristics, identified by in Schematic Diagram and Exploded View. These parts must be replaced with recommended components to prevent shock, fire, or other hazards. Do not modify the original design.
- General Guidance:
- Always use an isolation transformer when servicing a receiver not isolated from AC power line.
- Replace blown fuses/fusible resistors with specified types.
- Keep high wattage resistors (Oxide Metal Film Resistor, over 1W) 10mm away from PCB.
- Keep wires away from high voltage or high temperature parts.
- AC Leakage Current Check (Before returning to customer):
- Cold Check (Antenna Cold Check): With AC plug removed, jumper AC plug prongs, turn AC switch ON, connect ohm-meter to jumpered prongs and touch exposed metallic parts. Resistance should be between 1 MΩ and 5.2 MΩ if a return path to chassis exists; infinite if no return path.
- Hot Check: Plug AC cord directly into outlet (no isolation transformer). Connect 1.5 K / 10 watt resistor in parallel with a 0.15 uF capacitor between a known good earth ground and exposed metallic parts. Measure AC voltage across resistor (AC voltmeter with 1000 ohms/volt sensitivity). Reverse plug and repeat. Voltage must not exceed 0.75 volt RMS (0.5 mA). If limits are exceeded, repair before returning.
- Ground Resistance: When 25A is impressed between Earth and 2nd Ground for 1 second, Resistance must be less than 0.1 Ω.
Disassembly Procedures:
The manual provides step-by-step instructions with figures for disassembling the monitor:
- Put the MNT on a clean vinyl.
- Disassemble the Stand.
- Remove the Hinge cover.
- Remove Hinge Top (2ea).
- Separate the Back cover by hand at the bottom.
- Disassemble the backcover.
- Separate to B/C (Back Cover).
- Separate to the LED Wafer/ LVDS & Jog cover assy.
- Disassemble the PCB fixed screw (2ea).
- Disassemble the Metal bottom bar by screw (4ea).
- Separate to cabinet by Plastic Jig.
- Separate to the Cell & BLU.
Troubleshooting Guide:
The guide covers common issues with flowcharts:
- No Power:
- Check JP800 Voltage Level (12V). If N, check Power connector OK? If N, Replace Power Board. If Y, Replace IC700 & Recheck.
- Check IC700 Output Voltage Level (5VS). If N, Replace IC700 & Recheck.
- Check IC801 Output Voltage Level (1.1V, 3.3V). If N, Replace IC801 & Recheck.
- Check X100 Clock 14.318MHz. If N, Replace X100.
- If all checks pass, Replace IC101 Flash Memory.
- No Screen On:
- Check Module Back Light On? If N, check LED Driver FB (P700 1,6). If N, Check IC100 Replace Main Scaler IC. If Y, Check IC100 Repair Main B/D.
- Check Panel Power 5V(JP125) / IC700 Output 5V. If N, Replace IC700 & Recheck.
- Check Panel Clock P101(#10,11,22,23). If N, Check IC100 Repair Main B/D.
- Check FFC Cable for Damage or Open Conductors. If N, Replace Cable.
- If all checks pass, Replace T-Con Board or Module.
- No Video:
- Check input signal format (Is it supported?). If N, Replace Connector.
- Check Dsub Cable for Damage or Open Connector. If N, Replace Connector.
- Check JK200,201,202,P200 for proper connection or Damage. If N, Replace Connector.
- Check I2C Signal(JK200,201,202,P200). If N, Re Download EDID Data.
- If all checks pass, Replace Main Scaler (IC100).