59MAINTENANCE
ENGLISH
• It may become necessary to cancel or interrupt a
Self Clean cycle due to excessive smoke or fire in
the oven. To cancel the Self Clean function, press
CLEAR/OFF.
Removing/Assembling Lift-Off
Oven Doors
Door Care Instructions
Most oven doors contain glass that can break.
• Do not close the oven door until all the oven
racks are fully in place.
• Do not hit the glass with pots, pans, or any other
object.
• Scratching, hitting, jarring, or stressing the glass
may weaken its structure causing an increased
risk of breakage at a later time.
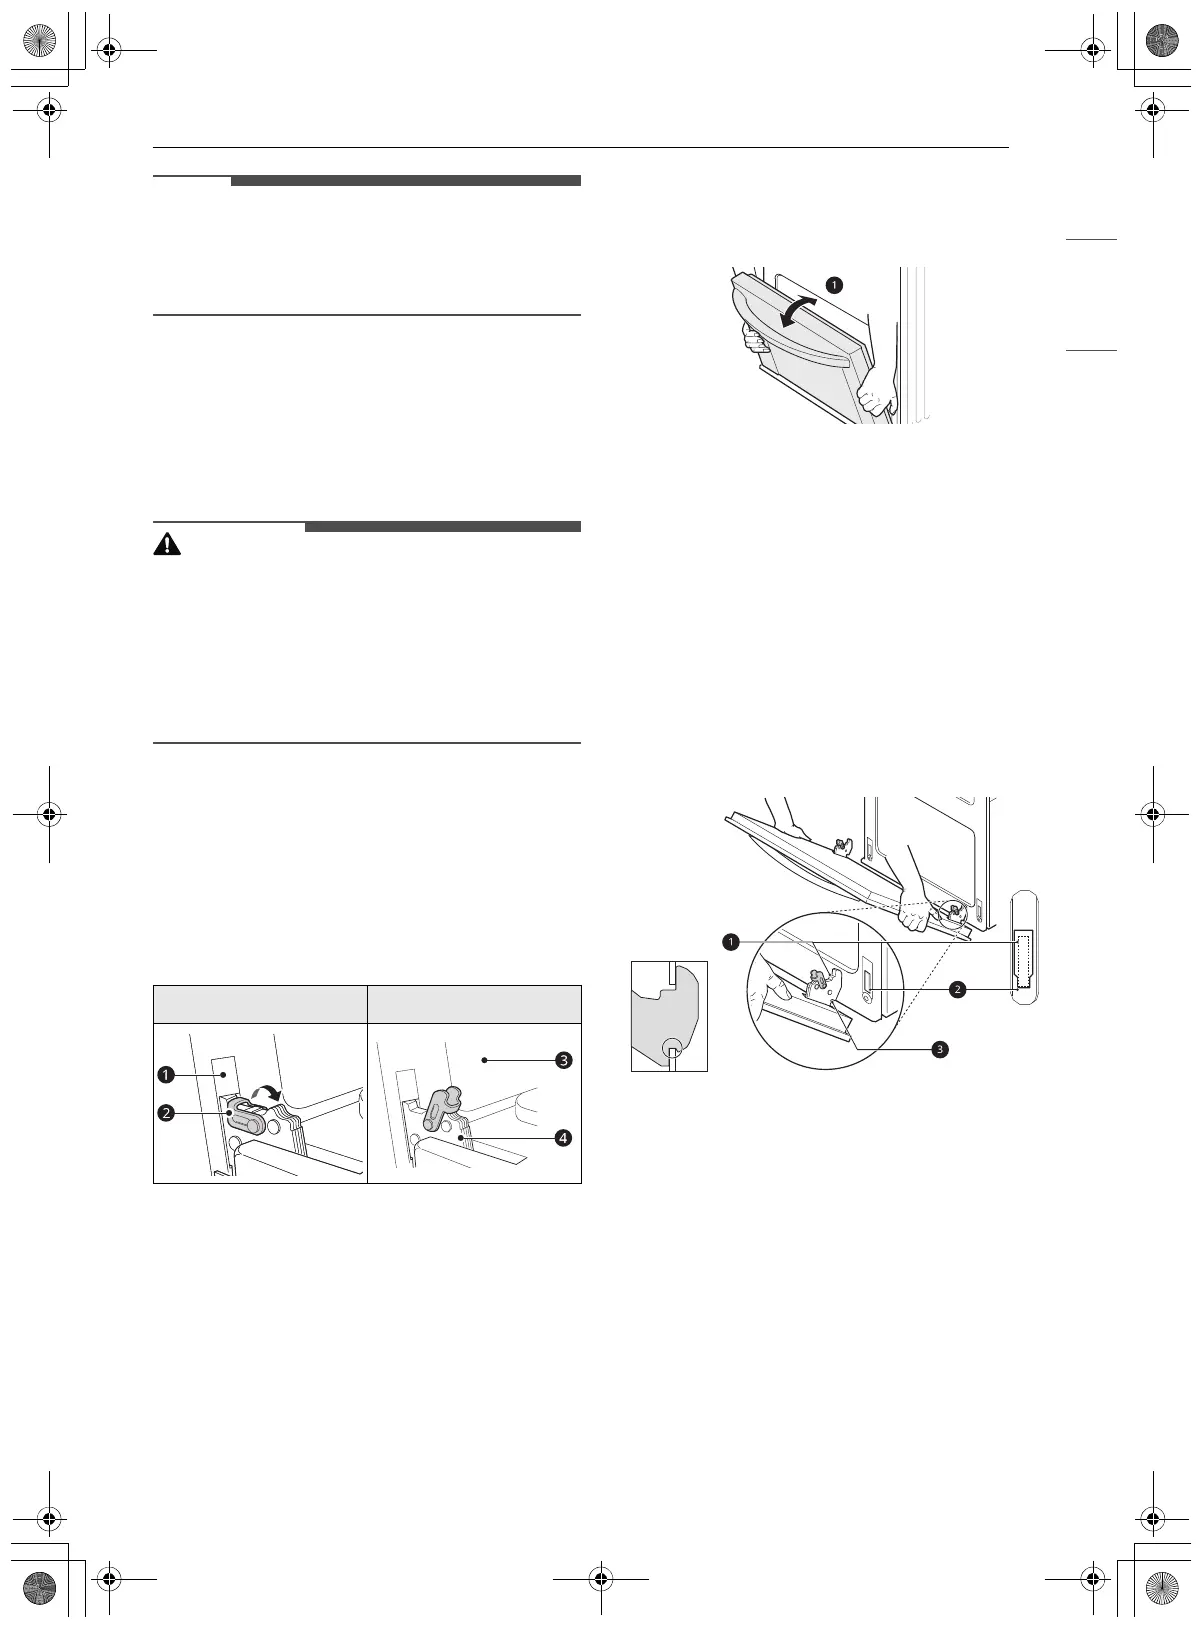
Removing Doors
1 Fully open the door.
2 Lift up the hinge lock b and flip it towards the
hinge arm
d completely. Repeat on other
side.
a Slot
b Hinge Lock
c Oven Frame
d Hinge Arm
3 Firmly grasp both sides of the door at the top.
4 Partially close the door to approximately 5
degrees a. If the position is correct, the hinge
arms will move freely.
a about 5°
5 Lift and pull the door towards you until the
hinge latches are completely loosened.
Assembling Doors
1 Firmly grasp both sides of the door at the top.
2 Fully insert the hinge arms a into the slots b
until the indentations
c on the hinge arms
rest on the bottom edges of the slots.
a Hinge Arm
b Bottom Edge of Slot
c Indentation
3 Slowly open the door fully. Make sure that the
hinge arms are properly engaged in the slots.
Locked Position Unlocked Position
en-us_main.book.book Page 59 Wednesday, March 27, 2024 11:27 AM



 To Next Page