132
MULTI V IV System Installation Manual
Due to our policy of continuous product innovation, some specications may change without notication.
©LG Electronics U.S.A., Inc., Englewood Cliffs, NJ. All rights reserved. “LG” is a registered trademark of LG Corp.
REFRIGERANT PIPING DESIGN
Insulating the Refrigerant Piping
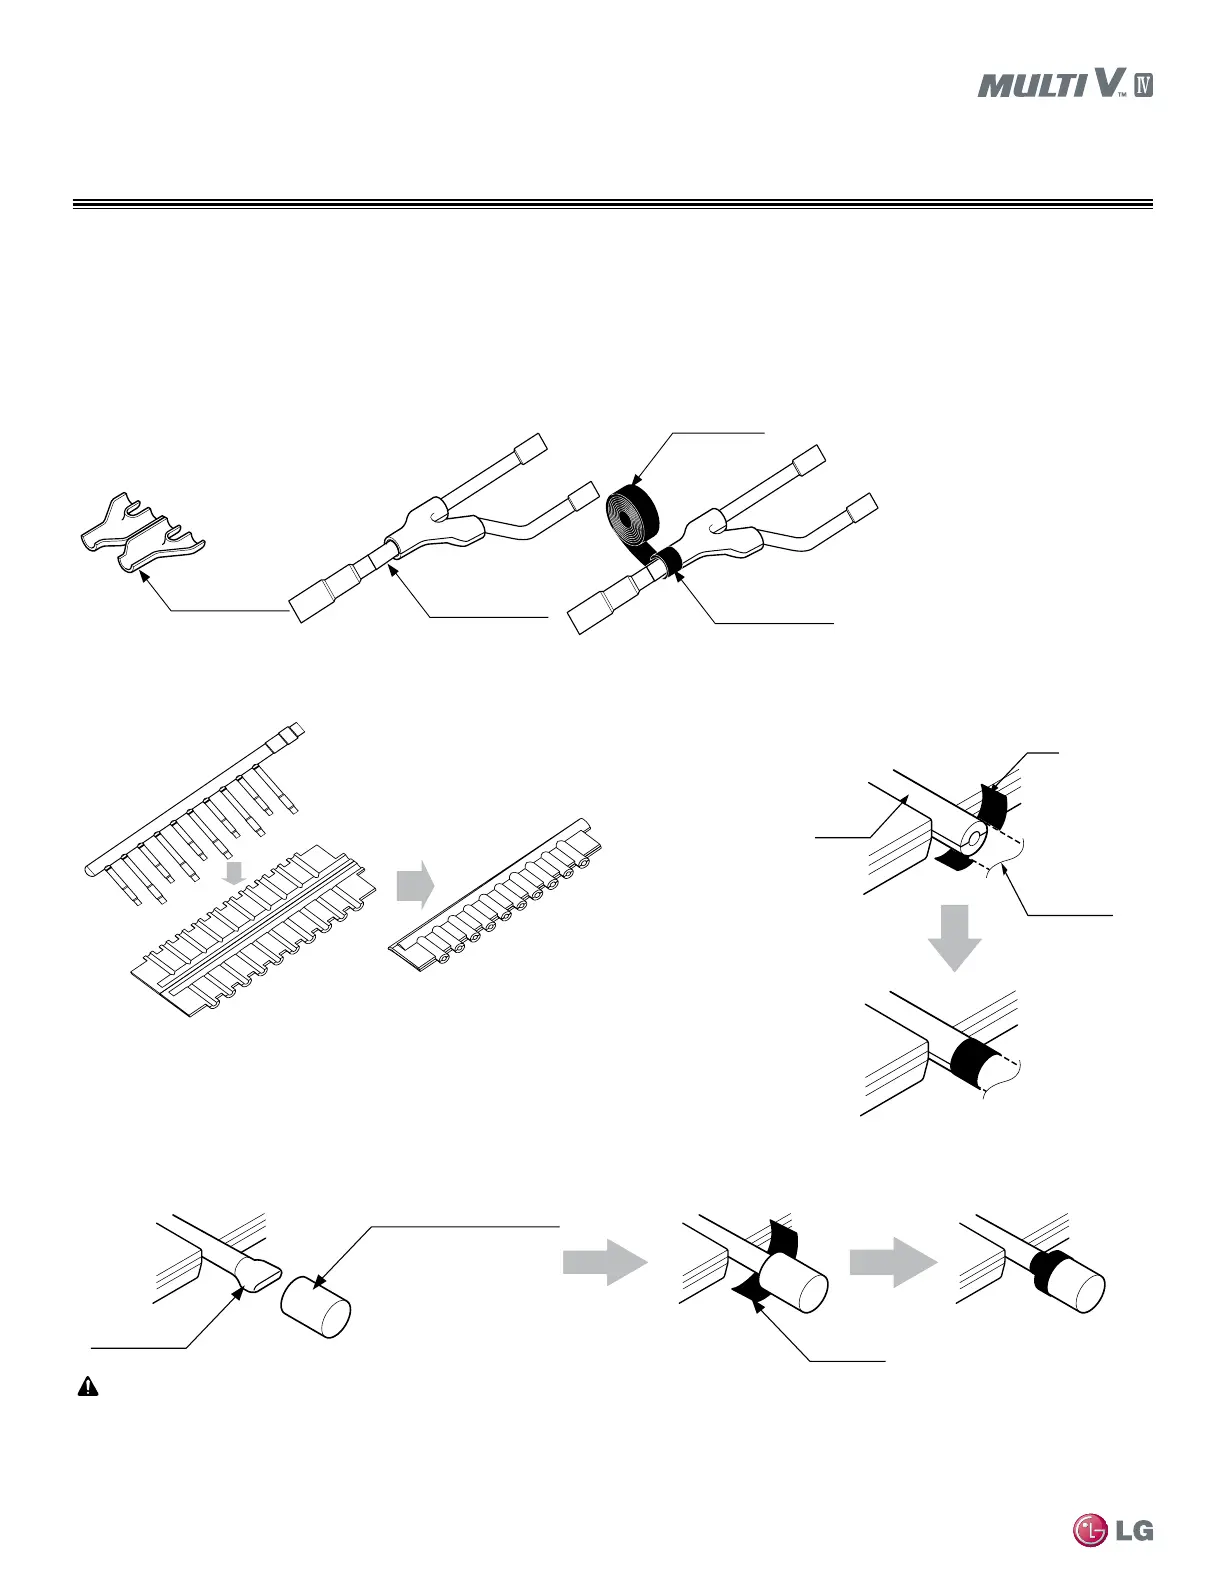
Figure 48: Joints between branch and pipe should be sealed
with tape included in each kit.
Insulator
(included with kit)
Liquid and vapor
pipe joints
Insulator for
field piping
Tape
(field supplied)
Insulate the header using
the insulation attached to
the branch pipe kit as shown.
Insulator
Field pipe
insulator
Tape
Figure 49: Y-Branch Insulation.
Figure 50: Header Insulation.
Figure 51: Cap pipes should be insulated using the insulator included in each kit, and then taped as shown.
Tape
Cap pipe
Pipe Insulator Cap
(included with Header Kit)
Additional Insulation for Y-Branches and Headers May be Required in Humid Environments.
If the system has been operating for a long time in a high humidity environment (dew point temperature: more than 73°F), condensate is
likely to form. If this happens, install 3/8 inch thick ethylene propylene diene methylene (EPDM) insulation that is plenum-rated with a heat-
resistance factor of more than 248°F.
Applying Insulation to Y-Branch and Header Fittings
Check the fit of the insulation jacket provided with the LG Y-branch and Header kits after all pipes are brazed to fittings. Mark all pipes at the
point where the insulation jacket ends. Remove the jacket. Install field-supplied insulation on the pipe segments first, and then install the LG
provided insulation plugs on the ends of all unused Header ports. Apply the clam-shell insulation on jackets to Y-branch and Header fittings
last. Peel the adhesive glue protector slip from the insulation jacket and install the clam-shell jacket over the fitting.
 Loading...