34
Multi V Wall-Mounted Indoor Unit
Due to our policy of continuous product innovation, some specifications may change without notification.
©LG Electronics U.S.A., Inc., Englewood Cliffs, NJ. All rights reserved. “LG” is a registered trademark of LG Corp.
MOUNTING
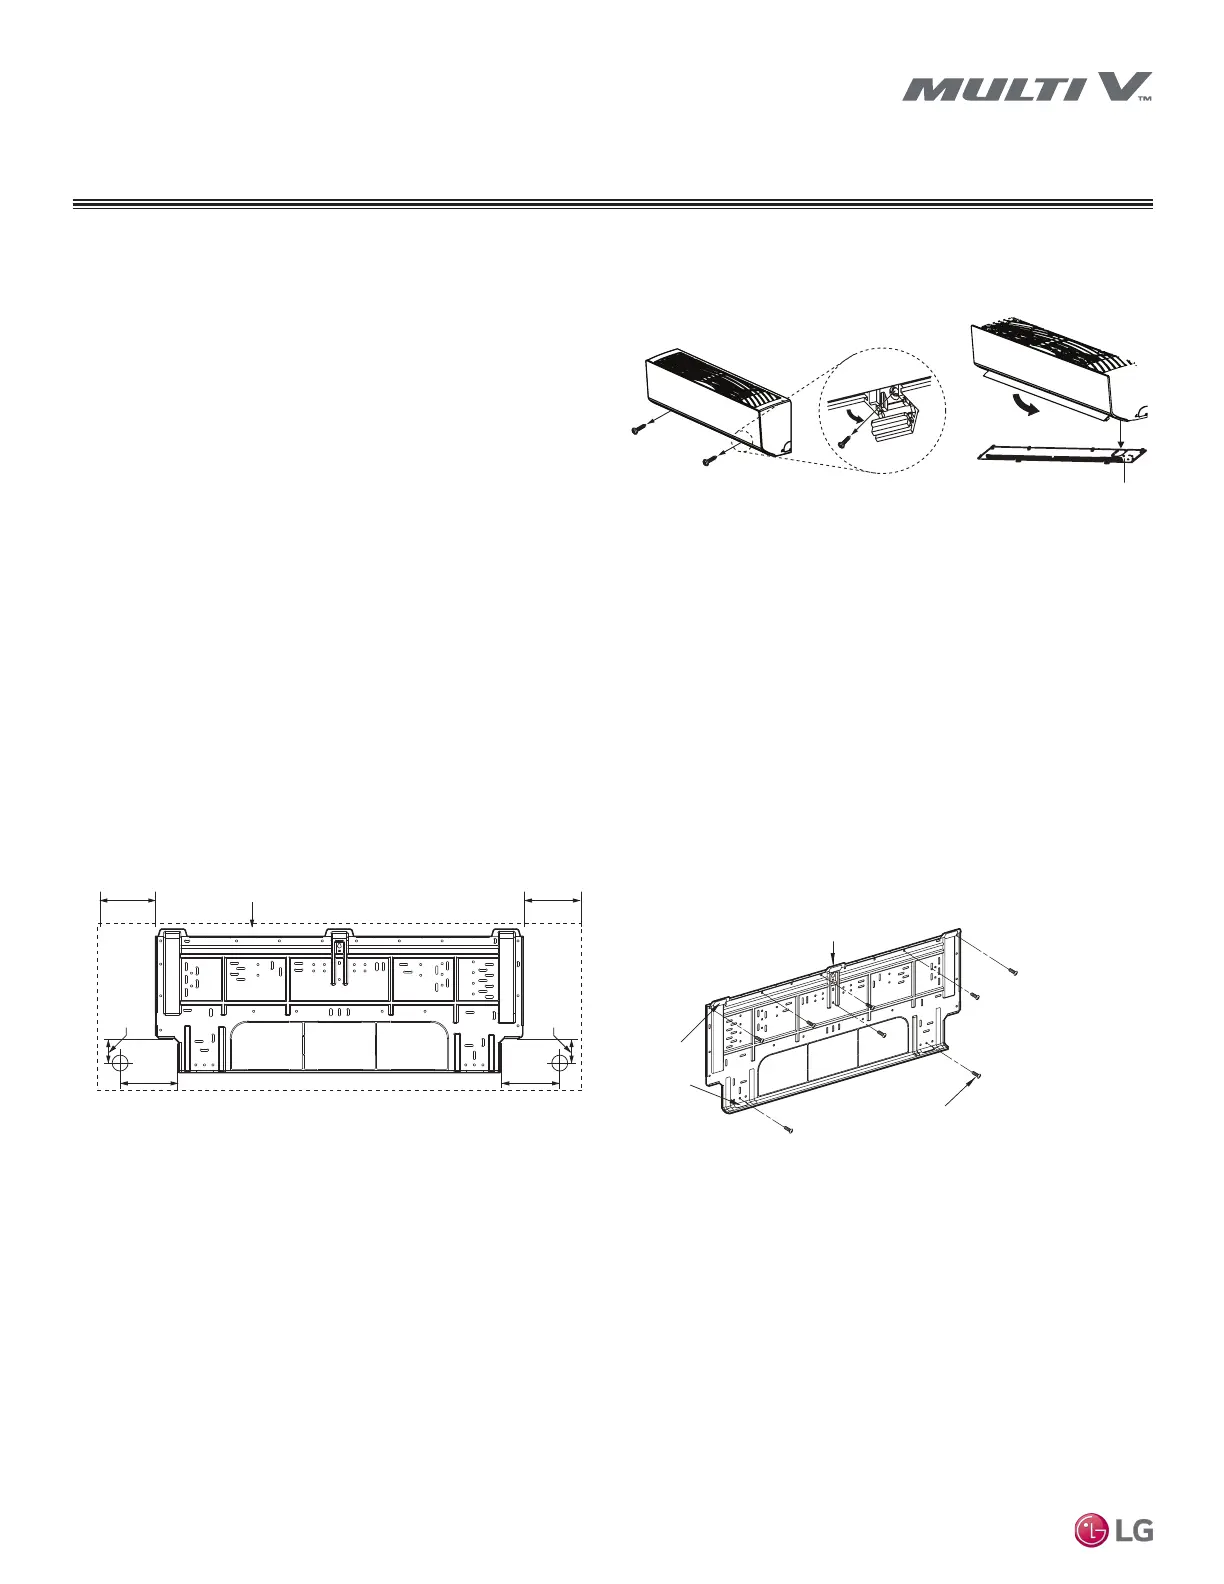
Mounting the Installation Plate — Wall-Mounted Indoor Units (SV Frame)
The mounting wall must be strong and solid enough to protect the unit from vibration. It must securely hold the installation plate and the
weight of the chassis.
1. Before installation of the plate, confirm the position the screw types (A or B) between chassis and installation plate.
2. Mount the installation plate horizontally by aligning the center line using a leveling tool, and use the factory-provided screws. If mounting
the unit on concrete, consider using anchor bolts. Use a level to ensure the plate is level.
3. Choose what side (left or right) to install the piping, and then observe the left and right rear piping clearances when drilling into the wall.
Figure 21: Removing the Chassis Cover.
Left rear piping Right rear piping
1-11/16
5-1/2
5-29/32
6-9/16
Unit: inches
Unit Outline
6-9/16
1-11/16
SV Frame Wall-Mounted Indoor Unit
Figure 22: Standard Wall-Mounted (SV Frame) Installation Plates.
Installation Plate
Type "A" screw
Chassis
Hook
SV Frame Wall-Mounted Indoor Unit
Wall Mounted Indoor Units
SV Frame
To avoid piping damage when moving the piping away from the
indoor unit chassis, follow instructions below.
1. Remove the screw covers at the bottom of the indoor unit and
unscrew the two Type B screws. Remove the chassis cover (may
differ depending on indoor unit type).
2. Unlock the tubing clamp (clamps may differ depending on indoor
unit type).
Figure 23: Standard Wall-Mounted (SV Frame) Installation Plates.
Attaching Screw Placement.
Preparing for Installation — Wall-Mounted Indoor Units (SV Frame)
 Loading...