53
Installation Manual
Due to our policy of continuous product innovation, some specifications may change without notification.
©LG Electronics U.S.A., Inc., Englewood Cliffs, NJ. All rights reserved. “LG” is a registered trademark of LG Corp.
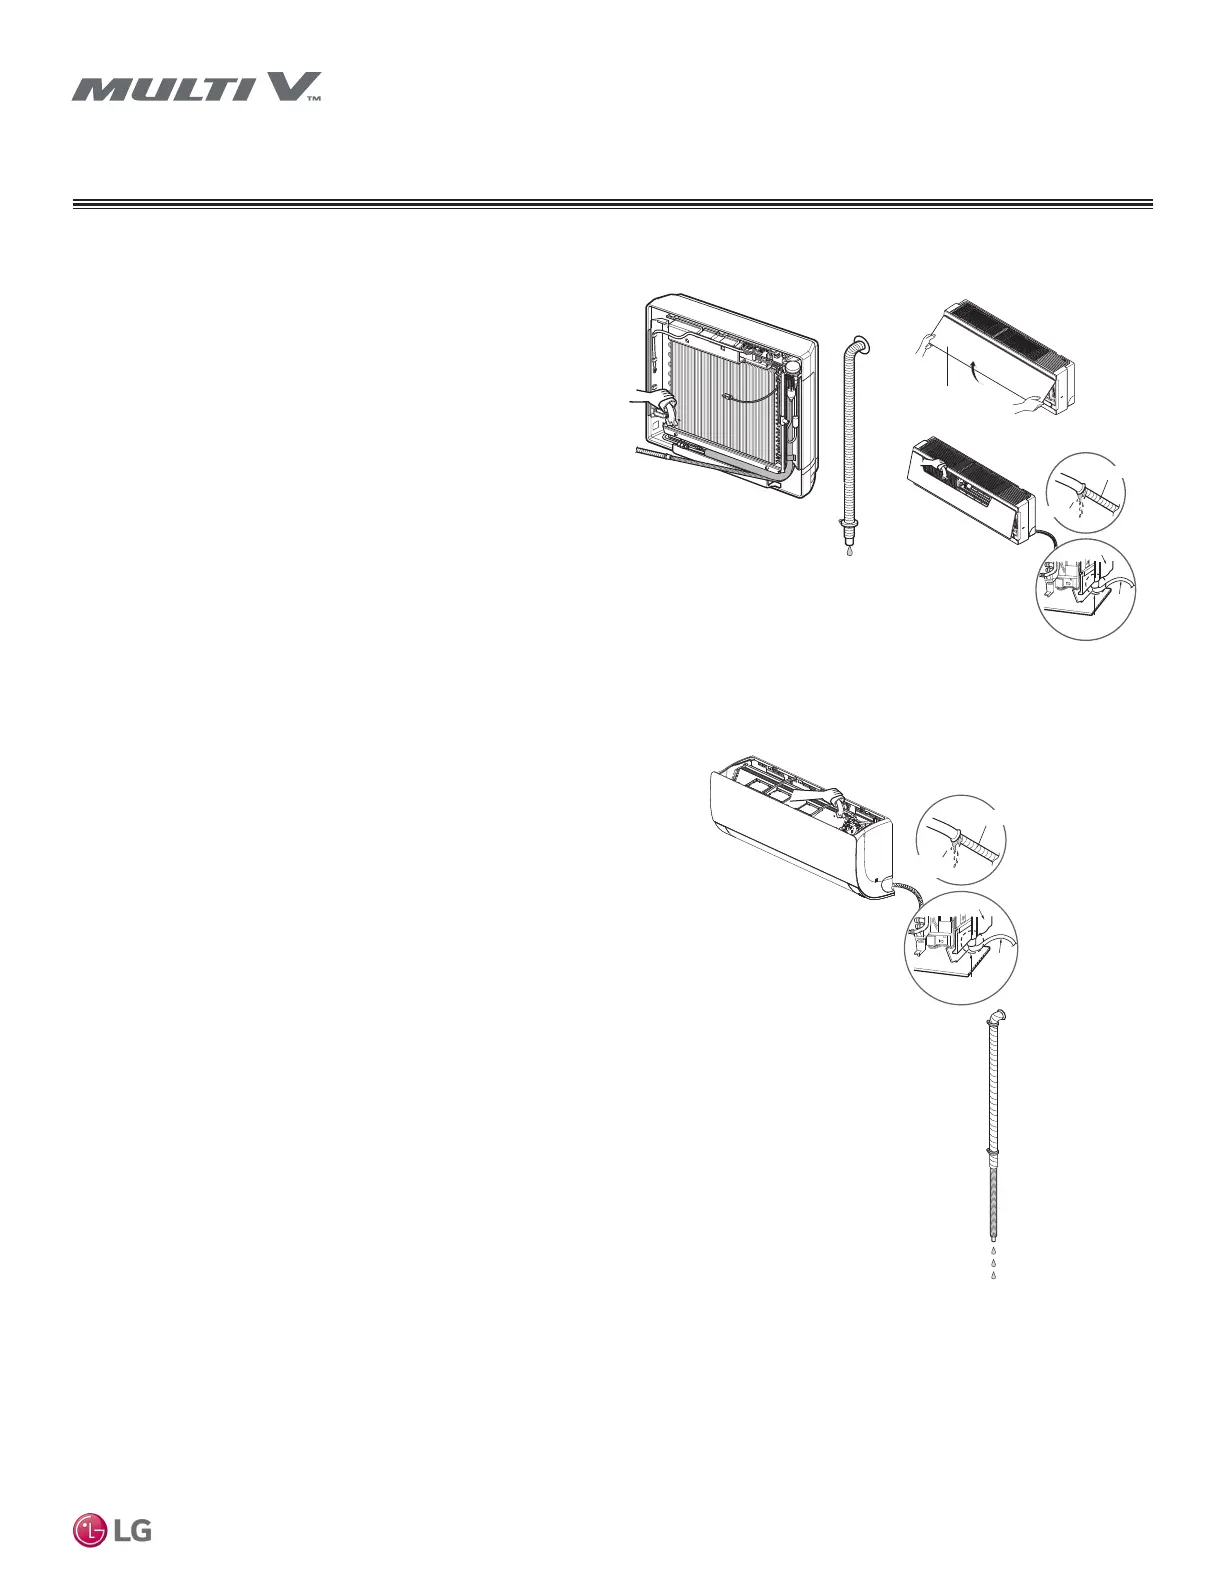
Checking the Indoor Unit Drain Hose
for Leaks (SJ/SK Frame)
1. Pour a glass of water on the evaporator.
2. Verify that the water flows appropriately through and out of the
drain hose without any leaks.
Figure 63: Gallery Indoor Unit (SF
Frame) Drain Leak Test.
Drain Pan
Drain
Hose
Check for Leaks
Drain Hose Connection
Check
for Leaks
REFRIGERANT PIPING CONNECTIONS
Drain Leak Test (SF, SV Frames)
Perform a leak test 24 hours after the drainage system has been
installed.
1. Lift up (Standard Indoor Units) and / or remove (Art Cool Gallery
Indoor Units) the picture or front panel from the indoor unit
chassis (A).
2. Remove any filters.
3. Manually set the up-and-down air direction louvers to the horizontal
position (Standard Indoor Units).
4. Remove the screws that secure the front metal panel (Art Cool Gal-
lery) or front panel to the indoor unit (Standard Indoor Units). Pull
the lower left and right sides of the panel toward you and lift the
panel off. (Standard Indoor Units).
5. Pour a glass of water on the evaporator (Art Cool Gallery, Standard
Indoor Units) (B).
6. Verify the water flows correctly through the indoor unit drain hose
to the drainage system without any leaks at the hose connections
(B).
Front Panel
Drain Pan
Drain
Hose
Check for Leaks
Drain Hose Connection
Check for Leaks
A
B
Figure 64: Wall-Mounted Indoor
Unit (SV Frame) Drain Leak Test
Figure 65: Checking for Leaks at the Indoor Unit.
 Loading...