www.lgmgeurope.com
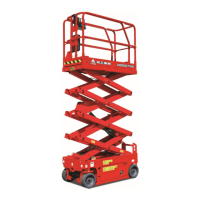
AS0808 / AS0808E / AS0812 / AS0812E / AS1012 / AS1012E / AS1212 / AS1212E / AS1413
24
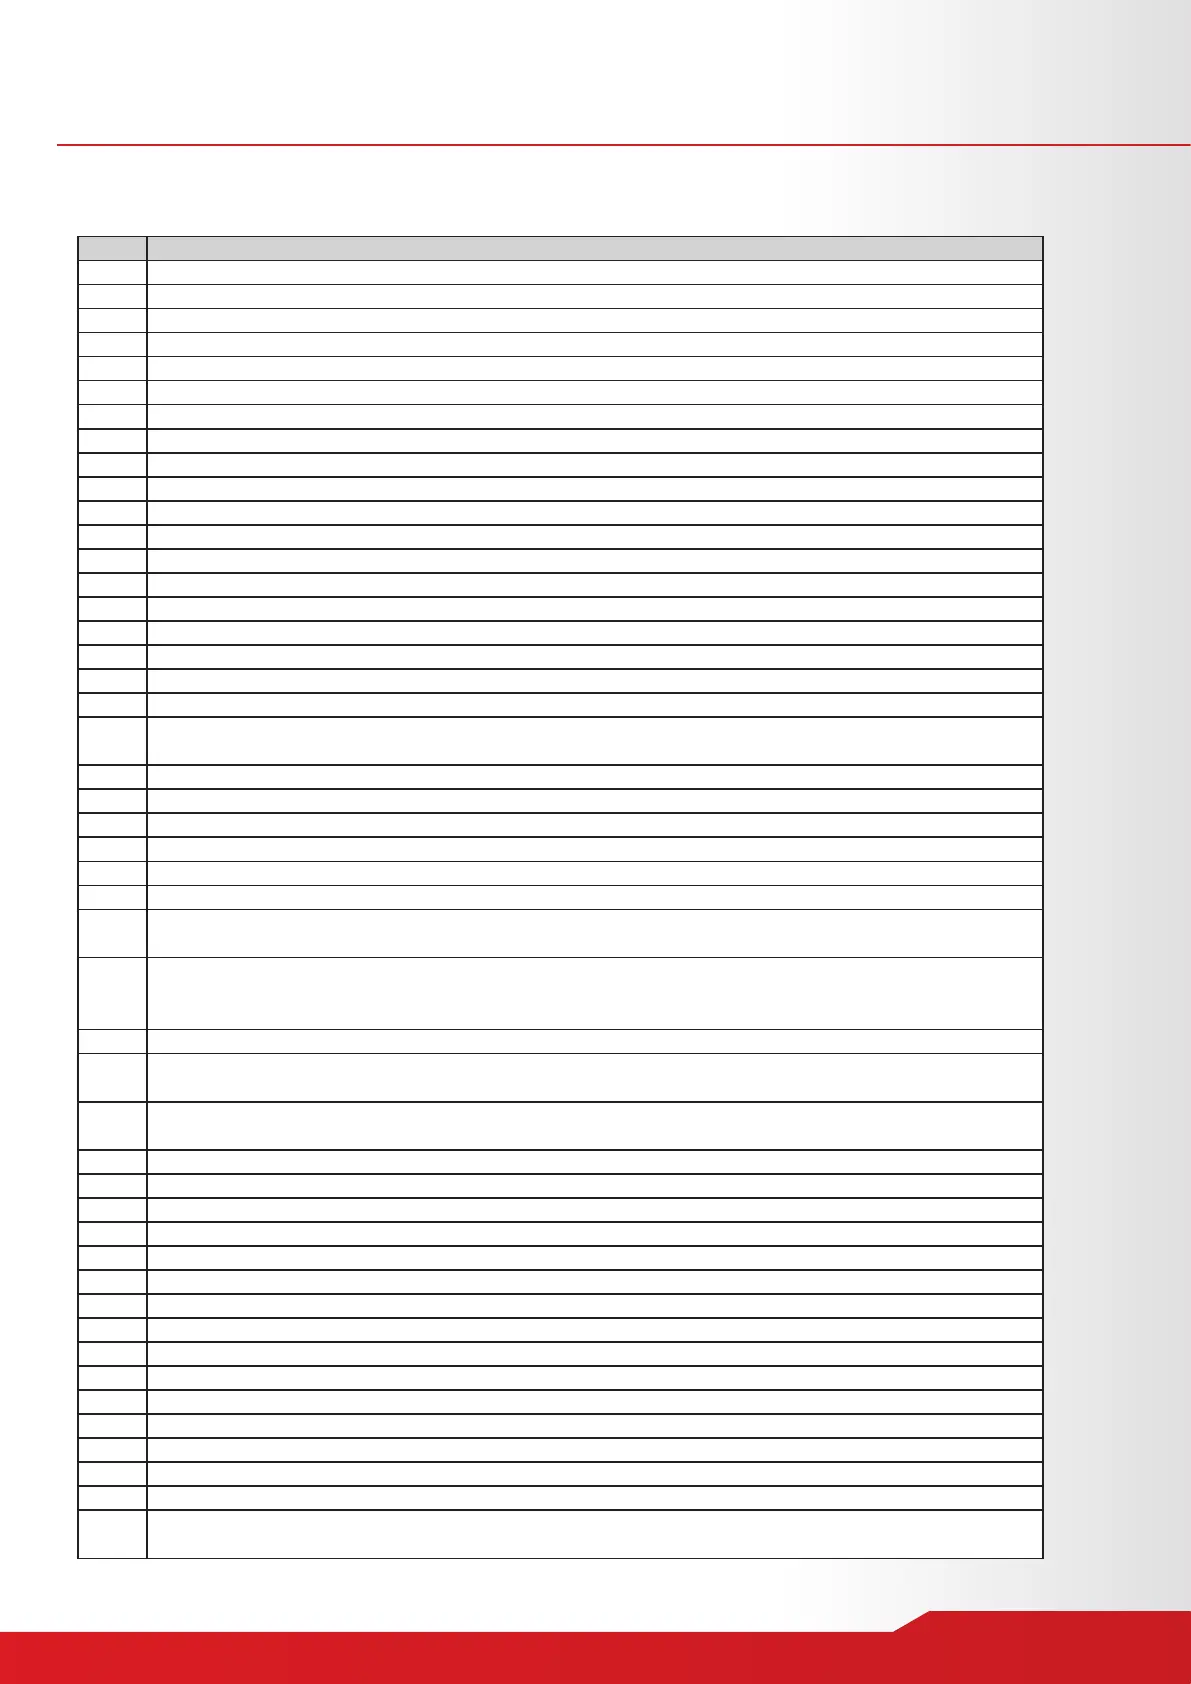
Table: troubleshooting and guidance
Chapter 4 - Operation
Display
01
02
03
12
18
31
32
42
43
46
47
52
53
54
55
56
57
58
60
61
62
63
64
65
66
67
68
70
71
72
73
74
75
76
77
78
79
80
81
82
83
89
90
91
92
0L
LL
.
r
.
.
.
.
.
.
.
.
.
Description
ECU may fail and replace the defective ECU.
Check the wiring of the toggle switch or check whether the toggle switch is stuck.
Check the sensor wiring and the sensor. Or, check and conrm that the correct overload detection option is selected for the machine.
Make sure that the buttons on the handle are not pressed. If not, consider replacing the lever or PCU.
Make sure that the buttons on the handle are not pressed. If not, consider replacing the lever or PCU.
Make sure that the power switch on the lever is not pressed. If not consider replacing the?
Conrm that handle is in center. Check center position parameter setting. If this is correct, consider replacing the lever or PCU.
Check the coil connection and conrm that this is normal. If yes, check whether the scissor coil is short-circuited or not connected.
Check the coil connection and conrm that this is normal. If yes, check whether the scissor coil is short-circuited or not connected.
Check the coil connection and conrm that this is normal. If yes, check whether the scissor coil is short-circuited or not connected.
Check the coil connection and conrm that this is normal. If yes, check whether the scissor coil is short-circuited or not connected.
Check the coil connection and conrm that this is normal. If yes, check whether the scissor coil is short-circuited or not connected.
Check the coil connection and conrm that this is normal. If yes, check whether the scissor coil is short-circuited or not connected.
Check the coil connection and conrm that this is normal. If yes, check whether the scissor coil is short-circuited or not connected.
Turn off the motor to reset the motor control. If that does not solve problem, replace the motor control.
Turn off the motor. If this does not solve the problem, look for noise sources. When necessary, try replacing the motor regulator.
First, check the wiring, and then turn off the power. Replace the control if necessary.
Look at motor deceleration with “Scissor Programmer”, it can be too small. Make sure that other parameters of motor operation are correct.
Check the wiring. Make sure the correct type of throttle valve is selected in motor control.
Make sure that the “Emergency Reverse Check” parameter is turned off in the motor controls.
Check the connections to the main switch. Replace the switch if necessary. Replace the motor controller if necessary.
Check the connections on the motors. Turn off the power to the lift, and if that does not solve the problem, replace the motor controls.
Check the connections on the motors. Turn off the power to the lift, and if that does not solve the problem, replace the motor controls.
Check the connections on the motors. Turn off the power to the lift, and if that does not solve the problem, replace the motor controls.
Check the connections on the pump motor. Turn off the power to the lift, and if that does not solve the problem, replace the motor controls.
Check the connections on the pump motor. Turn off the power to the lift, and if that does not solve the problem, replace the motor controls.
Check the motor connections and make sure they are securely xed. Check the motor briey.
The load on the platform is approaching the limit and do not increase the load.
Check the motor connections and make sure they are securely xed. Check the motor briey.
Check connections to terminals of coil and make sure that they are securely xed. Check the coil itself whether it is open or short-circuited.
Check connections to terminals of coil and make sure that they are securely xed. Check the coil itself whether it is open or short-circuited.
Check the excitation for the drive motor to see if it is open, including the terminals and the coil.
The load on the platform is approaching the limit and do not increase the load.
Check the left excitation for the drive motor to see if it is open.
Check the right excitation for the drive motor to see if it is open.
Immediately remove the excessive load.
If the machine is inclined, you need to take measures to restore its level. If the machine is level, you need to check the
level sensor wiring or the sensor.
Check the battery voltage and make sure the battery charger is not switched on. Then switch the power to the lift. If that
does not solve the problem, try replacing the moto controls.
Drive or lift motor has overheated. Allow the lift to cool. If that does not help, turn the motor off to reset the motor controls.
If the problem persists, check the wiring and replace the motor controls.
Look at the motor deceleration with the “Scissor Programmer”, it can be too small. Make sure that other parameters of motor operation are correct.
Check the battery voltage. Charge the battery if necessary. Check the battery and switch connection, amplify connection or
clean the connection. Check that the voltage of the PCU and ECU is normal.
Incorrect voltage at the control input of the ZAPI motor control. The ZAPO may have to be “inspected” for the three steering
voltages (on machines with differential controlled motors). Or the control voltage of the ECU was out of range during the
“operating session”. Train the ZAPI and/or check for uctuating voltages due to loose wires etc.
If that does not solve problem, replace the motor control. Drive or lift motor has overheated. Allow the lift to cool. If that does not
help, turn the motor off to reset the motor controls. If the problem persists, check the wiring and try to replace the motor control.
Check the sensor wiring and the sensor. Or, check and conrm that this is the correct overload. Detection option is selected for the machine.
Make sure the hollow protector has started. Check the limit switch, lower limit switch and wiring of the hollow protector.
Set the correct options for the machine.
Check the communication line and other cable connection. If the malfunction is not resolved, replace PCU or ECU.
 Loading...