Do you have a question about the Life Fitness x3 and is the answer not in the manual?
| Resistance Levels | 20 |
|---|---|
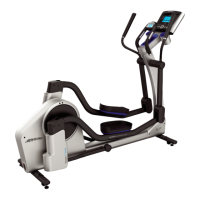
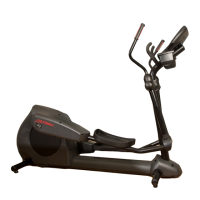
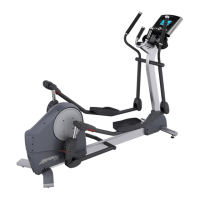
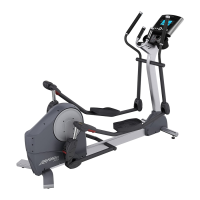
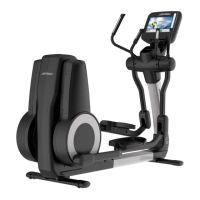
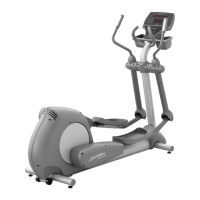
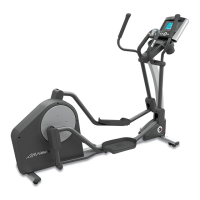
| Type | Elliptical |
| Stride Length | 20 inches |
| Heart Rate Monitoring | Contact Hand Sensors and Wireless Telemetry |
| Console Display | LCD |
| Programs | Manual, Random, Hill, Cardio, Fat Burn, Heart Rate Hill, Heart Rate Interval |
Key safety guidelines for operating and maintaining the Life Fitness Cross-Trainer.
Detailed list of all components included with the cross-trainer, with part numbers.
Visual illustration and identification of individual parts listed in the parts list.
Step-by-step instructions for assembling the Life Fitness Cross-Trainer.
Instructions for ensuring the cross-trainer is stable and level on the floor.
Guidance on connecting the cross-trainer to a power source and checking operation.
General explanation of the console's functionality and its role in tailoring workouts.
Detailed breakdown of the buttons, displays, and indicators on the x3 model console.
Detailed breakdown of the buttons, displays, and indicators on the x3i model console.
Description of the built-in reading rack for holding books or magazines.
Information on the accessory trays, noting standard and optional availability.
Explains the benefits and principles of using heart rate zones for effective exercise.
Instructions on how to use and properly wear the heart rate chest strap for accurate monitoring.
Overview of pre-programmed workout types available on the Life Fitness product.
Description of the manual workout mode and the quick start function.
Explanation of workouts that use heart rate zones based on age for target intensity.
Details the Fat Burn workout, focusing on using fat stores for fuel within a specific heart rate zone.
Describes the Cardio workout, similar to Fat Burn but with a higher target heart rate for cardiovascular improvement.
Details workouts that combine hill profiles with heart rate monitoring.
Explains the Sport Training program, featuring varied resistance levels for an engaging workout.
An intense workout for experienced users, focusing on rapid heart rate changes.
Describes the Random program, offering varied resistance levels and patterns for an unpredictable workout.
Details the Manual workout, allowing users to change resistance freely during their session.
Explains the EZ Resistance workout, simulating hills with subtle resistance changes for a gradual challenge.
Describes the automatic cool-down sequence designed to aid recovery after a workout.
Simulates hills and valleys for effective cardiovascular training with progressive intensity.
Workout designed for the x3i model, engaging major muscle groups with varied movements.
Workout that alternates forward and reverse motions for comprehensive leg muscle engagement.
Charts outlining the setup steps and parameters for various workout programs on X3 and X3i models.
Introduction to the custom programmed profile feature for users.
Details how the My Workout mode stores accumulated time, calories, and distance for users.
Lists the parameters that can be programmed for up to 4 users.
Instructions on how to program user names or days of the week for My Workouts.
Steps for programming custom workouts into the My Workouts feature.
How to view accumulated statistics for Time, Calories, and Distance within My Workouts.
Introduction to the User Menu for customizing cross-trainer features.
Instructions on how to access the User Menu from the idle mode.
Details the settings and functions available within the User Menu.
Recommendations for routine cleaning and care to keep the cross-trainer in peak condition.
Guides for resolving issues with erratic or absent heart rate readings from the chest strap.
Information on contacting customer support for assistance and service.
Welcome message, safety warnings, and cautions regarding product use.
Lists all hardware and components required for the assembly process.
Instructions for unpacking and preparing the components for assembly.
Procedure for attaching the stabilizer tube to the base brackets using bolts.
Instructions for attaching the console upright tube to the main bracket.
Procedure for connecting the wiring harnesses at the base of the upright assembly.
Detailed steps for attaching the left and right rocker arm assemblies to the pivot shafts.
Instructions for connecting moving arms to pedal levers and attaching pivot covers.
Procedure for attaching the base shrouds and securing the console bracket.
Steps for connecting console wiring and attaching the back plastic shell.
Final step to connect the cross-trainer to a power outlet.
Guidance on selecting an appropriate location and ensuring sufficient space for the cross-trainer.
Detailed instructions for adjusting the levelers to ensure the cross-trainer is stable.
Steps to connect the cross-trainer to power and verify it is operational.
Instructions on how to safely mount and dismount the cross-trainer.
Explanation of the hand pulse sensors for monitoring heart rate and tips for accuracy.
Details standard accessories like water bottle holders and an accessory tray.
Information about the cushioned pedal insert for enhanced user comfort.
Introduction to the CoachZone feature for workout variety and motivation.
Explanation of the keys, LEDs, and functions of the CoachZone interface.
Details the Arm Toner workout enhancement for focusing on upper body muscles.
Details the Glute Toner workout enhancement for focusing on lower body muscles and glutes.
Describes the amber LED timer that breaks down workout intervals.
Explains how to adjust resistance and intensity levels using console keys.
Instructions for adjusting audio settings and the attract display for the CoachZone.