M8 / M8P Installation Manual
12 13
From the Status page of the NL4 interface, click the "Program-
ming" button near the top left corner. This will open the M8's
configuration page.
"Return" Button - This button returns to the M8 Status page.
Any changes must be saved prior to clicking this button or the
changes will be lost.
"Save Settings" Button - This button will save all changes on
the page.
"Fill All" Button (top) - This button will take all settings from
Zone 1 and copy them to Zones 2 through 8.
"Import Settings" Button - This button opens a page allow-
ing you to select an M8 Configuration file to import. Click the
Browse button to select the file, then click open. After selecting
the file, click "Download" then "Confirm".
"Export Settings" Button - This button saves the configuration
of the M8 zones to a file, which may be imported to other M8
boards. If prompted after clicking, select "Save File". Check the
"Include Output Descriptions" selection to include the output
descriptions in the export file.
"Fill All" Buttons (Column) - Each column has a "Fill All" but-
ton. This button takes the setting from Zone 1 of that column
only and copies it to Zones 2 through 8.
Output # - This column shows each zone number
Output Description - This column shows the programmable
descriptive name given to the zone.
Control Input Type - This column has a drop-down list for the
type of input to be used to activate the zone. Choices include:
Normally Closed - Normally Closed (NC) dry contact. The in-
put will be activated when the contact is opened.
Normally Open - Normally Open (NO) dry contact. The input
will be activated when the contact is closed.
Open Collector - An open collector transistor output will acti-
vate the input when the input is pulled to ground.
Voltage - A positive voltage (12-24VDC) will activate the input.
Disabled - The input terminals will have no effect.
Output Load Type - This column has a drop-down list for the
type of device being powered. Select the type of device closest
to the device being powered. Choices include:
Maglock - The output power will be removed when the in-
put is activated. Zone 8 also adds NC Contact for dry con-
tact operation (See page 5 #7).
Fail-Secure Strike - The output power will be applied when
the input is activated. Zone 8 also adds NO Contact for dry
contatc operation (See page 5 #7).
Constant ON - The output will always have power, regard-
less of the state of the input.
Unlock on FAI Activation - This column has a drop-down list
to select whether an FAI condition will affect the output of each
zone. Choices are "Yes" and "No"
Unlock on AC Loss - This column has a drop-down list to se-
lect whether an AC Loss will affect the output of each zone.
Choices are "Yes" and "No". This is useful for regions where it
is required to unlock all doors upon a loss of AC.
Email Alert on Fault - This column has a drop-down list to
select whether fault conditions on each zone will send an email
alert when email is configured in the NL4. Choices are "Yes"
and "No".
Voltage Lower Limit (V) - This column allows setting a lower
voltage limit to trigger a fault for each zone. For example, if the
lower voltage limit is set for 23.5V, a fault will be triggered if
the voltage on that zone goes below 23.5V. This limit will not
be triggered when the zone is deactivated via the zone's input,
FAI, or other intended deactivation.
Voltage Upper Limit (V) - This column allows setting an upper
voltage limit to trigger a fault for each zone. For example, if the up-
per voltage limit is set for 26.0V, a fault will be triggered if the volt-
age on that zone goes above 26.0V.
Current Lower Limit (A) - This column allows setting a lower
current limit to trigger a fault for each zone. For example, if
the lower current limit is set for 1.0A, a fault will be triggered
if the current on that zone falls below 1.0A. This limit will not
be triggered when the zone is deactivated via the zone's input,
FAI, or other intended deactivation.
Current Upper Limit (A) - This column allows setting an upper
current limit to trigger a fault for each zone. For example, if the up-
per current limit is set for 2.0A, a fault will be triggered when the
current on that zone goes above 2.0A.
Cycle Count Limit - This column allows setting a limit to trigger
a fault when the zone is activated a certain number of total cycles.
Output Limit Setting Aid - This section allows automatic setting
of the upper and lower voltage and current limits for each output.
To utilize the automatic settings, all output field wiring must be
completed to the output devices to be powered. Enter the desired
percentage for each limit, and click the "Start Measurement" button.
The M8 will briefly cycle each output on and off and measure the
voltage and current levels for each device. When complete, the up-
per and lower limits will be set based on the entered percentages.
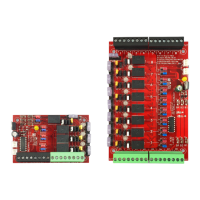
Programming the M8 Power Control Module
 Loading...