EasyManua.ls Logo

Lifetime 60370 User Manual

Lifetime 60370
80 pages
To Next Page IconTo Next Page
Page #1 background imageLoading...
Page #1 background image
Scan the code, or visit go.lifetime.com/
60370-assemblyvideo
OR WATCH THE HOW-TO ON YOUTUBE
3D ANIMATION
OF THE FULL ASSEMBLY
WATCH
SCAN THE
CODE
OR SEARCH
1217253
YouTube
®
and the YouTube logo are trademarks of Google, LLC.
Icon Legend..................................................4
Warnings & Notices.....................................5
Platform Construction..................................6
Truss Assembly...........................................11
Gable Assembly..........................................16
Door Assembly............................................21
Floor Assembly............................................35
Wall Assembly.............................................38
Parts Identifi er............................................39
Shelving Installation..................................48
Door & Gable Installation............................51
Roof Assembly............................................55
Wall Hook Installation................................65
Window Pane Installation..........................67
Door Alignment...........................................70
Shed Anchoring..........................................72
Cleaning & Care.........................................75
Registration..............................................76
Warranty....................................................77
TOOLS REQUIRED TABLE OF CONTENTS
7/16" (≈11 mm)
3/8" (≈10 mm)
5/16" (≈8 mm) Wood Drill Bit
5/16" (≈8 mm) Masonry Drill Bit
CONTACT LIFETIME
®
CUSTOMER SERVICE:
Call: 1-800-225-3865
7:00 am–5:00 pm (Monday–Friday) MST
and 9:00 am–1:00 pm Saturday MST
Live Chat: www.lifetime.com/customerservice
(click on “LIVE CHAT” tab)
For Customer Service in the United Kingdom and mainland Europe:
E-mail: cs@lifetimeproducts.eu
QUESTIONS?
MODEL# AND PRODUCT ID
(both are needed when contacting us)
Model Number: 60370
Product ID:
Pour le français, voir la page 2. Para el español, ver la página 3.
ASSEMBLY INSTRUCTIONS
OUTDOOR
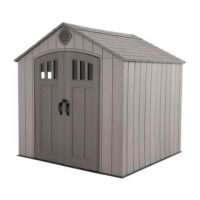
SHED
MODEL 60370
BEFORE ASSEMBLY:
Assemble on a level surface
At least 3 people recommended for setup
Ensure all hardware and parts are included and
free of damage.
FOR DOMESTIC USE ONLY!
IMPORTANT, RETAIN FOR FUTURE REFERENCE: READ CAREFULLY.
COPY
Remove Watermark
Wondershare
PDFelement
Question and Answer IconNeed help?

Do you have a question about the Lifetime 60370 and is the answer not in the manual?

Lifetime 60370 Specifications

General IconGeneral
MaterialHigh-Density Polyethylene (HDPE)
LockableYes
Floor IncludedYes
UV-protectedYes
Assembly RequiredYes
StyleHorizontal
Exterior Dimensions48.5 x 27.5 x 24.5 inches

Summary

Icon Legend

Icon Legend / Légende des Icônes / Significado de los Íconos

Explains the meaning of various icons used in the assembly instructions.

Warnings and Notices

Warnings & Notices / Avertissements et Avis / Advertencias y Avisos

Provides crucial safety warnings and precautions for product assembly and use.

Platform Construction

Platform Construction / Construction de la Plate-forme / Construcción de la Plataforma

Details requirements for building a stable and level platform for shed assembly.

Concrete Platform / Plate-forme en Béton / Plataforma de Concreto

Specifies dimensions and requirements for a concrete foundation for the shed.

Wood Platform / Plate-forme en Bois / Plataforma de Madera

Specifies requirements for building a wood platform foundation for the shed.

Wood Platform Construction Steps

Details steps for building the wood platform frame and measuring for studs.

Frame Construction and Plywood Fastening

Guides on squaring the frame and attaching plywood with drainage holes.

Truss Assembly

Hardware and Parts Required for Truss Assembly

Lists all necessary hardware and metal parts for assembling the shed trusses.

Connector and Brace Assembly

Instructions for attaching connectors and truss braces to the gutter channels.

Large Truss Brace Attachment

Details on securing the large truss brace using specified hardware.

Truss Rod Installation

Guidance on sliding the truss rod through the large truss brace and connector.

Securing Truss Components with Cap Nuts

Instructions for securing the truss assembly using cap nuts.

Gable Assembly

Hardware and Parts Required for Gable Assembly

Lists all necessary hardware and parts for assembling the shed gables.

Gable Half Alignment and Securing

Steps for aligning gable halves and securing them with screws, plus screen installation.

Securing Gable Components

Instructions for securing gable assembly components using specified hardware.

Entry Gable Half Alignment

Guides on aligning entry gable halves and securing them.

Header Alignment and Securing

Steps for aligning the header with the gable and securing it with screws and nuts.

Left Door Assembly

Hardware and Parts Required for Left Door

Lists all necessary hardware and parts for assembling the left door.

Long Tube Installation into Left Door

Guides for inserting the long tube into the left door opening.

Latch Bracket Attachment and Drilling

Instructions for attaching the latch bracket and drilling pilot holes.

Lock and Handle Assembly for Left Door

Steps for attaching door locks, spacers, and handle pieces.

Handle and Hinge Tube Installation

Instructions for attaching the handle and sliding the hinge tube into the door.

Butyl Tape Application on Left Door

Guides for applying butyl tape along the window groove on the door.

Window Pane Installation and Securing

Steps for aligning and securing the window pane to the door.

Right Door Assembly

Hardware and Parts Required for Right Door

Lists all necessary hardware and parts for assembling the right door.

Long Tube Installation into Right Door

Guides for inserting the long tube into the right door opening.

Latch and Handle Assembly for Right Door

Instructions for attaching the latch and handle pieces to the right door.

Handle Attachment for Right Door

Details on attaching the handle securely to the right door.

Hinge Tube Installation for Right Door

Guides for sliding the hinge tube into the right door.

Butyl Tape Application on Right Door

Applying butyl tape along the window groove on the right door.

Window Pane Installation on Right Door

Steps for aligning and securing the window pane to the right door.

Floor Assembly

Hardware and Parts Required for Floor Assembly

Lists all necessary hardware and plastic parts for assembling the shed floor.

Inner and Outer Floor Panel Assembly

Guides on interlocking inner and outer floor panels.

Bushing Insertion and Panel Attachment

Instructions for inserting floor bushings and securing floor panels with screws.

Wall Assembly

Hardware and Parts Required for Wall Assembly

Lists all necessary hardware and parts for assembling the shed walls.

Wall Support Channel Installation

Guides for attaching wall support channels to the shed panels.

Channel to Panel Securing and Panel Identification

Securing channels to panels and identifying specific wall panel types.

Corner Panel Attachment and Sliding

Instructions for attaching corner wall panels and sliding them into place.

Bending Corner Panels and Inserting Tabs

Guides for bending corner panels and inserting tabs into the floor.

Attaching Rear and Side Wall Panels

Steps for attaching rear and side wall panels to the shed structure.

Shelving Installation

Hardware and Parts Required for Shelving

Lists all necessary hardware and plastic parts for installing shelves.

Shelf Bracket Installation

Guides for inserting shelf brackets into the wall support channels.

Shelf Folding and Attachment

Instructions for folding shelf flaps and securing the shelf to panels and brackets.

Door and Entry Gable Installation

Hardware and Parts Required for Door & Gable

Lists all hardware and parts for installing the entry gable and doors.

Hinge Tube Installation and Repetition

Guides for installing hinge tubes and repeating steps for the right door.

Entry Gable Sliding and Securing

Steps for sliding the entry gable and securing it with screws.

Gap Flap Attachment

Instructions for attaching left and right gap flaps to block out light.

Roof Assembly

Hardware and Parts Required for Roof Assembly

Lists all hardware and parts needed for assembling the shed roof.

Truss Assembly and Roof Panel Placement

Guides for setting truss assemblies and placing roof panels.

Wall Panel to Roof Panel Alignment

Instructions for aligning wall panels with the bottom of the roof panel.

Inserting Screws and Roof Support

Guides for inserting screws and roof supports into the gable and roof panel.

Panel Securing and Repetition

Instructions for securing panels and repeating steps for the second roof panel.

Center Roof Panel Assembly

Guides for assembling center roof panels using specified screws.

Rear Gable Attachment

Instructions for attaching the rear gable to the shed using screws.

Attaching Final Roof Panels

Guides for attaching the last two roof panels to the shed.

Roof Cap Installation

Instructions for attaching roof caps to the shed starting from the front.

Skylight Installation

Guides for folding and attaching skylights to the roof using screws and washers.

Wall Hook Installation

Accessories and Parts Required for Wall Hooks

Lists required accessories and parts for installing wall hooks.

Inserting Wall Hooks and Safety Warning

Instructions for inserting wall hooks and important weight limit warnings.

Window Pane Installation

Hardware and Parts Required for Window Pane

Lists required hardware and plastic parts for installing window panes.

Pane Preparation and Sliding

Guides for peeling protective backing and sliding the window pane into place.

Window Latch Attachment

Instructions for attaching window latches to the panel opening.

Door Alignment

Hardware and Parts Required for Door Alignment

Lists required hardware and plastic parts for door alignment.

Leveling Doors with Shims

Guides for using shims to ensure doors are level and do not scrape the floor.

Shed Anchoring

Tools Required for Shed Anchoring

Lists tools needed for anchoring the shed to a platform.

Anchoring to Concrete Platform

Instructions for anchoring the shed to a concrete platform using specific hardware.

Anchoring to Wood Platform

Instructions for anchoring the shed to a wood platform using specific hardware.

Cleaning and Care

Cleaning and Care Instructions

Provides guidance on cleaning polyethylene panels and repairing metal parts.

Product Registration

Register Your Product Online at Lifetime.com

Instructions and benefits of registering the product online for warranty and updates.

Warranty Information

10-Year Limited Factory Warranty

Details the terms and conditions of the 10-year limited factory warranty.

Related product manuals