19
2. Setup & Use
3. Optional
Accessories
1. Overview
5. Warranty, Safety
& Specifications
4. Troubleshooting
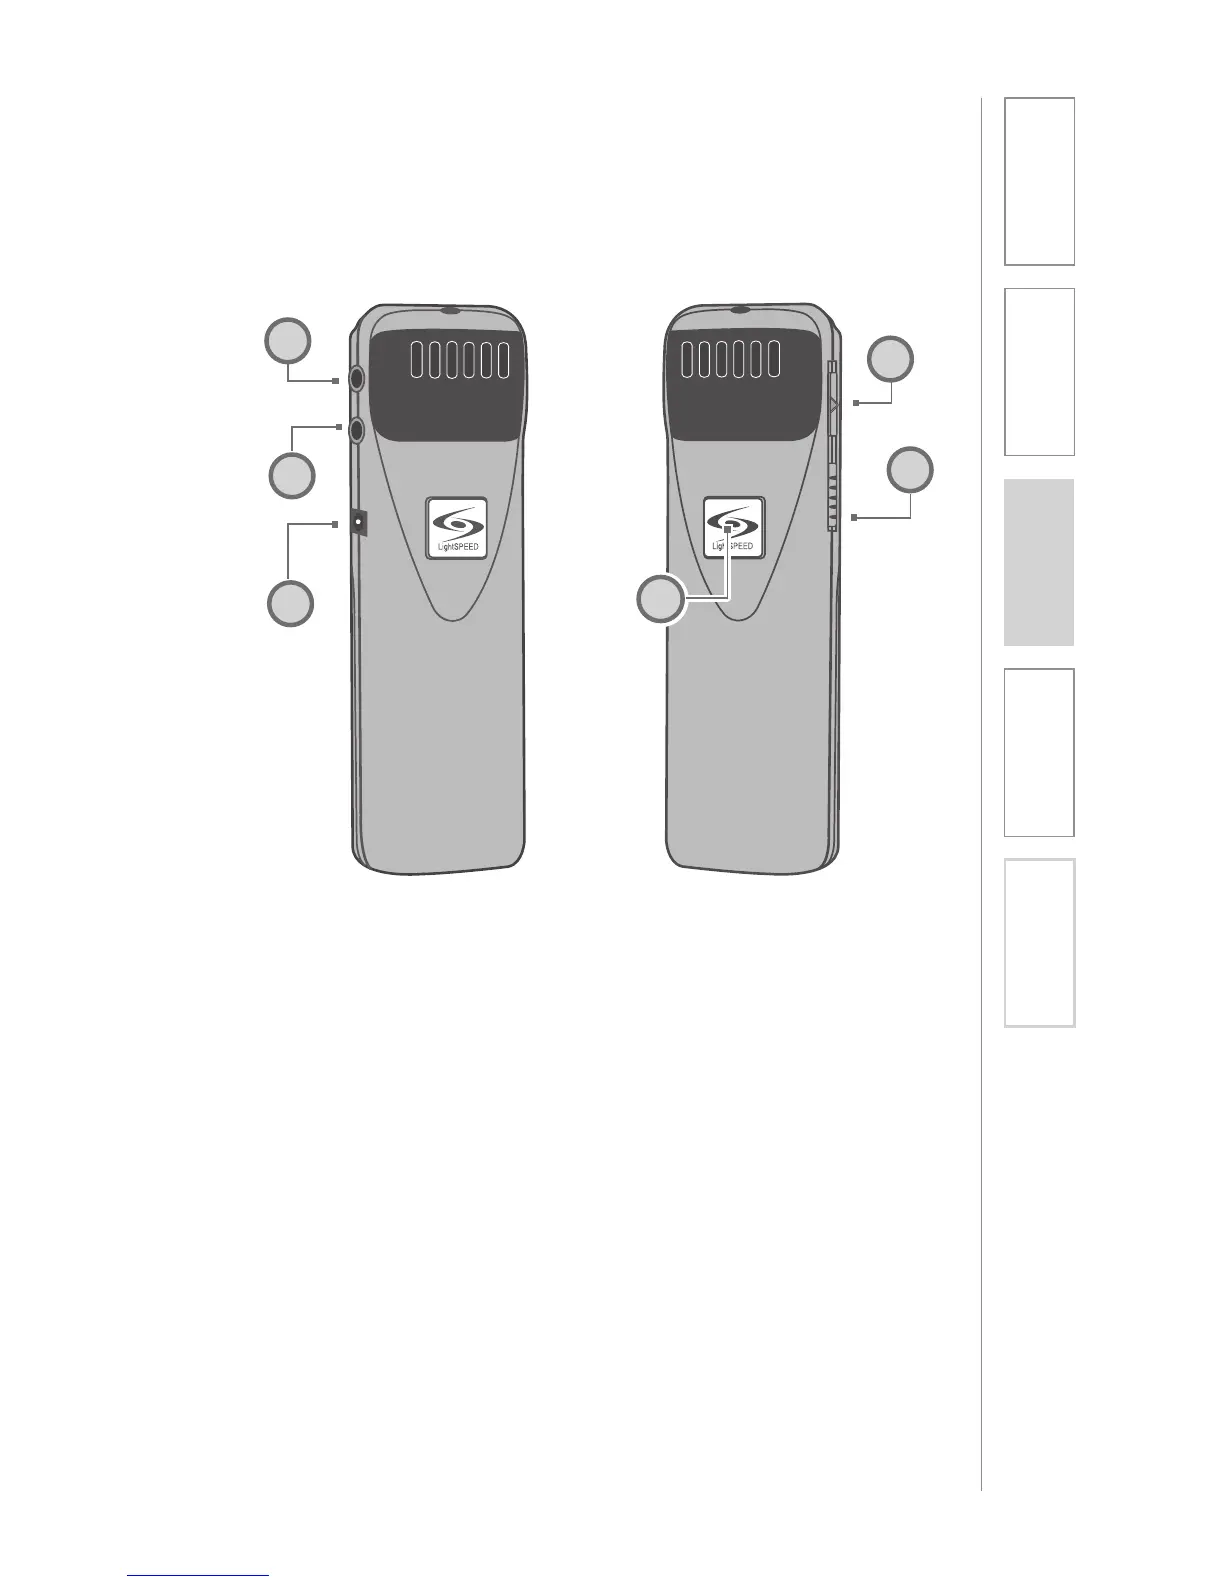
1. ON/OFF/MUTE SWITCH
2. CHANNEL SELECT SWITCH (CH
A/B): Use this to choose channel
A or B. If you are using a single
microphone, we recommend using
channel A.
3. POWER/CHARGE INDICATOR: A
blue light indicates the REDMIKE
VC is on and fully charged. A red
light indicates a charge is needed.
4. EXTERNAL MICROPHONE
INPUT (MIC): Use the 3.5mm
MIC jack for the optional TK250M
headset microphone (part#
TK250M).
5. AUXILIARY (AUX): Plug a laptop,
MP3 player or other audio source
into this jack to wirelessly transmit
the audio signal to be played
through the system.
6. CHARGER INPUT (CHARGER):
Plug the charging cable from the
charger into this jack for daily
charging. The LED on the front will
glow red to indicate charging.
OPTIONAL LT71: Controls and Connections
LT- 71
LT- 71
1
2
4
5
6
3