20
2. Setup & Use
3. Optional
Accessories
4. Troubleshooting
5. Warranty, Safety
& Specifications
1. Overview
SPEAKER OUTPUTS
AUDIO INPUT
CHARGERS
DC
POWER
TV/VCR
CD/DVD
L L
R
R
24V
DC
SENSOR INPUT
SENSOR
SHORT
2.06/2.54
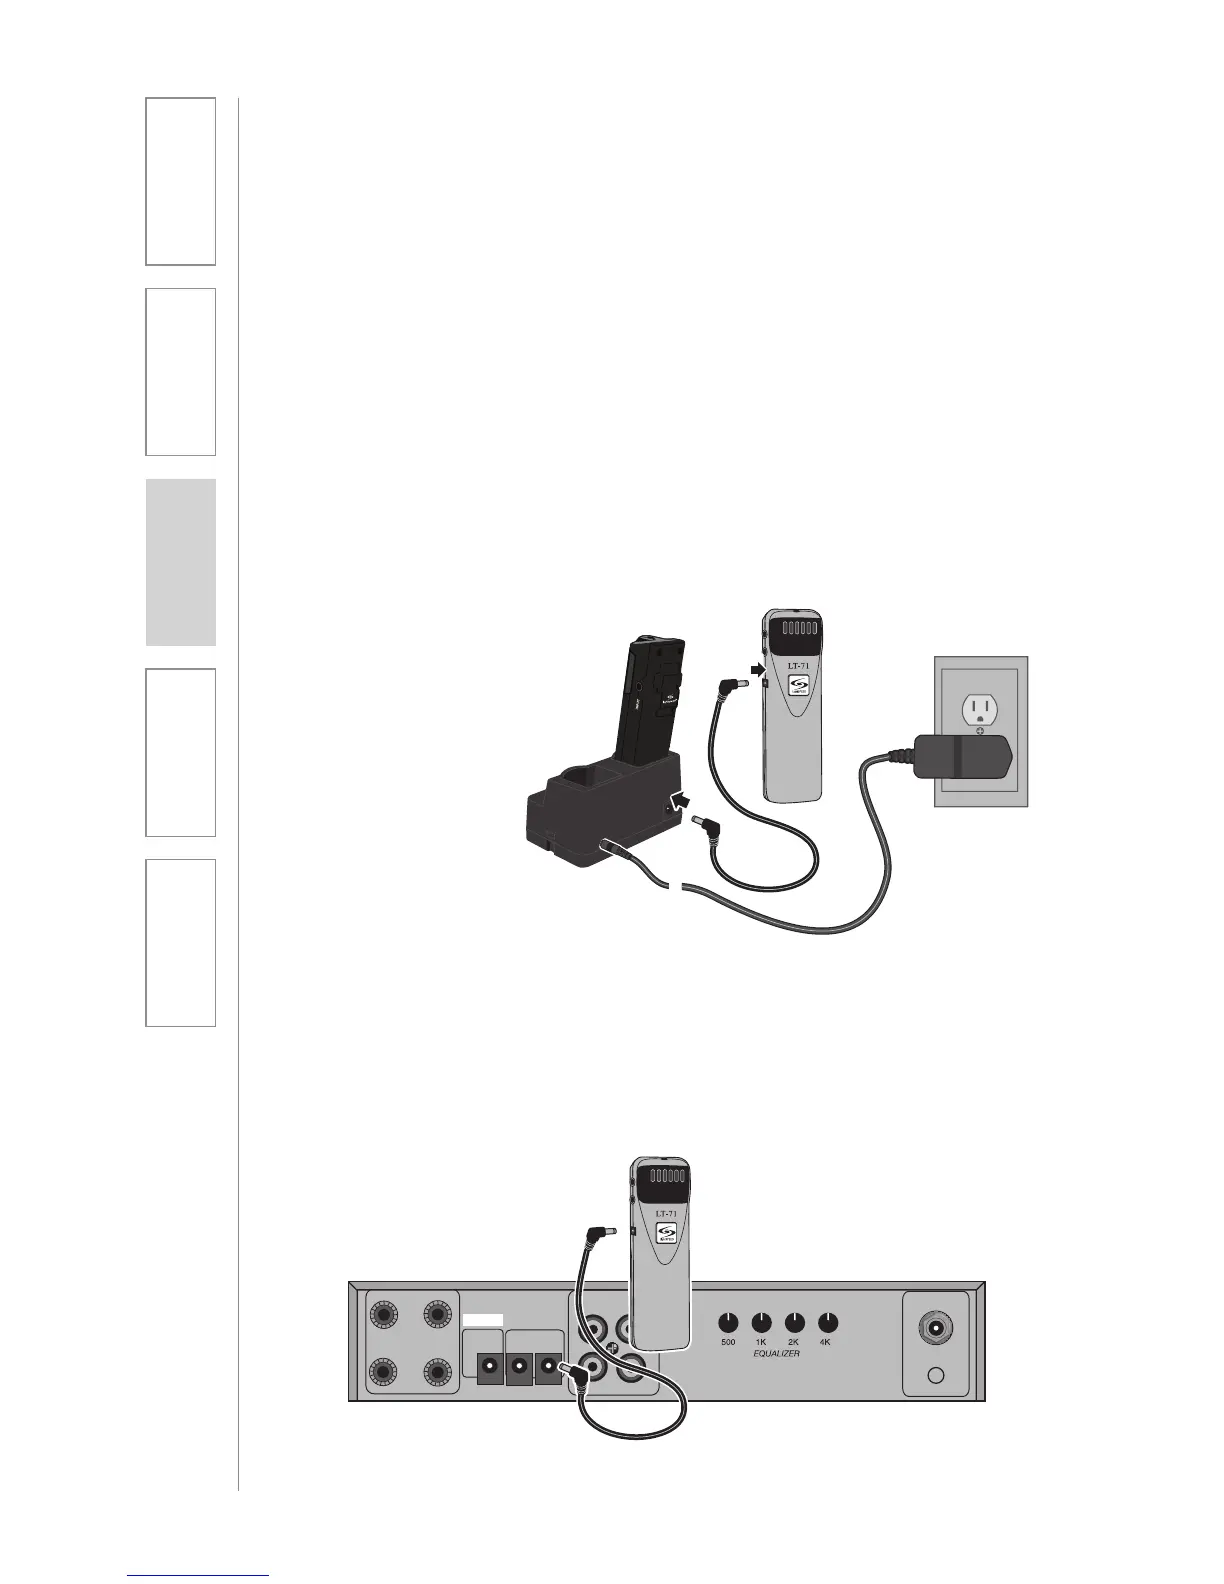
LT71: Charging
1. Ensure that the LT71 is turned off.
2. Make sure the cradle charger
is plugged into a wall outlet.
Connect one end of the charging
cable into the jack labeled
CHARGER on the side of the LT71
and plug the other end into the
charging jack on the rear of the
REDMIKE cradle charger. The
LT71’s rechargeable batteries are
factory installed. The LED on the
front of the LT71 will glow red
when charging.
3. Leave the LT71 plugged in
overnight (8–10 hrs.) to obtain a
full charge.
NOTE: If the system was purchased
without a REDMIKE or REDMIKE VC,
the LT71 will utilize a charging cable.
Simply connect the charging cables
to the jacks labeled CHARGER on
the back of the amplifier and connect
the opposite ends to the jacks on the
back of the cradle charger.