28 29
OVERVIEWINSTALLATION
PLANNING
SPEAKER LOCATION &
INSTALLATION
SET UP &
INTEGRATION
INSTALLING OPTIONAL
EQUIPMENT
TROUBLESHOOTING
Power Link
InputOutputMic
. PLACE THE MICROPHONES IN THE ACTIVATE STATION
Prior to full operation, the microphones should be fully charged (5-6 hours) to
ensure optimum performance. In most cases, there should be enough battery life for
initial setup and testing.
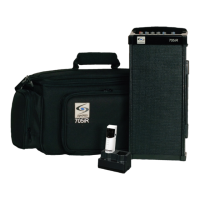
1. Insert the microphone(s) into the Activate Station.
2. The microphone(s) will power on and battery status light will turn red to
indicate normal charging. When fully charged, it will turn green. The white
microphone 1 or 2 light will blink for several seconds as it establishes a link,
then turns solid.
NOTE ON PAIRING: If your Activate System was purchased together with the 975, all
components were paired together at the factory. If the system is being added to an
existing Lightspeed audio system, please refer to the Registration Procedure at
www.lightspeed-tek.com/accessregistration for proper pairing instructions.
The components are paired and ready for operation when:
• Microphone(s) has a solid white #1 or #2 light
• Activate Station has a solid green link light
NOTE: Refer to Daily Use Guide for operation.
. VOLUME ADJUSTMENT FOR THE ACTIVATE STATION
The Activate Station can be used as the primary volume control for the audio sources
you’ve connected.
1. Connect the audio source(s) to the Activate Station using the 3.5mm cables
provided.
2. Set the audio source volume to provide sound through the classroom speaker.
3. Use the Activate Station Audio In volume control to increase or decrease the
sound level.
NORMALIZING AUDIO SOURCE VOLUME LEVELS
Use the Activate Station as the master audio volume control for the classroom. When
two or more audio sources are connected, you will need to normalize volume settings
by setting all connected audio sources to the same sound level while leaving the
Activate Station Audio In volume control set to its center setting. The Activate Station is
an audio mixer using a master volume control to adjust the volume of all audio sources
at once. Use the following procedure to set audio source volumes:
1. Connect the multimedia audio sources to the Activate Station using the 3.5mm
cables provided.
2. Set the Audio In volume control on the Activate Station to its center position.
3. Turn on an audio source that does not have an accessible audio level control. (DVD
player)
4. Adjust the Activate Station Audio In volume control so the audio level playing
through the speaker is appropriate for the classroom.
5. Turn o the first audio source.
6. Turn on the second audio source. Use its volume control to balance the audio
output to the same audio level played through the speaker as the first source.
7. Repeat steps 5 and 6 for the remaining audio sources.
8. Now, the Activate Station’s Audio In volume can be used to increase or decrease
the volume level for all audio sources as desired.
PowerLink
InputOutputMic