12 13
OVERVIEWINSTALLATION
PLANNING
SPEAKER LOCATION &
INSTALLATION
SET UP &
INTEGRATION
INSTALLING OPTIONAL
EQUIPMENT
TROUBLESHOOTING
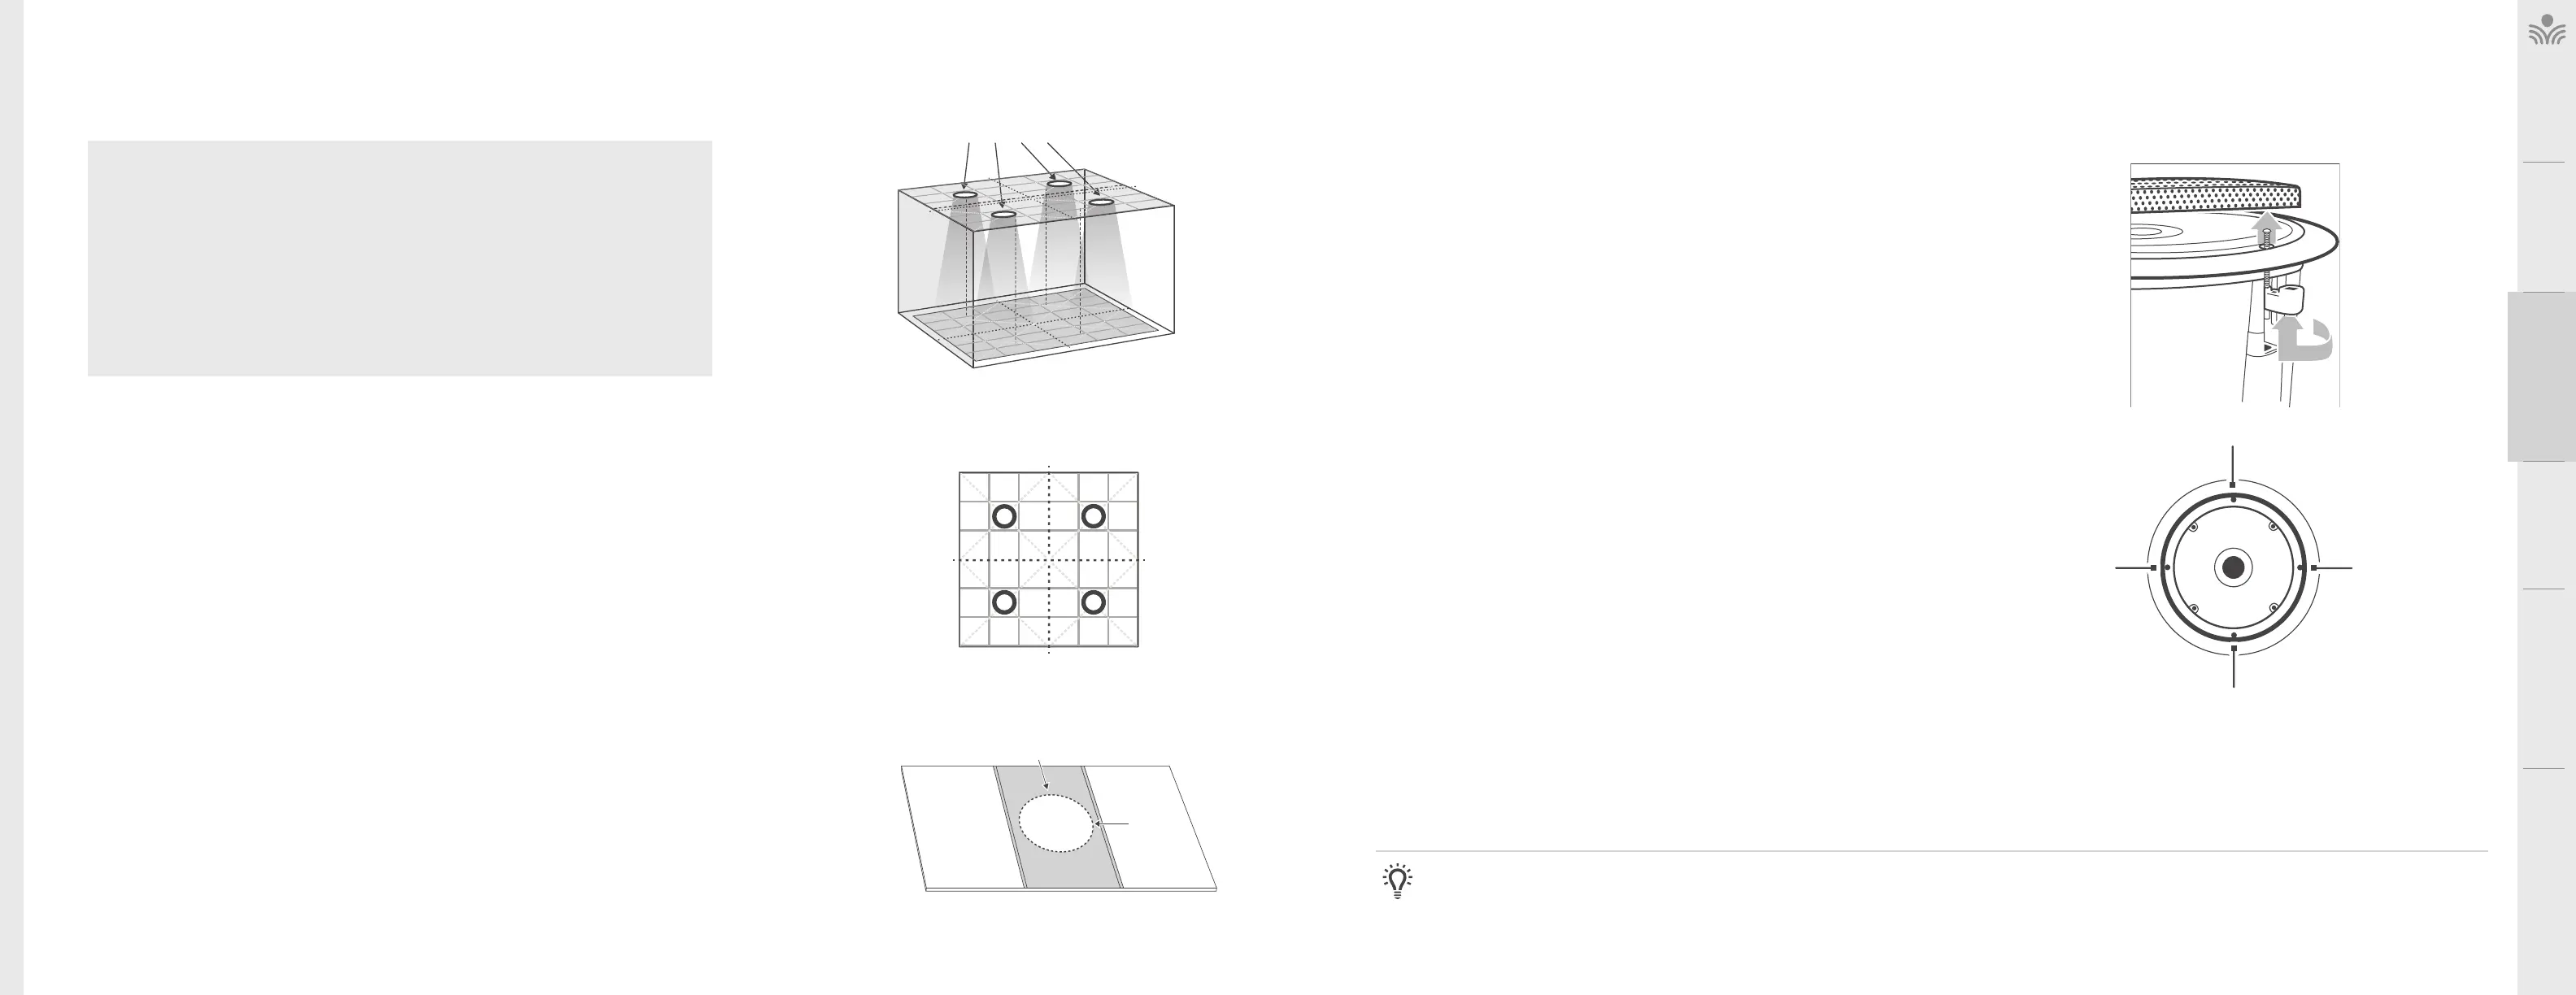
FIGURE :
SPEAKER PLACEMENT
SELECTING SPEAKER MOUNTING LOCATIONS
A standard system includes four ceiling speakers for rooms up to 1600 sq
(148sqm) with a ceiling height of 9-12 feet (2.75m - 3.75m). The location of the
speakers is critical for even sound distribution.
1. Quarter the classroom into four equal quadrants (see figure 1).
2. Select a ceiling tile that is centered in each quadrant.
3. Remove the selected ceiling tiles for speaker installation.
FIGURE :
CUTTING THE TILE
TILE BRIDGE
BACK SIDE OF
CEILING TILE
CUT OUT
AREA
DRQ Ceiling Speaker Installation
DRQ LOCATIONS
CEILING
LEVEL
LISTENING AREA
DIVIDE THE LISTENING
AREA INTO QUARTERS
AND CENTER SPEAKERS
IN EACH SECTION
INSTALLING THE SPEAKERS INTO THE CEILING TILE
Before beginning the speaker tile work, choose a flat work surface
1. Lay the tile bridge across the backside of the ceiling tile as shown in figure 2.
Using a marker or pencil, trace out the cutout circle as a template.
2. Using a drywall saw or jigsaw, cut out a circular hole as neatly as possible.
NOTE: to ensure the hole is large enough, cut slightly outside the mark.
FIGURE :
REMOVE THE GRILLE
FIGURE :
MOUNT SPEAKER
MOUNTING SCREWS
3. Remove the speaker grille by turning and pushing one of the arms upward (see
figure 3). Or use the grille removal tool, insert one end into one of the holes near the
edge and pull the grille o.
4. Turn the tile on its side and insert the speaker into the front side of the tile. Place
the tile bridge around the backside of the speaker, oriented horizontally across the
tile (as shown in figure 2).
5. Use a screwdriver (or screwgun) to tighten the four mounting screws (see figure
4). NOTE: the first quarter turn pulls the mounting tabs away from the speaker
enclosure, then it begins tightening.
6. Repeat steps 1-5 for each speaker and tile.
NOTE: Building codes vary from state to state and county to county. It may be required that the speaker itself be secured to a support wire.
Tools and Equipment
• Small flathead screwdriver
• Philips screwdriver
• Marker or pencil
• Drywall saw
Speaker Components
• (4) DRQ speakers
• (4) Tile bridges
• (2) 30 bundles of plenum-rated speaker wire
(if ordered) marked with a white band
• (2) 50 bundles of plenum-rated speaker wire
(if orderd) marked with a blue band
NOTE: Wiring should follow the class 2 wiring methods as outlined in the National Electric Code.