26 27
OVERVIEWINSTALLATION
PLANNING
SPEAKER LOCATION &
INSTALLATION
SET UP &
INTEGRATION
INSTALLING OPTIONAL
EQUIPMENT
TROUBLESHOOTING
Optional Activate Charging Station Set-Up
. DETERMINE SET-UP LOCATION
The Activate Station charges the microphone(s) and also wirelessly
connects audio to the instructional audio system and your mobile device.
Set it up in a convenient place near a power source that is highly accessible
for both teachers and students. If plugging in multimedia audio sources, it
should be located in close proximity to minimize cable runs.
Key considerations:
• Accessible for daily charging of all components
• Do not place in a fully enclosed metal cabinet
. PLUG IN THE ACTIVATE STATION
1. Locate the 24V power supply and power cable.
2. Connect the AC power cord into the DC power supply.
3. Insert the DC connector into the Power jack on the back.
4. Plug the AC power cord into an electrical outlet.
5. The white power light on the front of Activate Station will glow.
6. The green link light will begin blinking as it searches for its
paired classroom base station.
Aux Input Aux Output
ALD
12
12
34
Rec
Bluetooth
Pairing
Access
Reg
Phone/Pods
(1.0A)
Pods/Remote
(500mA)
Aux
Power Input
5V/0.3A
Power
2.4V/1.75A
Charge Out (5V USB)
Charging Disable When Aux Power Used
Power Link
InputOutputMic
ACTIVATE PODSACTIVATE STATION
TO TRIGGER ALERT, PRESS
VOLUME UP AND DOWN
BUTTONS FOR SECONDS
Life Safety Solutions
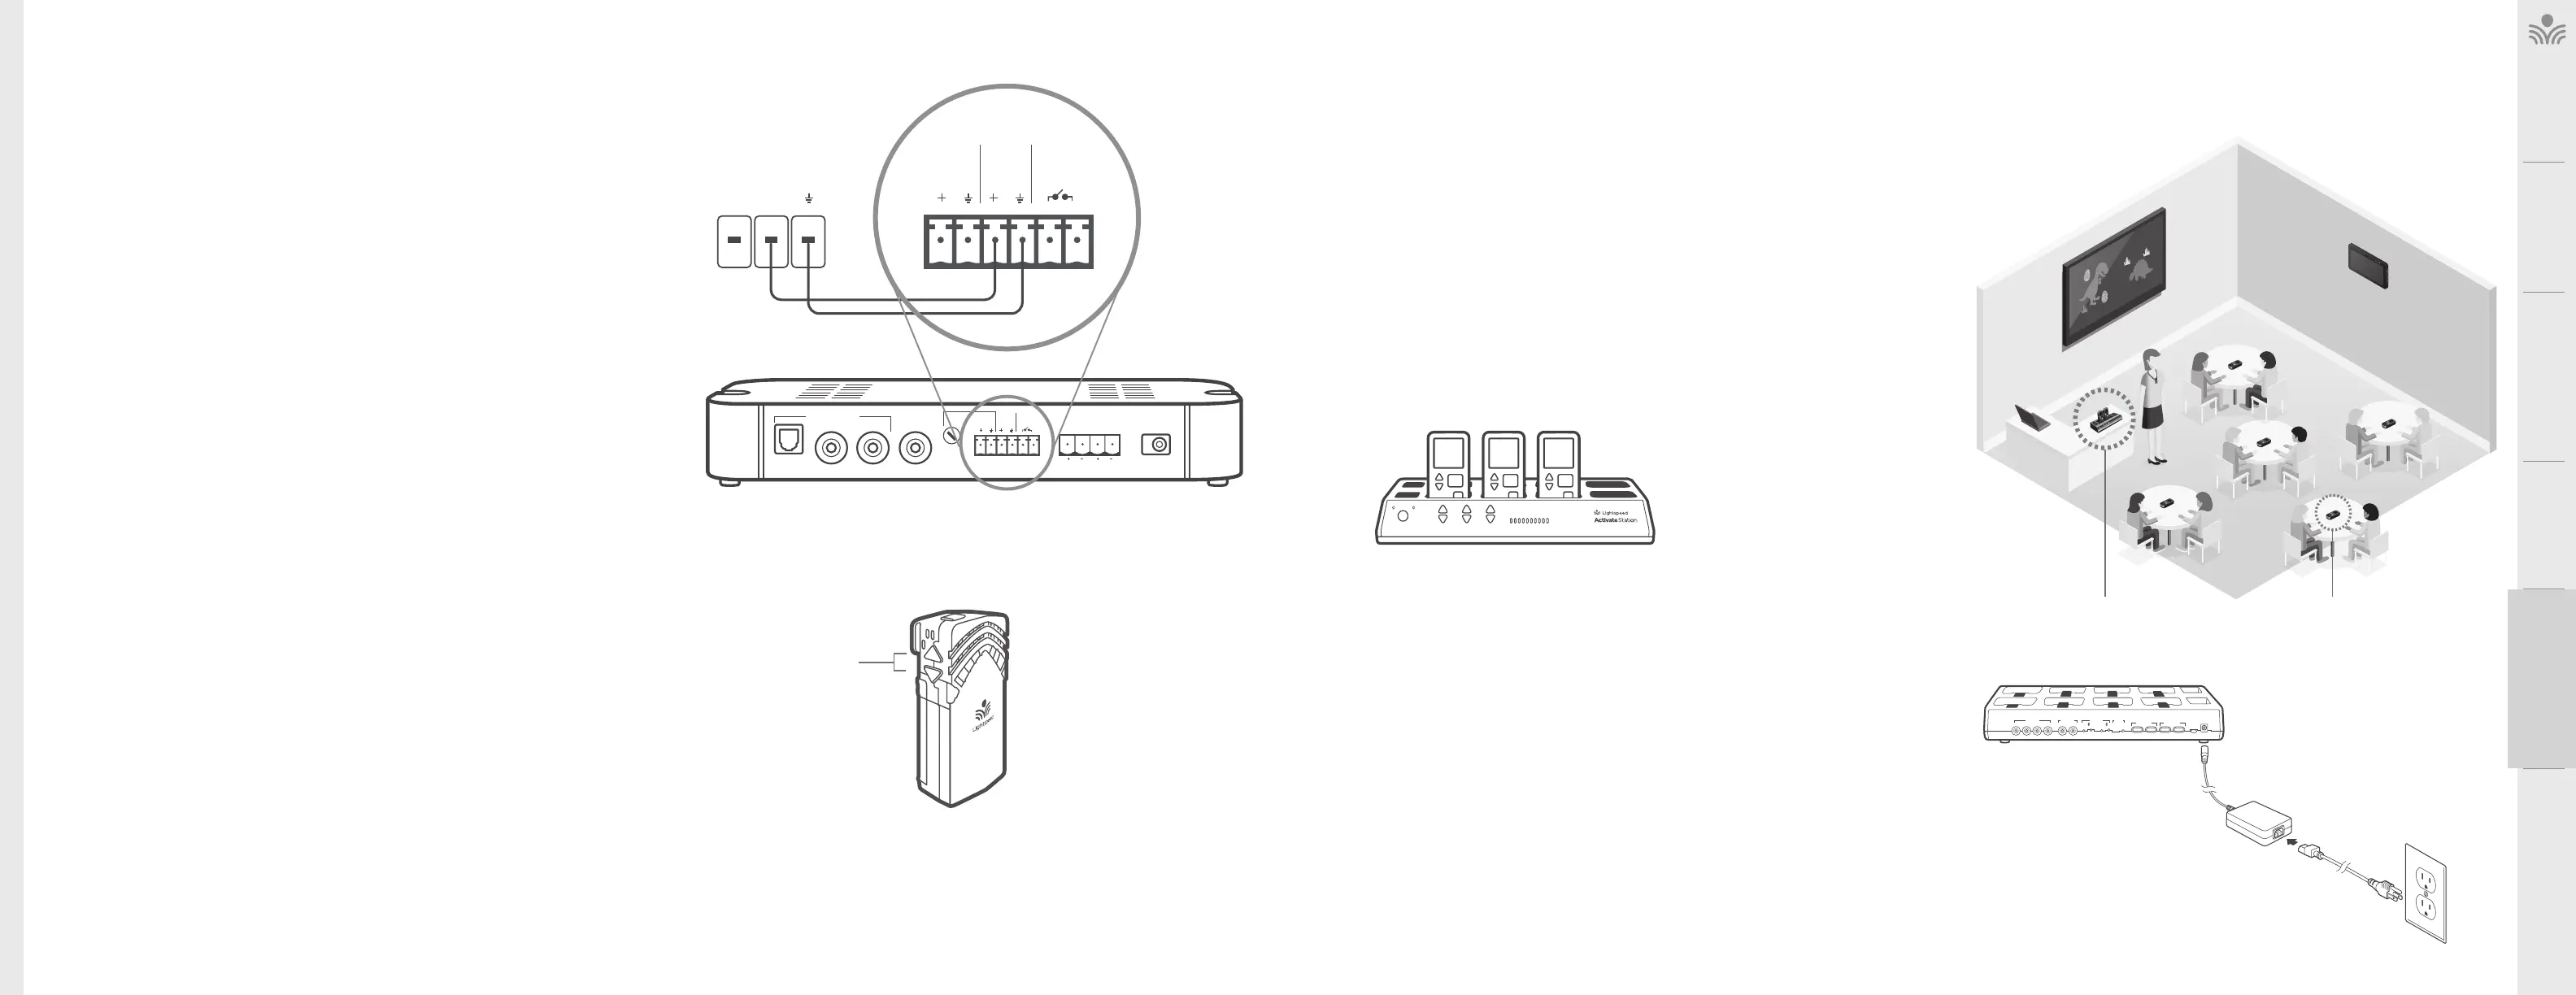
RELAY INPUT
The 975 contains an input connection to detect a signal from Fire Alarm, IP Paging
System or other device. When triggered, audio from the 975 is muted to ensure
emergency alerts from external systems can be heard.
The Relay Input can be triggered with DC voltage between .5V and 24V that can be
provided from fire alarm systems and control systems with powered relay switches.
CONTACT CLOSURE
If your building is equipped with an alert notification system, teachers can use the
Flexmike microphone to send an alert.
This activates the contact closure function on the 975, which external systems
use to perform a prescribed action, such as notifying the appropriate parties of a
classroom alert.
The Contact Closure is a normally open relay that can be closed by pressing the
up and down volume buttons at the same time for 3 seconds on the Flexmike.
Input
Priority
Power
24VDC / 2.5A
Speaker Outputs
12
Audio Inputs
Class 2 Wiring
Optical
Adjust
Page
First
Relay
Input
Contact
Closure
First
Relay
ComNO
Input
Closure