42
Setting Up: Advanced
Linksys EA-Series
4.
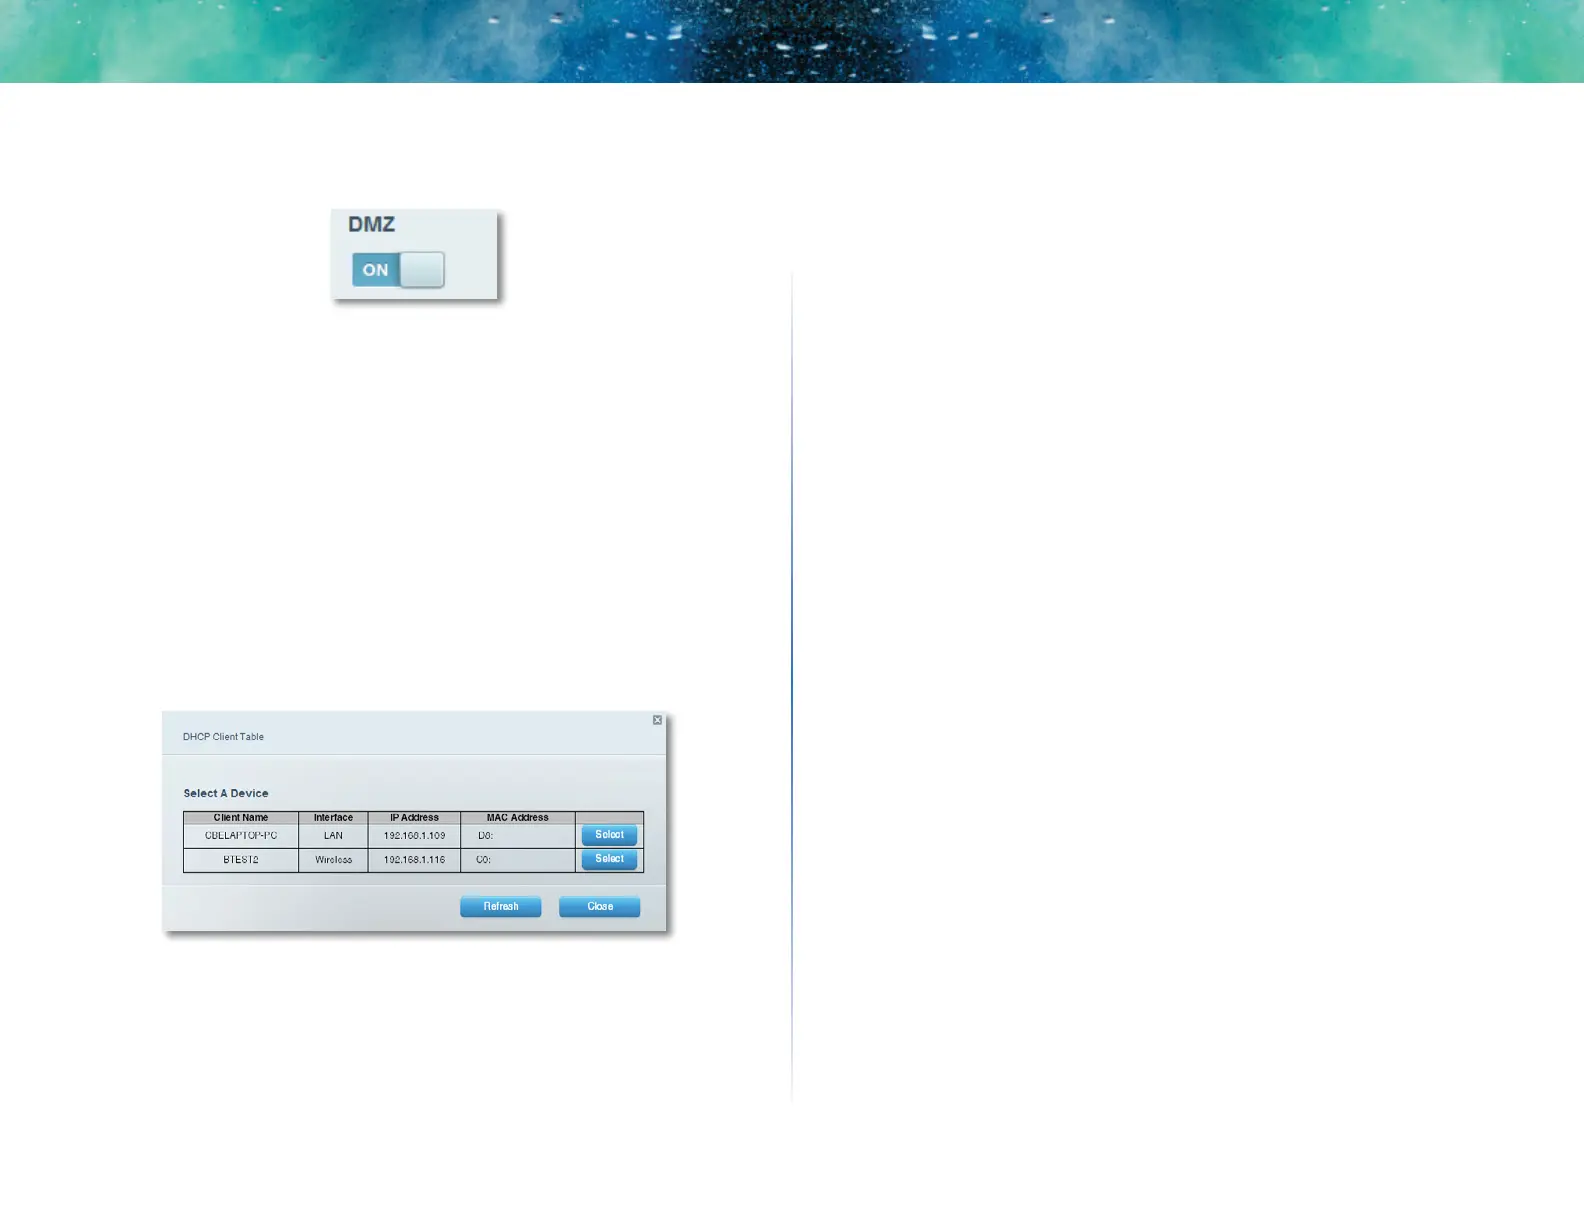
Click the setting for DMZ to turn it on.
5.
Select Enabled.
6.
In the Source IP Address section, select Any IP Address to allow access to
your DMZ device from the entire Internet, or select the alternate button
and enter a range of allowed source addresses.
7.
In the Destination IP Address section, enter the last three digits of the IP
address of the device that will be in the DMZ. The rest of the IP address is
already completed.
- OR -
If you want to specify the 12-digit MAC address of the device instead of
setting up a DHCP address reservation, you can replace Step 6 with the
following steps:
a.
In the Destination IP Address section, select MAC Address, then click
View DHCP Client Table. The DHCP Client Table screen opens.
b.
Click Select next to the device that you want to place in the DMZ,
then click Close. The corresponding MAC address is copied into the
MAC Address field.
c.
Click OK.
 Loading...