Linksys PAP2 Installation Guide
Page 4
3. Provisioning
3.1 General Configuration for Outbound Calling
To configure the PAP2 for outbound calling:
1. Connect to the PAP2 by entering the device’s IP address in the Web browser’s
Address bar. For instructions on obtaining the IP address, refer to section 2.3
Accessing the PAP2 on page 2 in this Guide.
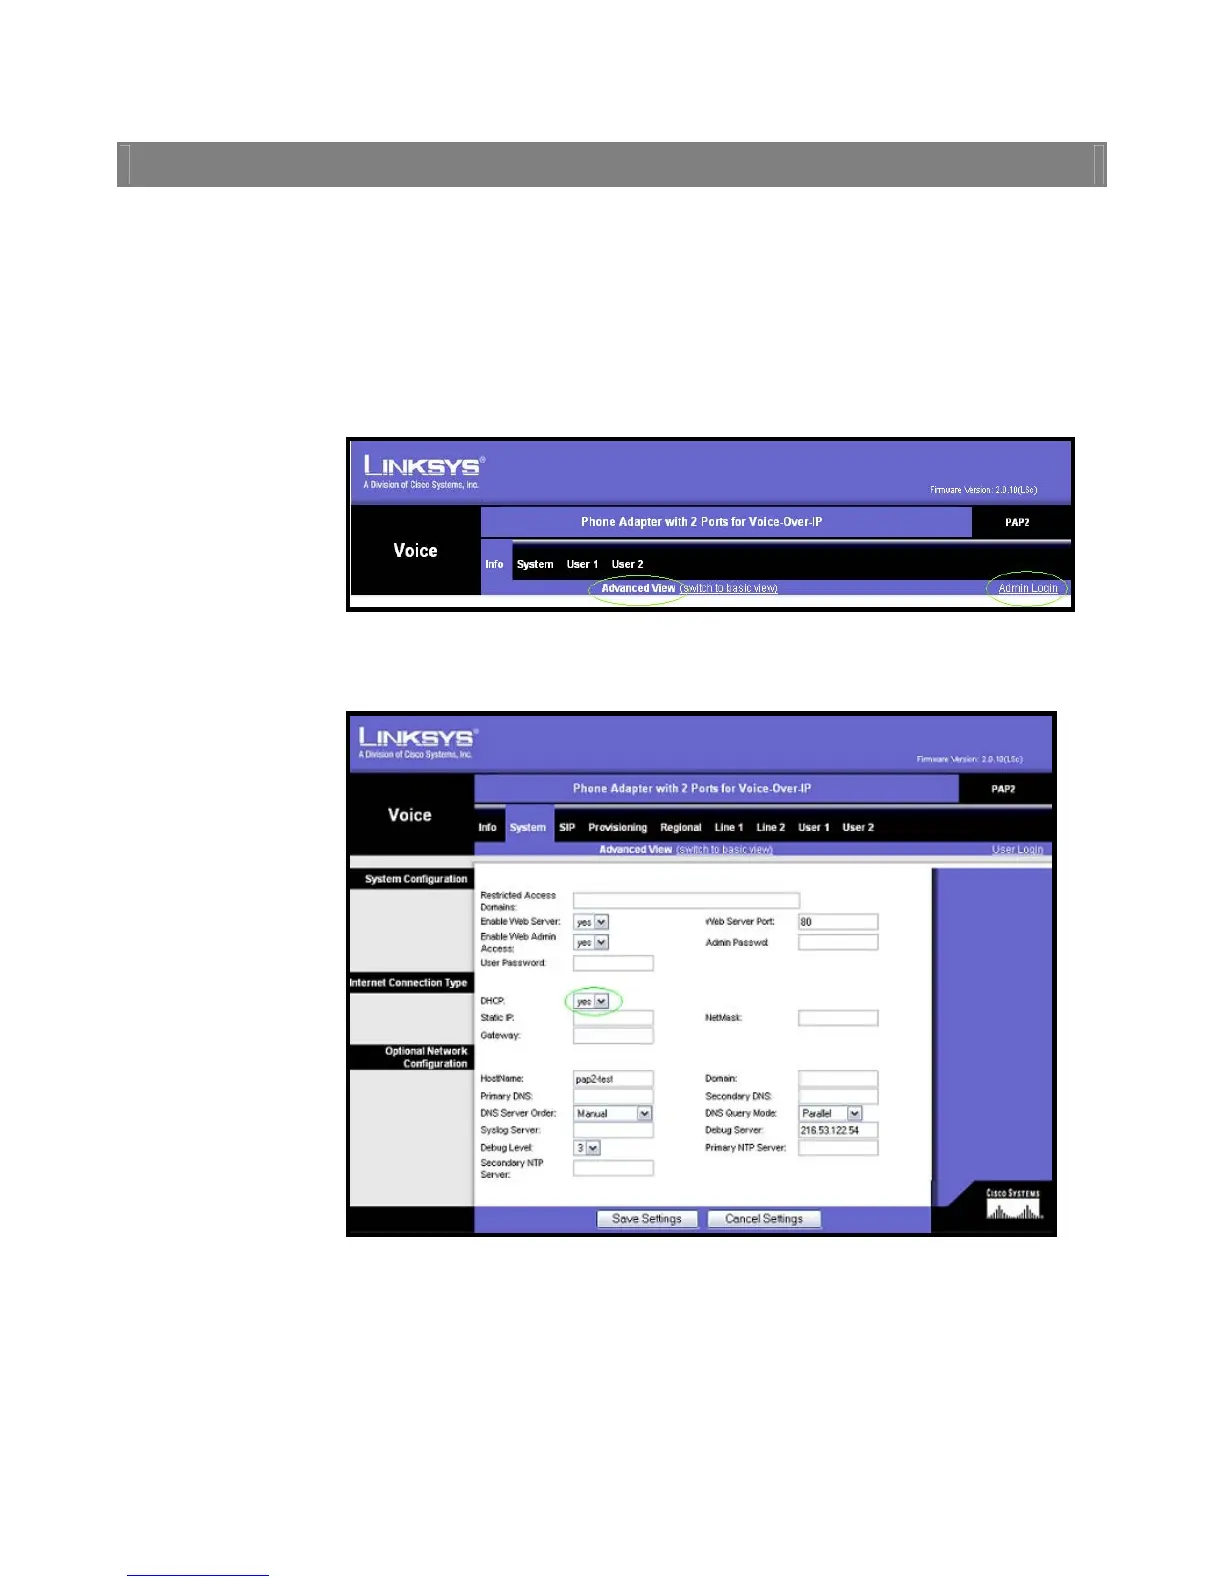
2. Click on the Admin Login link in the upper right corner of the page, and then
click the advanced configuration link.
PAP2 Web Interface – Main Window
3. Click the System tab, and in the Internet Connection Type section, click the
DHCP drop-down menu, and select yes or no.
System Tab
4. If you set DHCP to no, enter the Static IP, NetMask, and Gateway information.
If you set DHCP to yes, continue to step 5.
5. Click the Submit All Changes button at the bottom of the page to save the
settings.
 Loading...