Linksys PAP2 Installation Guide
Page 5
3.2 Line-Specific Configuration
1. Click the Line1 or Line2 tab at the top of the page, and in the NAT Settings
section, change the following setting:
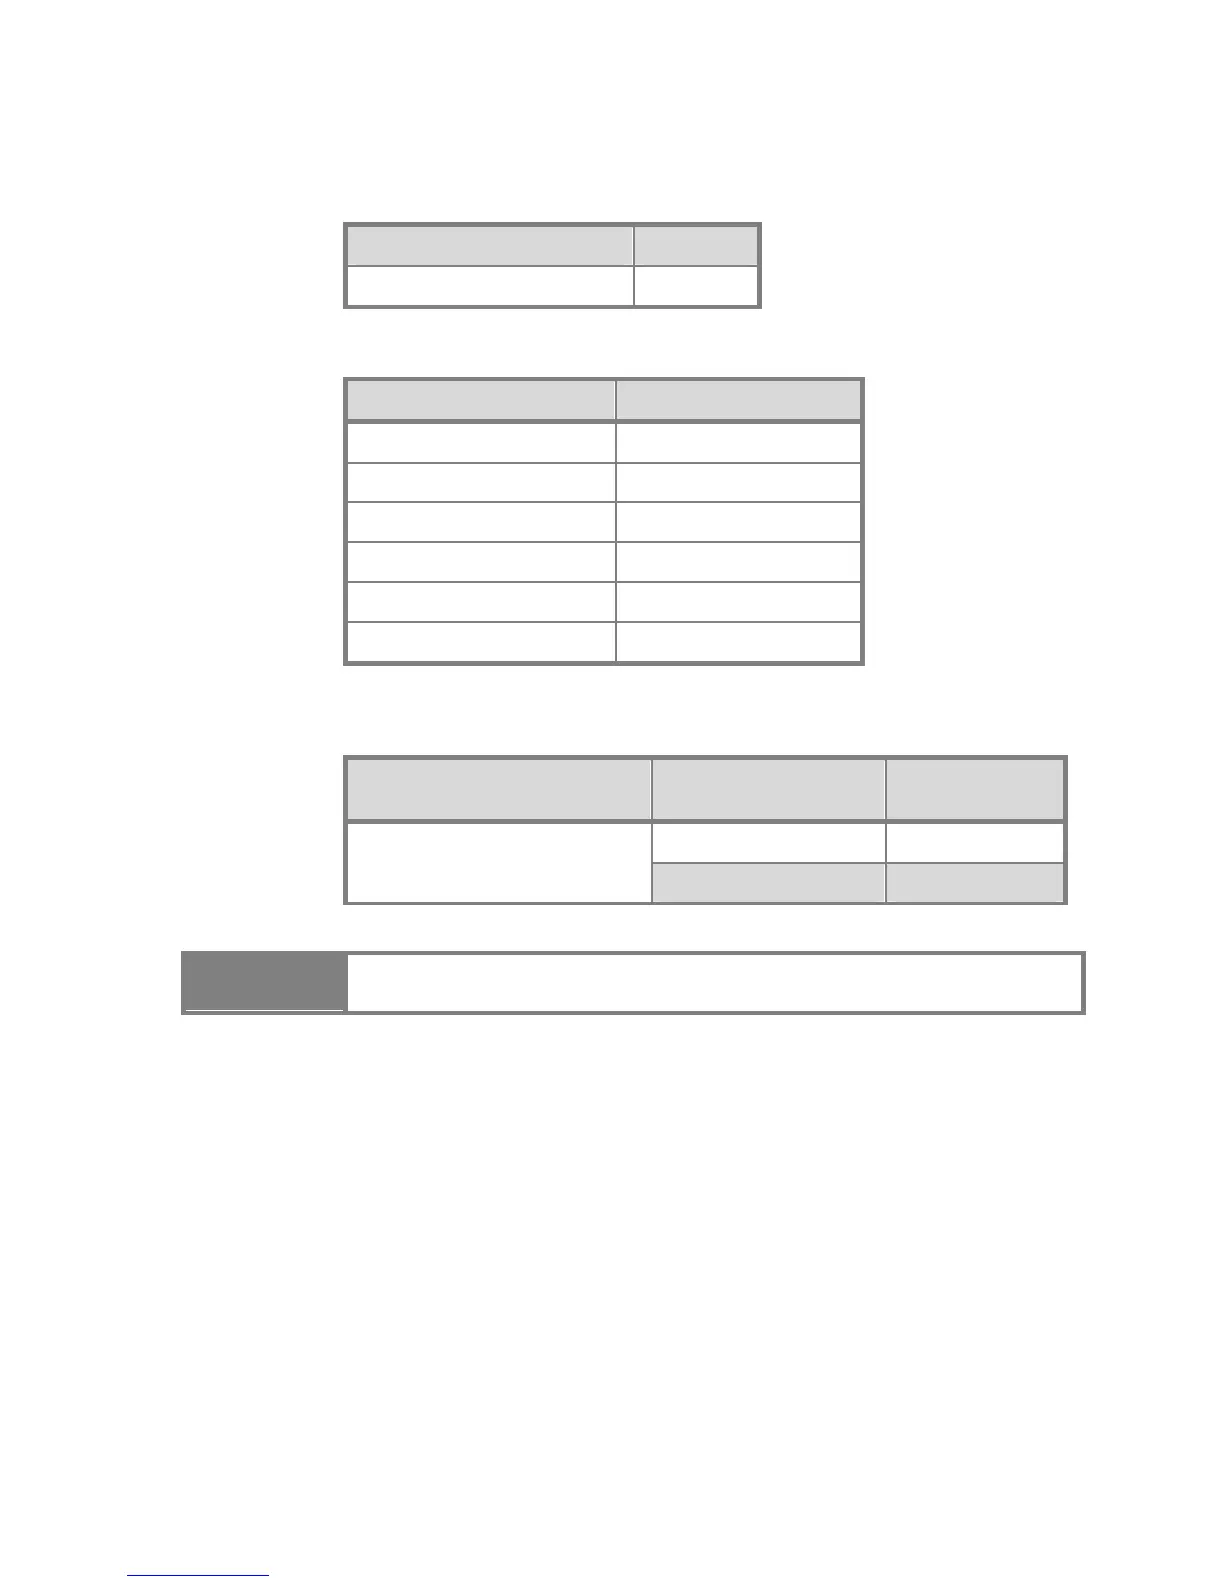
Field Value
NAT Keep Alive Enable no
2. In the Proxy and Registration section (see the screen on the following page),
change the following settings:
Field Value
Proxy byod1.net2phone.com
Use Outbound Proxy no
Use OB Proxy In Dialog no
Make Call Without Reg yes
Ans Call Without Reg yes
DNS SRV Auto Prefix no
3. In the Subscriber Information section (as shown in the Line1/2 Window screen on
the following page), enter a Display Name. This value can be any alphanumeric
string. Enter the following values for outbound only service:
Service Type Field Display Name
Value
Display Name (Line 1) NO_DID1
OUTBOUND SERVICE ONLY
Display Name (Line 2) NO_DID2
4. Enter the User ID (account) and Password (PIN).
IMPORTANT You must have a different account and PIN for Line 1 and Line 2.
5. Click the Use Auth ID drop-down menu, and click no.
 Loading...