Chapter 2: Get started
FA69315–3 English 21 Linx 5900 & 7900 Quick Start Guide
2.3.2 Pause the print
To pause printing:
• At the Print Monitor page, press the Pause Printing key
Printing stops but the jet is not stopped. The Printer Status area displays the
message “JET RUNNING”. You can press the Start Printing key to
quickly restart the print, or you can select a different message to print.
Use the Pause Printing key to stop the print for a short time, or to change
the Current Message. The Pause Printing key is only available when the
printer is printing.
If the print job is completed and you want to turn off the printer, refer to
‘Stop and turn off the printer’ on page 24.
NOTE: When you pause the print, the printer saves any changes to the
message. For example, if you use a sequential field, the print
restarts at the correct position in the sequence. (The sequential
field types are described in the How To guides for the printers.)
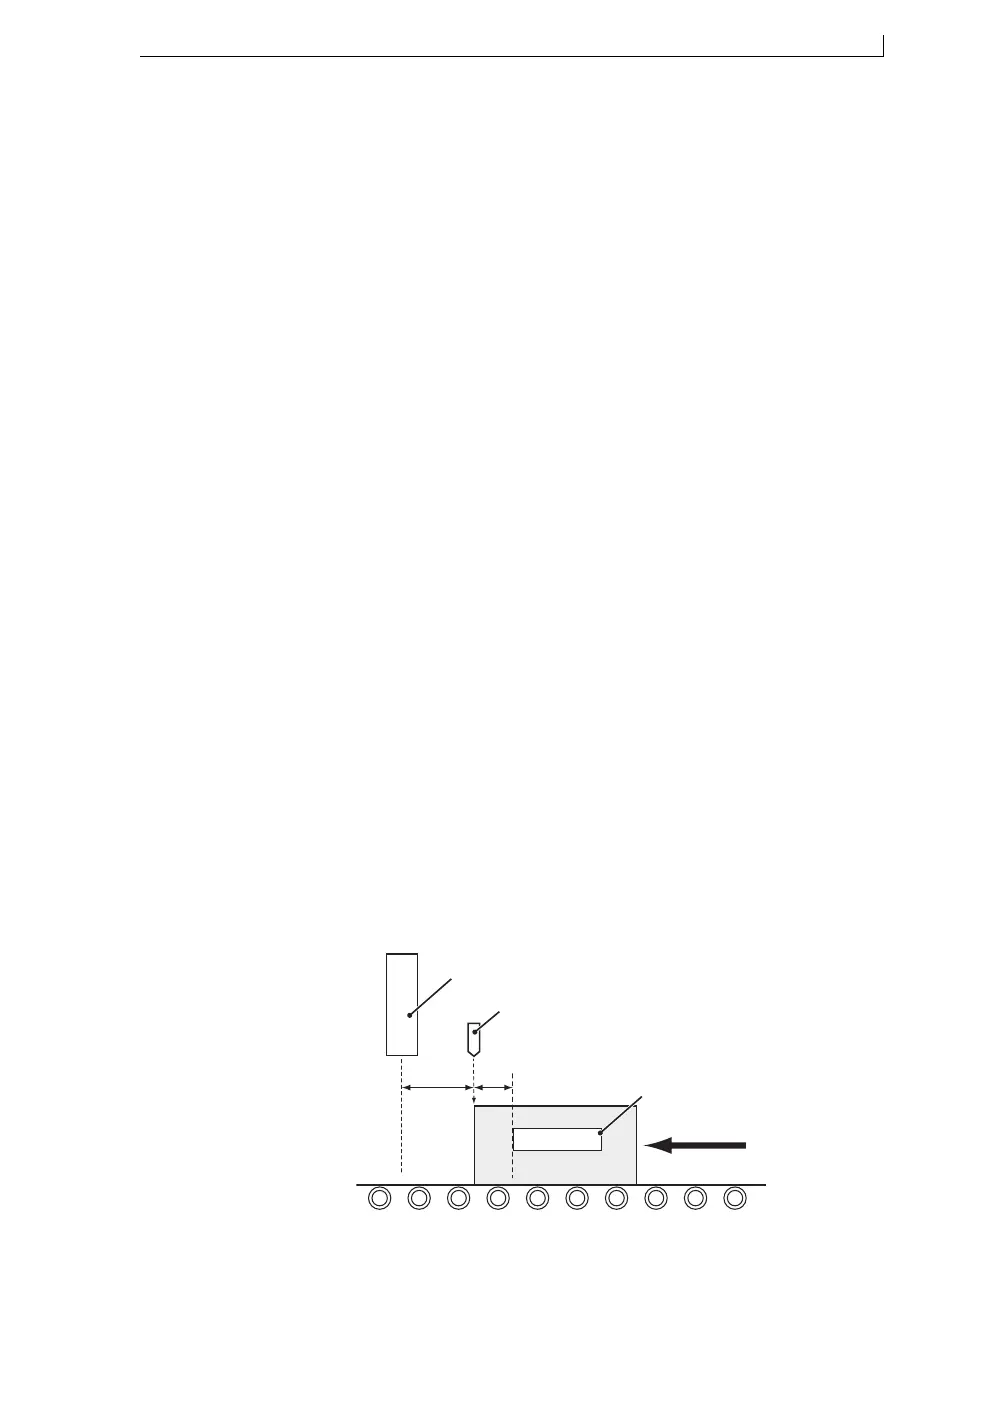
2.3.3 Adjust the print position
This section shows you how to make sure that the printed message appears
in the right position on the product.
Figure 2-9 helps you understand the print position. The large arrow shows
the direction of the movement of the product. In this example, there is a
fixed distance (C) between the printhead (A) and the sensor (B) that detects
the edge of the product. This distance is the same for all products and all
messages. The distance is zero for some installations. The installation
engineer enters this measurement into the printer during the installation,
but you can change the value. Refer to the How To guides for the printers
for more information.
In Figure 2-9, the trigger signal from the sensor occurs at the edge of the
product, but the label (E) is not at the edge of the product. The distance
between the sensor position and the print position (E) is the Print
Delay (D).
Figure 2-9. Print position
XYZ123
69038
B
E
D
C
A