Rev: 02.01.21 Page 2 CCD-0004129
As a supplier of components to the RV industry, safety, education and customer satisfaction are our primary concerns. Should you
have any questions, please do not hesitate to contact us at (574) 537-8900 or by email at customerservice@lci1.com. Self-help tips,
technical documents, product videos and a training class schedule are available at lci1.com or by downloading the MyLCI app.
PSX1™ STABILIZER MOTOR REPLACEMENT
TI-379
LEVELING AND STABILIZATION
Motor Replacement
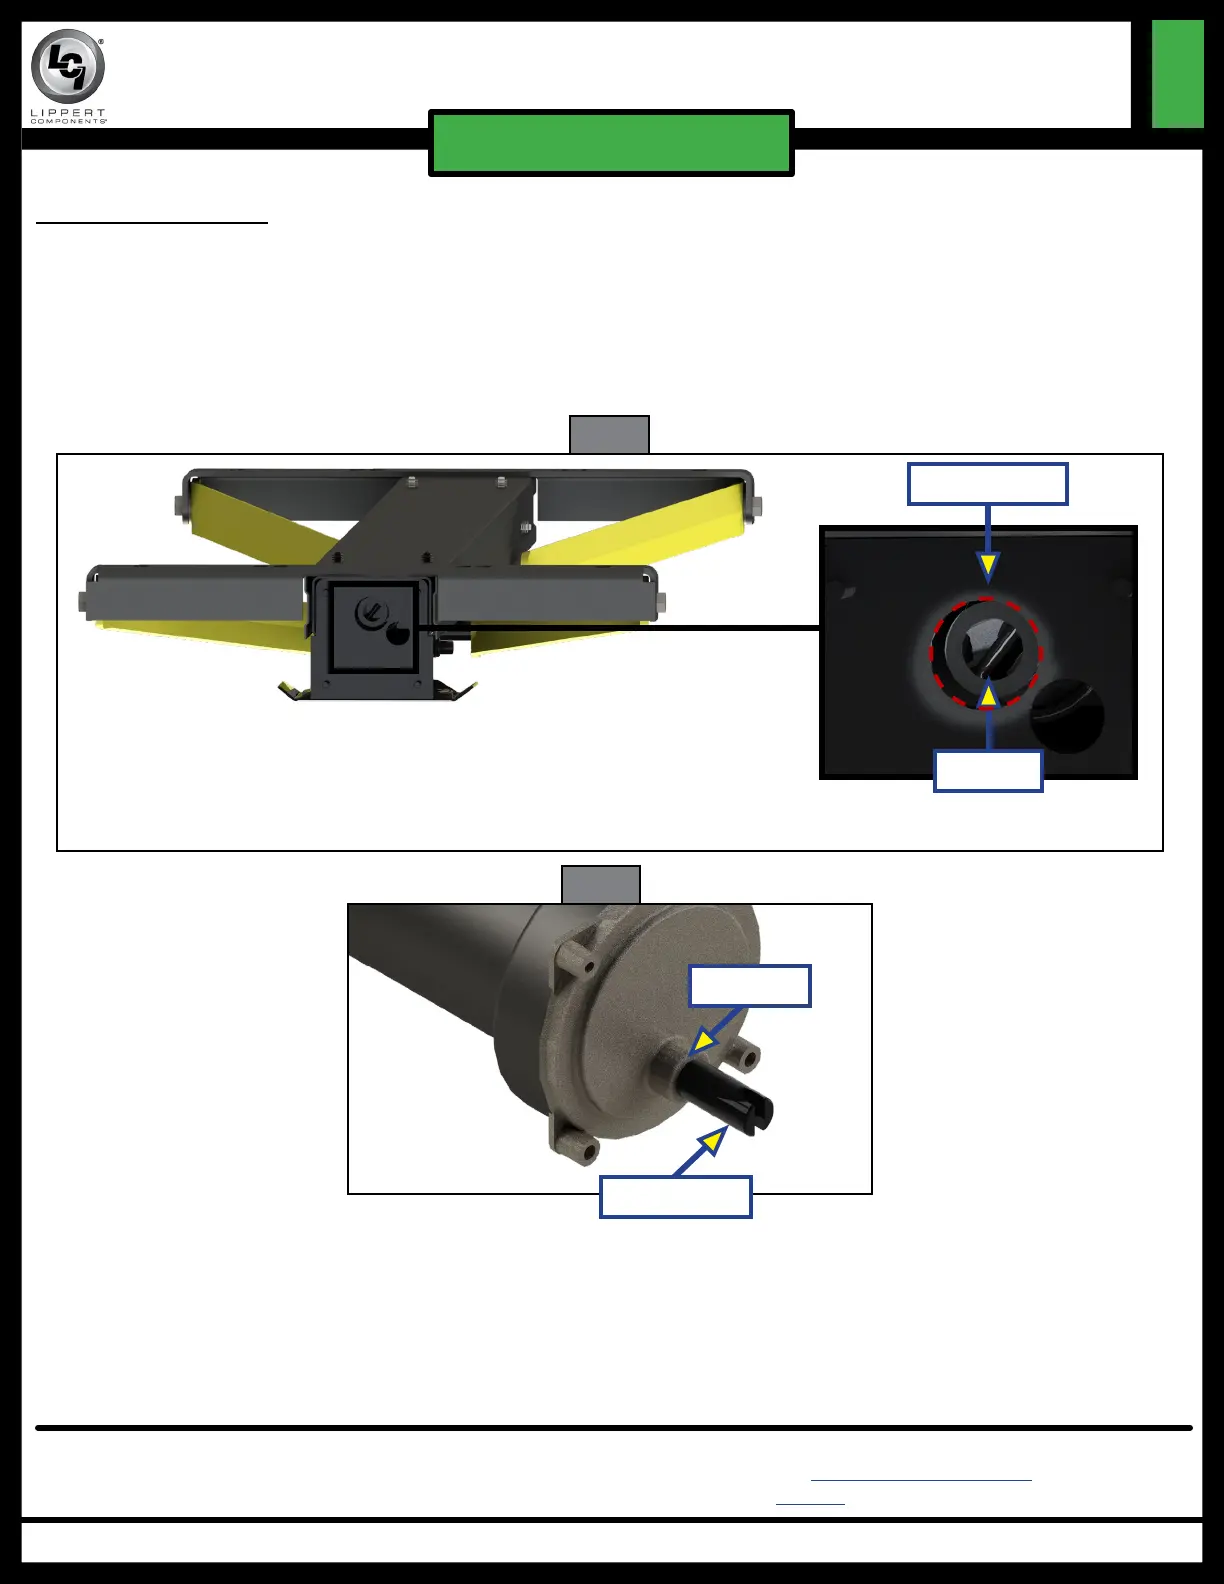
1. Line up the motor shaft (Fig. 3) on the new motor with the coupler (Fig 2) and install the new motor
using the previously removed socket cap screws and nuts.
NOTE: When installing the new motor, it may be necessary to enlarge the bracket hole from 0.97" to 1.18"
so that the motor shoulder (Fig. 3) fits into the bracket hole. Using a rotary cutting/grinding tool,
remove the material around the bracket hole (Fig. 2) for the shoulder of the motor (Fig. 3) to fit into
the bracket hole.
Fig. 2
Fig. 3
Motor Shaft
Coupler
Bracket Hole
NOTE: The red line indicates designated location to grind.
2. Using the 4mm hex wrench and 8mm combination wrench, securely tighten the socket cap
screws and nuts.
3. Reconnect the wires to the power source and test.
Shoulder
 Loading...