Rev: 03.26.20 Page 5 CCD-0001371
A
A
B
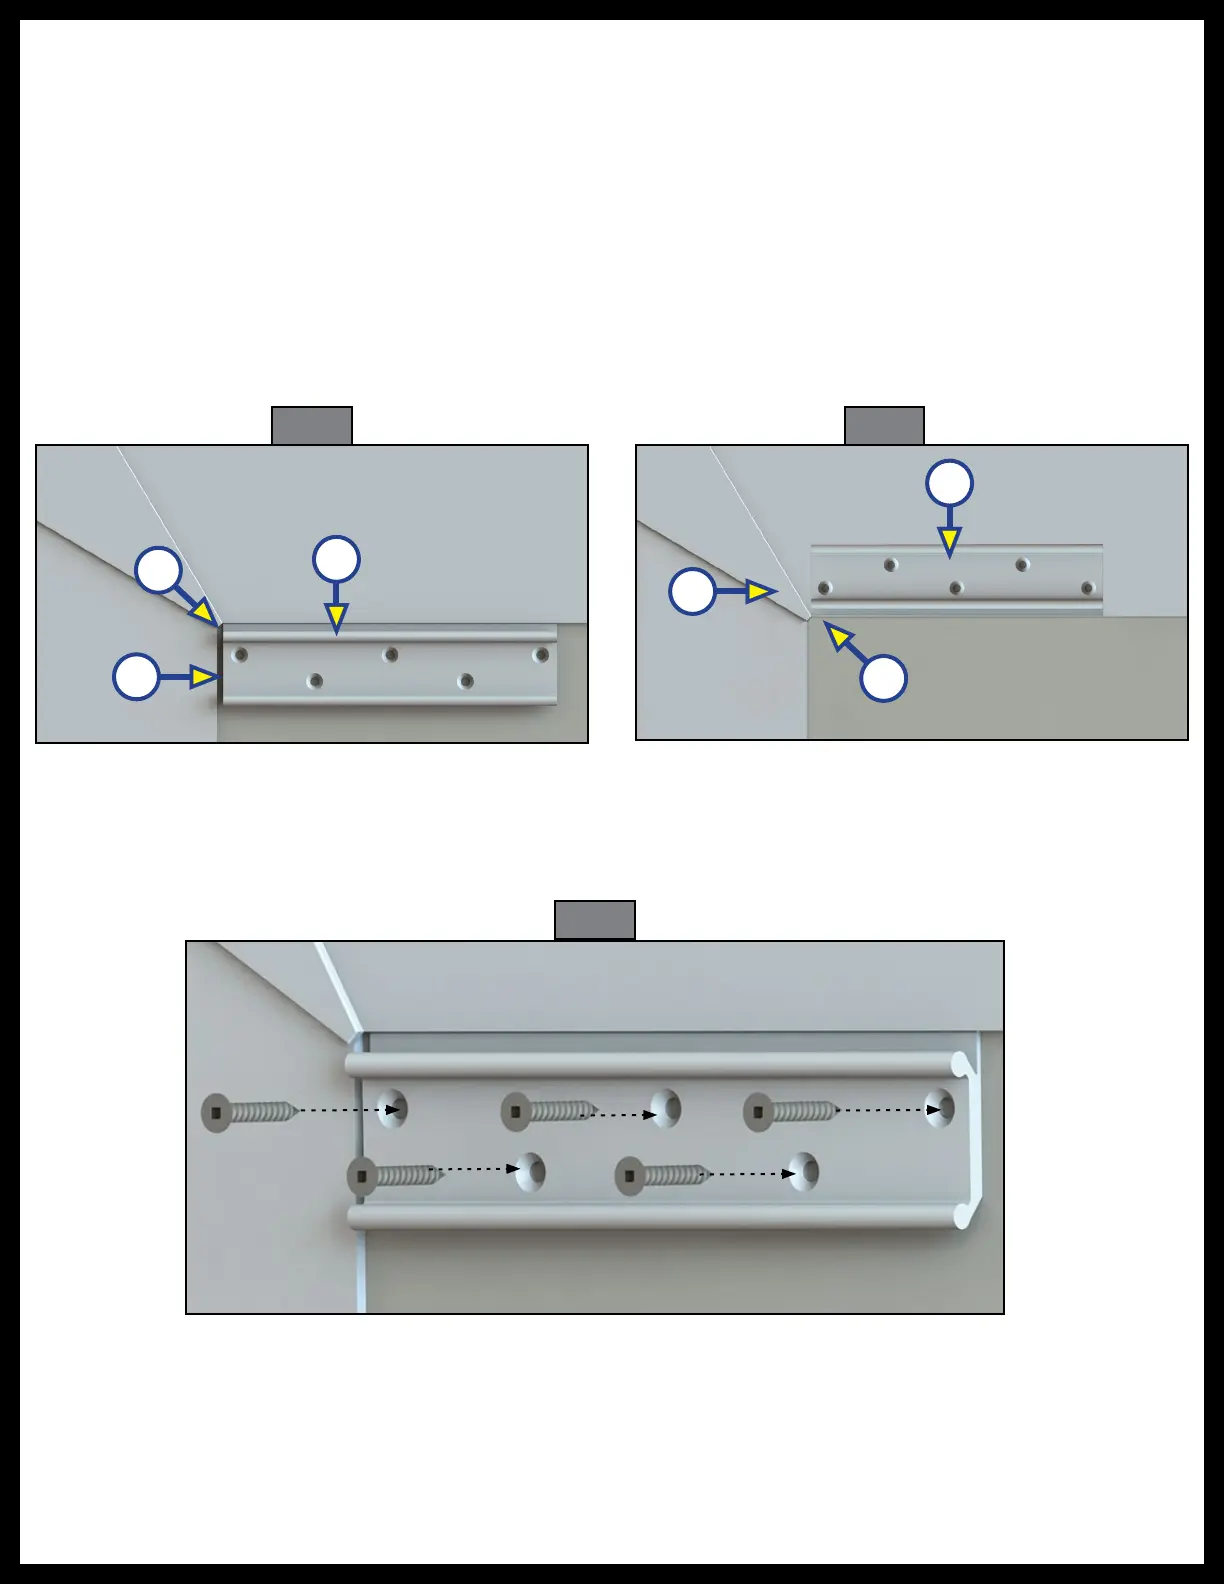
1. Install the access plate below the T-molding (Fig. 5) or on the T-molding (Fig. 6).
A. If installing below the T-molding, start on one side of the front of the slide-out by placing one of the
two access brackets (Fig. 5A) against the bottom of the T-molding at the top corner of the slide-out
(Fig. 5B) as close to the corner as possible. Keep the mounting bracket parallel with the bottom edge of
the T-molding.
NOTE: There might be a slight gap between the T-molding side and the side of the mounting bracket
(Fig. 5C) if the corner does not have a 90 degree angle.
B. If installing on the T-molding, start on one side of the front of the slide-out by placing one of the two
access brackets (Fig. 6A) at the very bottom corner of the T-molding, (Fig. 6B) as close to the outside of
the T-molding as possible without going over the corner mold (Fig. 6C).
NOTE: Make sure the screws do not go over the roof line.
Fig. 5
Fig. 6
Fig. 7
2. Fasten the mounting bracket to the slide-out exterior wall using the five provided #10 -13 x 1 1/4”
recessed square head screws (Fig. 7).
C
C
B