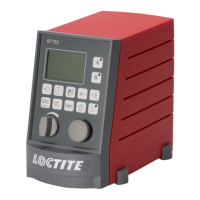
4.3 Cure Light On Indicator
The LED Controller monitors the power delivered to the CureJet
TM
light source to ensure
proper operation. Whenever the CureJet
TM
is emitting light, the LED Controller will indicate
that the system is operating properly by lighting this indicator blue.
4.4 Fault Indicator
Both the LED Controller and the CureJet
TM
come equipped with temperature monitoring chips
to ensure the system will not suffer damage from overheating. While the system is made for
continuous operation, improper installation (either in an environment too hot, or obstructing
the airflows) can cause either the LED Controller or the CureJet
TM
to overheat. Should this
happen, the system will no longer turn the curing light on, and the Fault Indicator will turn red.
The Fault indicator will also light if the operating parameters, are outside of normal operation.
4.5 Checking the Unit’s Output
To check the unit’s output, insert the LED tip directly into Loctite
®
UV-B&A LED Qualified
Radiometer P/N 1390323 (375 Units), Visible Light LED Dosimeter, P/N 1265282 (405 Units
& Indigo
TM
Units) and flush against the adapter plate. Irradiate the sensor for 5 seconds to
check the system output.
4.6 Using the Foot Switch
The Loctite
®
CureJet
TM
LED System can also be actuated using a Foot Switch, P/N 97201.
By depressing the Foot Switch, the light will turn on. If the LED Controller is set to Manual
Mode, the light will turn off when the foot switch is released. If the LED Controller is set to
Timed Mode, the light will turn off when the control timer reaches 0s.
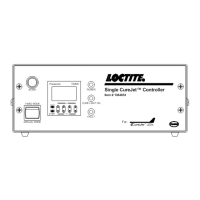
4.7 Using an External Controller
The LED Controller can communicate with an external controller (such as a PLC) via the XS
1 port (Figure 1 “10”). This port offers 2-way communication for actuation of the CureJet
TM
and relaying of pertinent information back to the PLC. There are 3 signals on the port: Start
(NO), Overheat (NC), and Cure Light On (NO). See Figure 3 for wiring schematic.
Notice:
The current draw for the start signal is 2.5 mA. The max current rating on the Overheat and
Cure Light On signal contacts is 200 mA.